Piglet Sensors
Overview
The Piglet is a powerful network monitoring application developed by RG Nets, designed to be installed on a Raspberry Pi (3, 4, or Compute Module 4). Commonly referred to as a network sensor, the Piglet provides comprehensive insights into network performance from the client's perspective.

Deployment and Functionality
The Piglet is strategically deployed within a network south of the rXg. It is capable of running tests over both wired and wireless connections, with the results being sent back to the rXg. These results can either be reviewed directly via the rXg interface or trigger notifications to network administrators for further action.
Testing Capabilities
A Piglet can execute two primary types of tests:
Ping Tests - Measure latency, jitter, and uptime - Can be directed towards a specified target over the wired connection or a specified WLAN
Speed Tests - Speedtest.net: Perform a standard internet speed test by setting the destination to speedtest.net - iPerf3: Run speed tests to a specified destination. The rXg includes a built-in iPerf server which can be used as a target for evaluating LAN infrastructure
Use Cases
The Piglet is an essential tool for a variety of network monitoring and validation tasks:
- Throughput and Reliability Testing: Assess the performance of downstream network infrastructure
- Client Network Experience Measurement: Evaluate the actual network experience from any client location within the network
- Policy and Segmentation Verification: Remotely confirm the effectiveness of network policies, segmentation, and routing
WLAN-Scoping
The Piglet supports WLAN-Scoping, which allows all aforementioned tests to be configured over a specified wireless network. This ensures that network administrators have continuous visibility into the performance of all wireless networks within the environment.
Hardware Requirements
Raspberry Pi Compute Module 4 (Recommended)
This version can be purchased directly from RG Nets (Product Code: Piglet-HW).
- No SD/USB required (uses eMMC)
- Internal Wireless Adapter:
- PCIe to mPCIe adapter
- AX210 Wi-Fi 6E Card
Raspberry Pi 3 or 4
- Recommended to use a USB drive instead of SD card (e.g., Samsung Bar Plus USB 3.1, 32 GB)
- Minimum 8 GB memory
- External Wireless Adapters:
- Netgear AC 1200 A6210
Installation
Install Boot Loader Image (Compute Module 4)
To flash the eMMC directly, you will need to run a provisioner on your local network and provide the boot loader image to the active project.
- Connect a USB cable between the provisioning server and the micro USB port of the Raspberry Pi Compute Module 4 IO Board
- Place a jumper on the CM4 IO Board
This causes the compute module to perform a USB boot, where the provisioning server transfers the utility OS files over USB. After the utility OS has booted, it contacts the provisioning server over Ethernet to receive further instructions and download additional files (e.g., the OS image to be written to eMMC).
Install Boot Loader Image (Raspberry Pi 3 or 4)
Piglets rely on a compact boot loader that automates rXg server discovery. This boot loader also enables remote software updates for Piglets, eliminating the need for physical intervention.
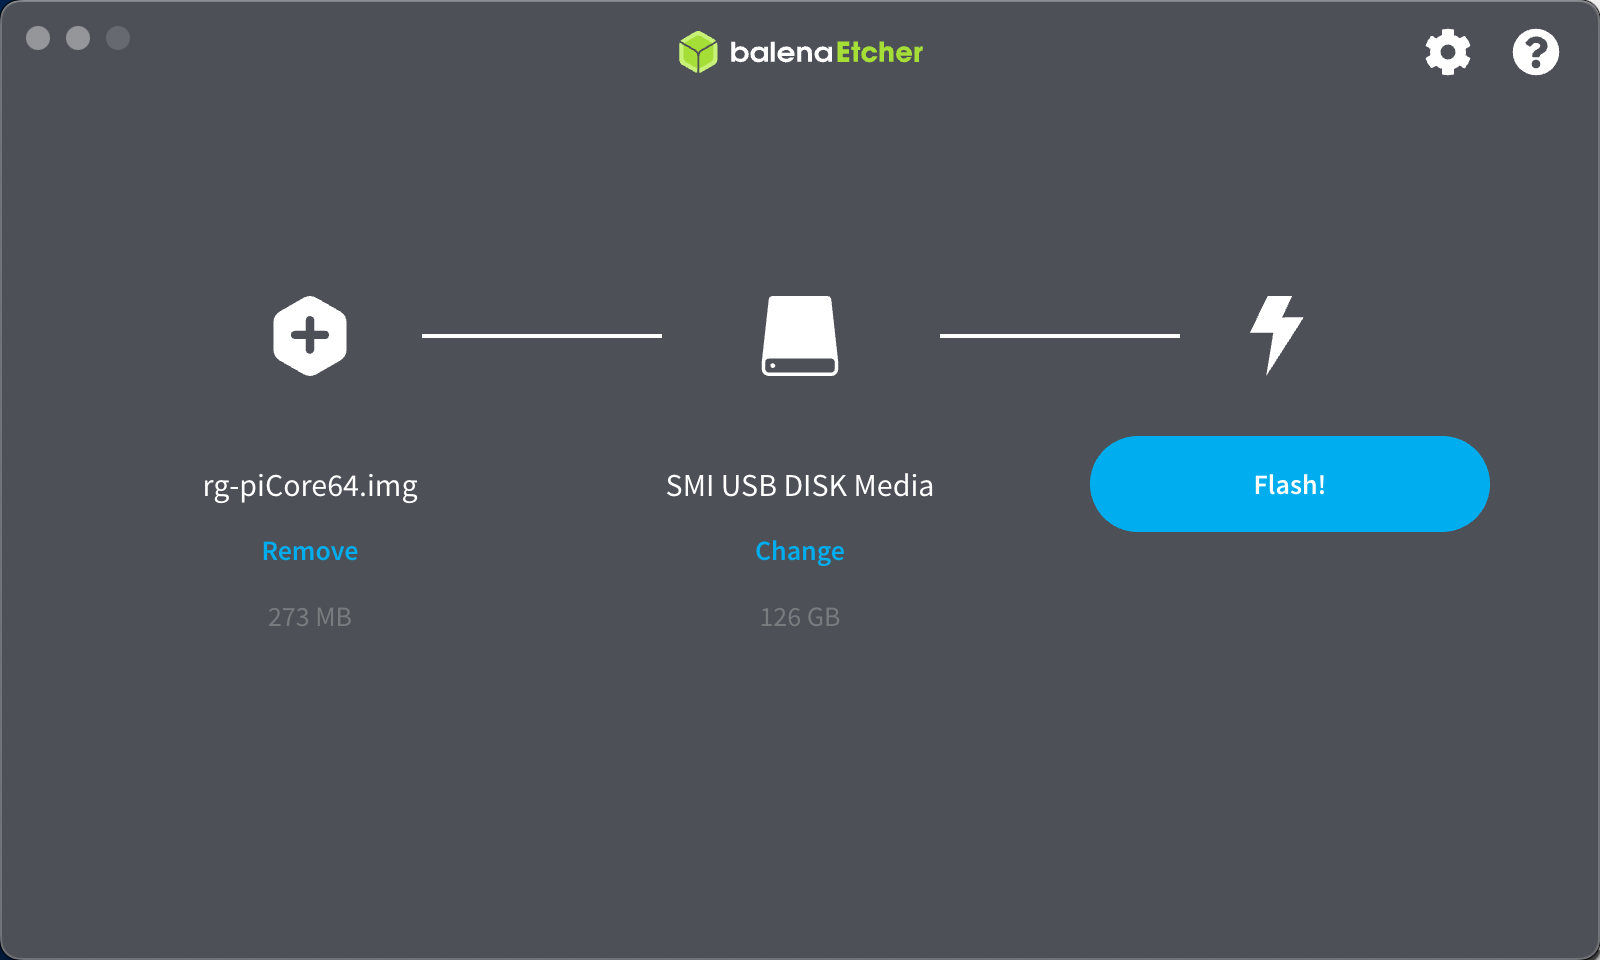
- Use a program such as Rufus (Windows) or balenaEtcher (Mac) to create a bootable USB or SD card with the boot loader image. It is recommended to use a USB drive.
Add a Piglet Image to the rXg
- Navigate to Network >> Wireless >> Device Firmwares
- Click "Create New" on the Device Firmwares scaffold
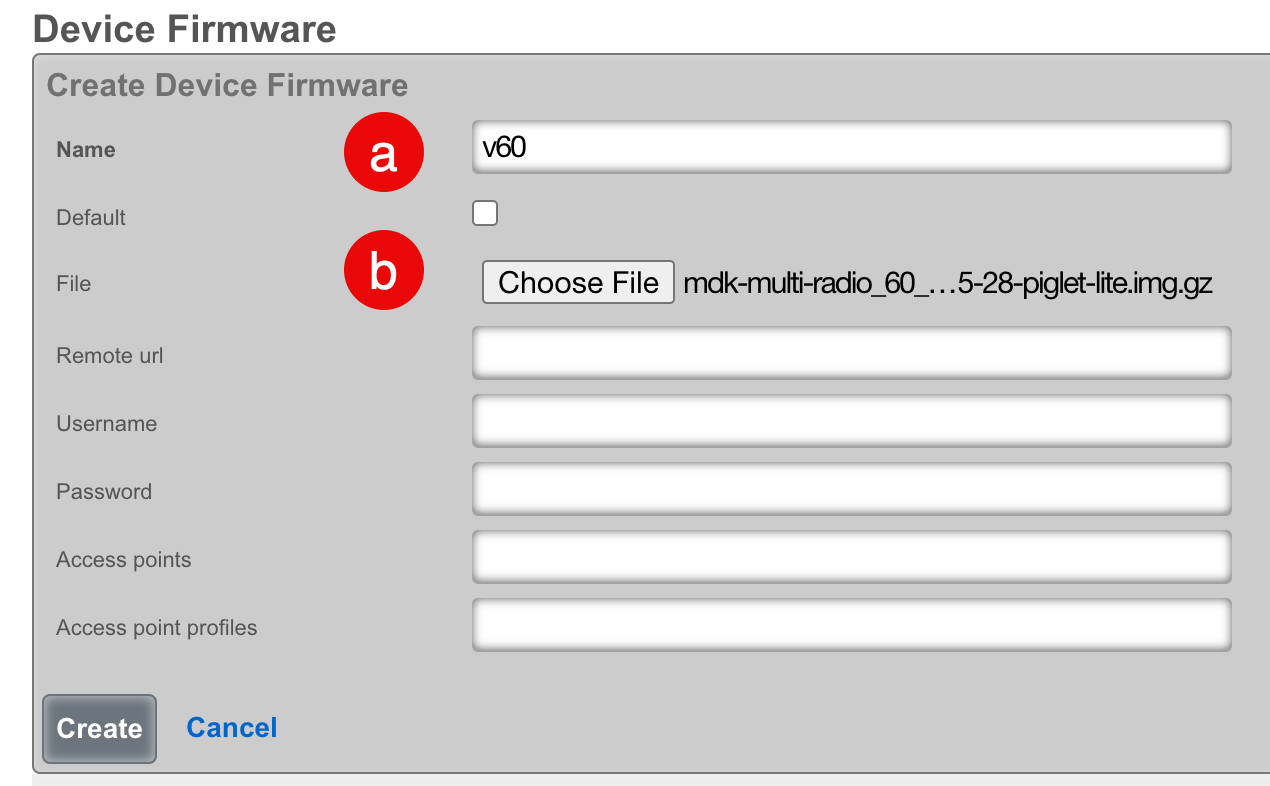
- Configure the firmware record:
- Select a name for the record
- Click "Choose File" and browse to the Piglet image, or provide a remote URL with username and password
- If you wish this image to be used as the default, check the "Default" field
- Click "Create"
Note: rXg Device Firmware management can be used for other images that are compatible with Raspberry Pi such as WLAN Pi.
Configure the rXg for Piglet Discovery
- Navigate to Network >> Wireless >> WLAN Controllers
- Click "Create New" on the WLAN Controllers scaffold
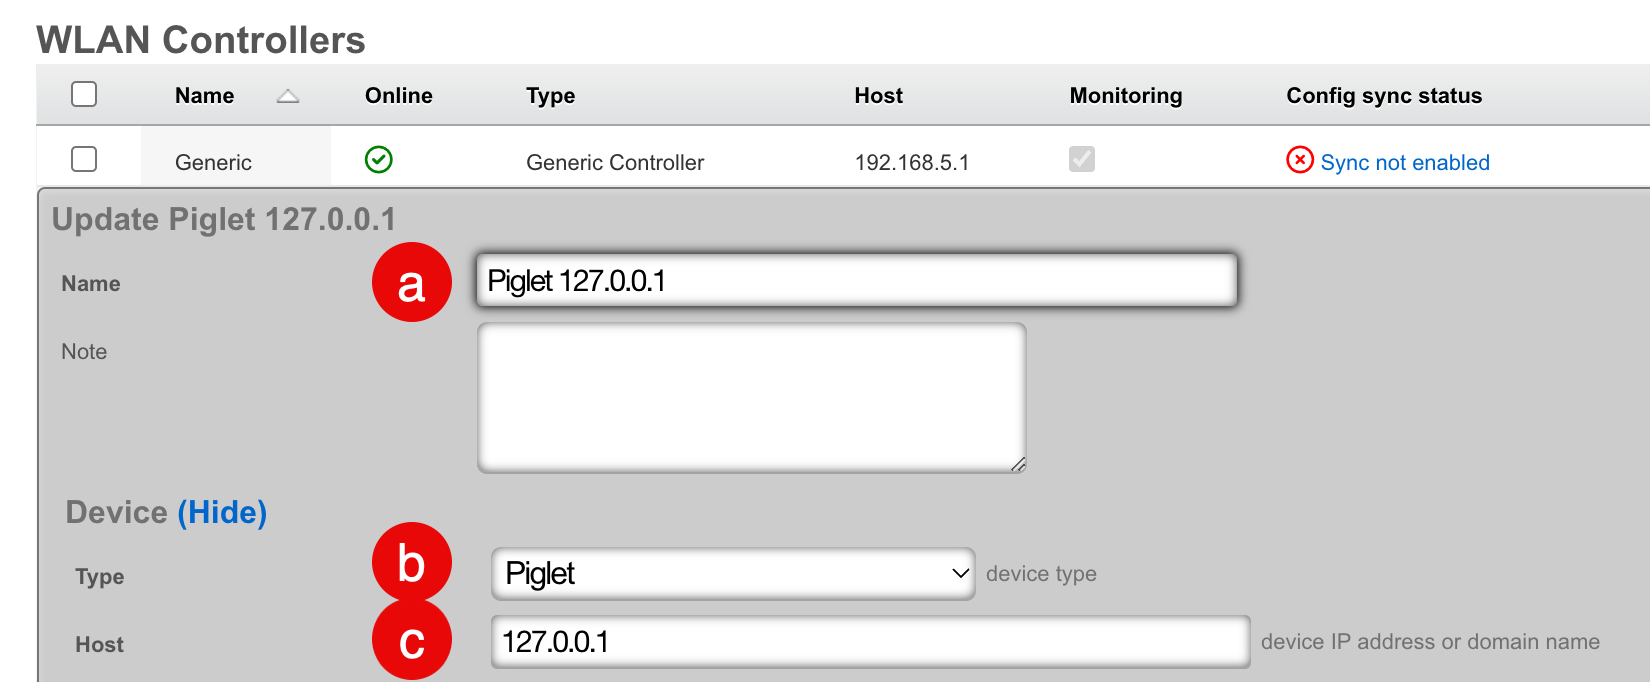
- Configure the controller record:
- Select a name for the record
- Set the Device Type to "Piglet"
- Set the Host address to "127.0.0.1"
- Click "Create"
Approve Piglet and Select Default Image
When the Piglet boots, it will automatically pull a DHCP address and discover the rXg.
- Navigate to Network >> Wireless >> Access Points
- Edit the record for the newly discovered Piglet
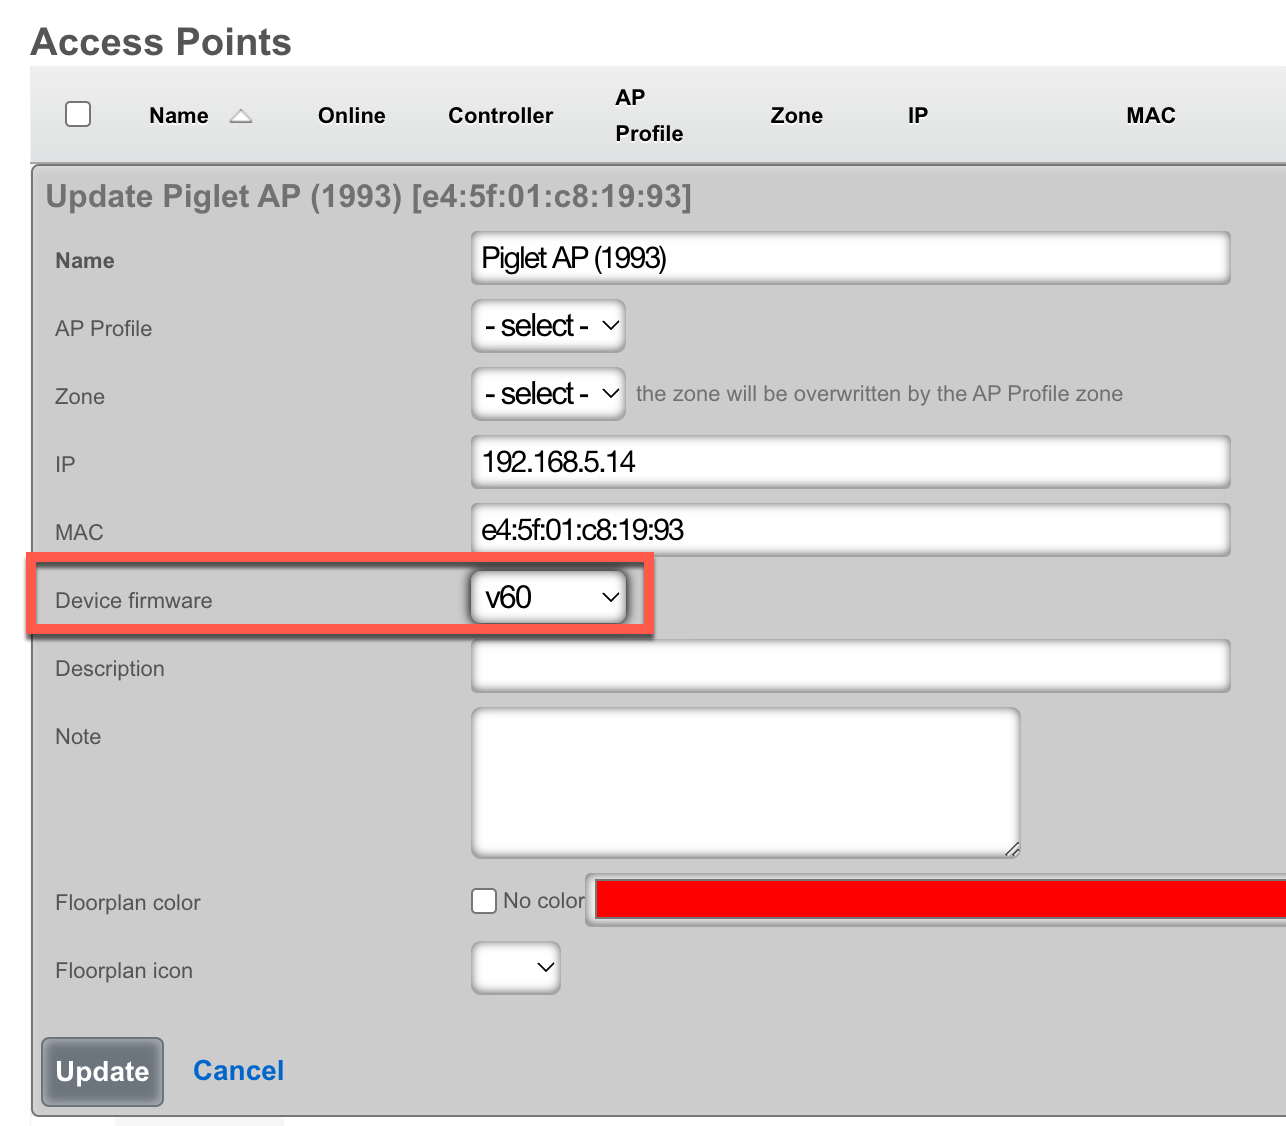
- Select the desired Device Firmware
- Click "Update"

- Click "Approve" on the appropriate row
Configuration
Ping Tests
Ping tests can be scheduled to run from any approved Piglet on either the wired or wireless connection.
- Navigate to Instruments >> Network Monitor >> Ping Targets
- Click "Create New" on the Ping Targets scaffold
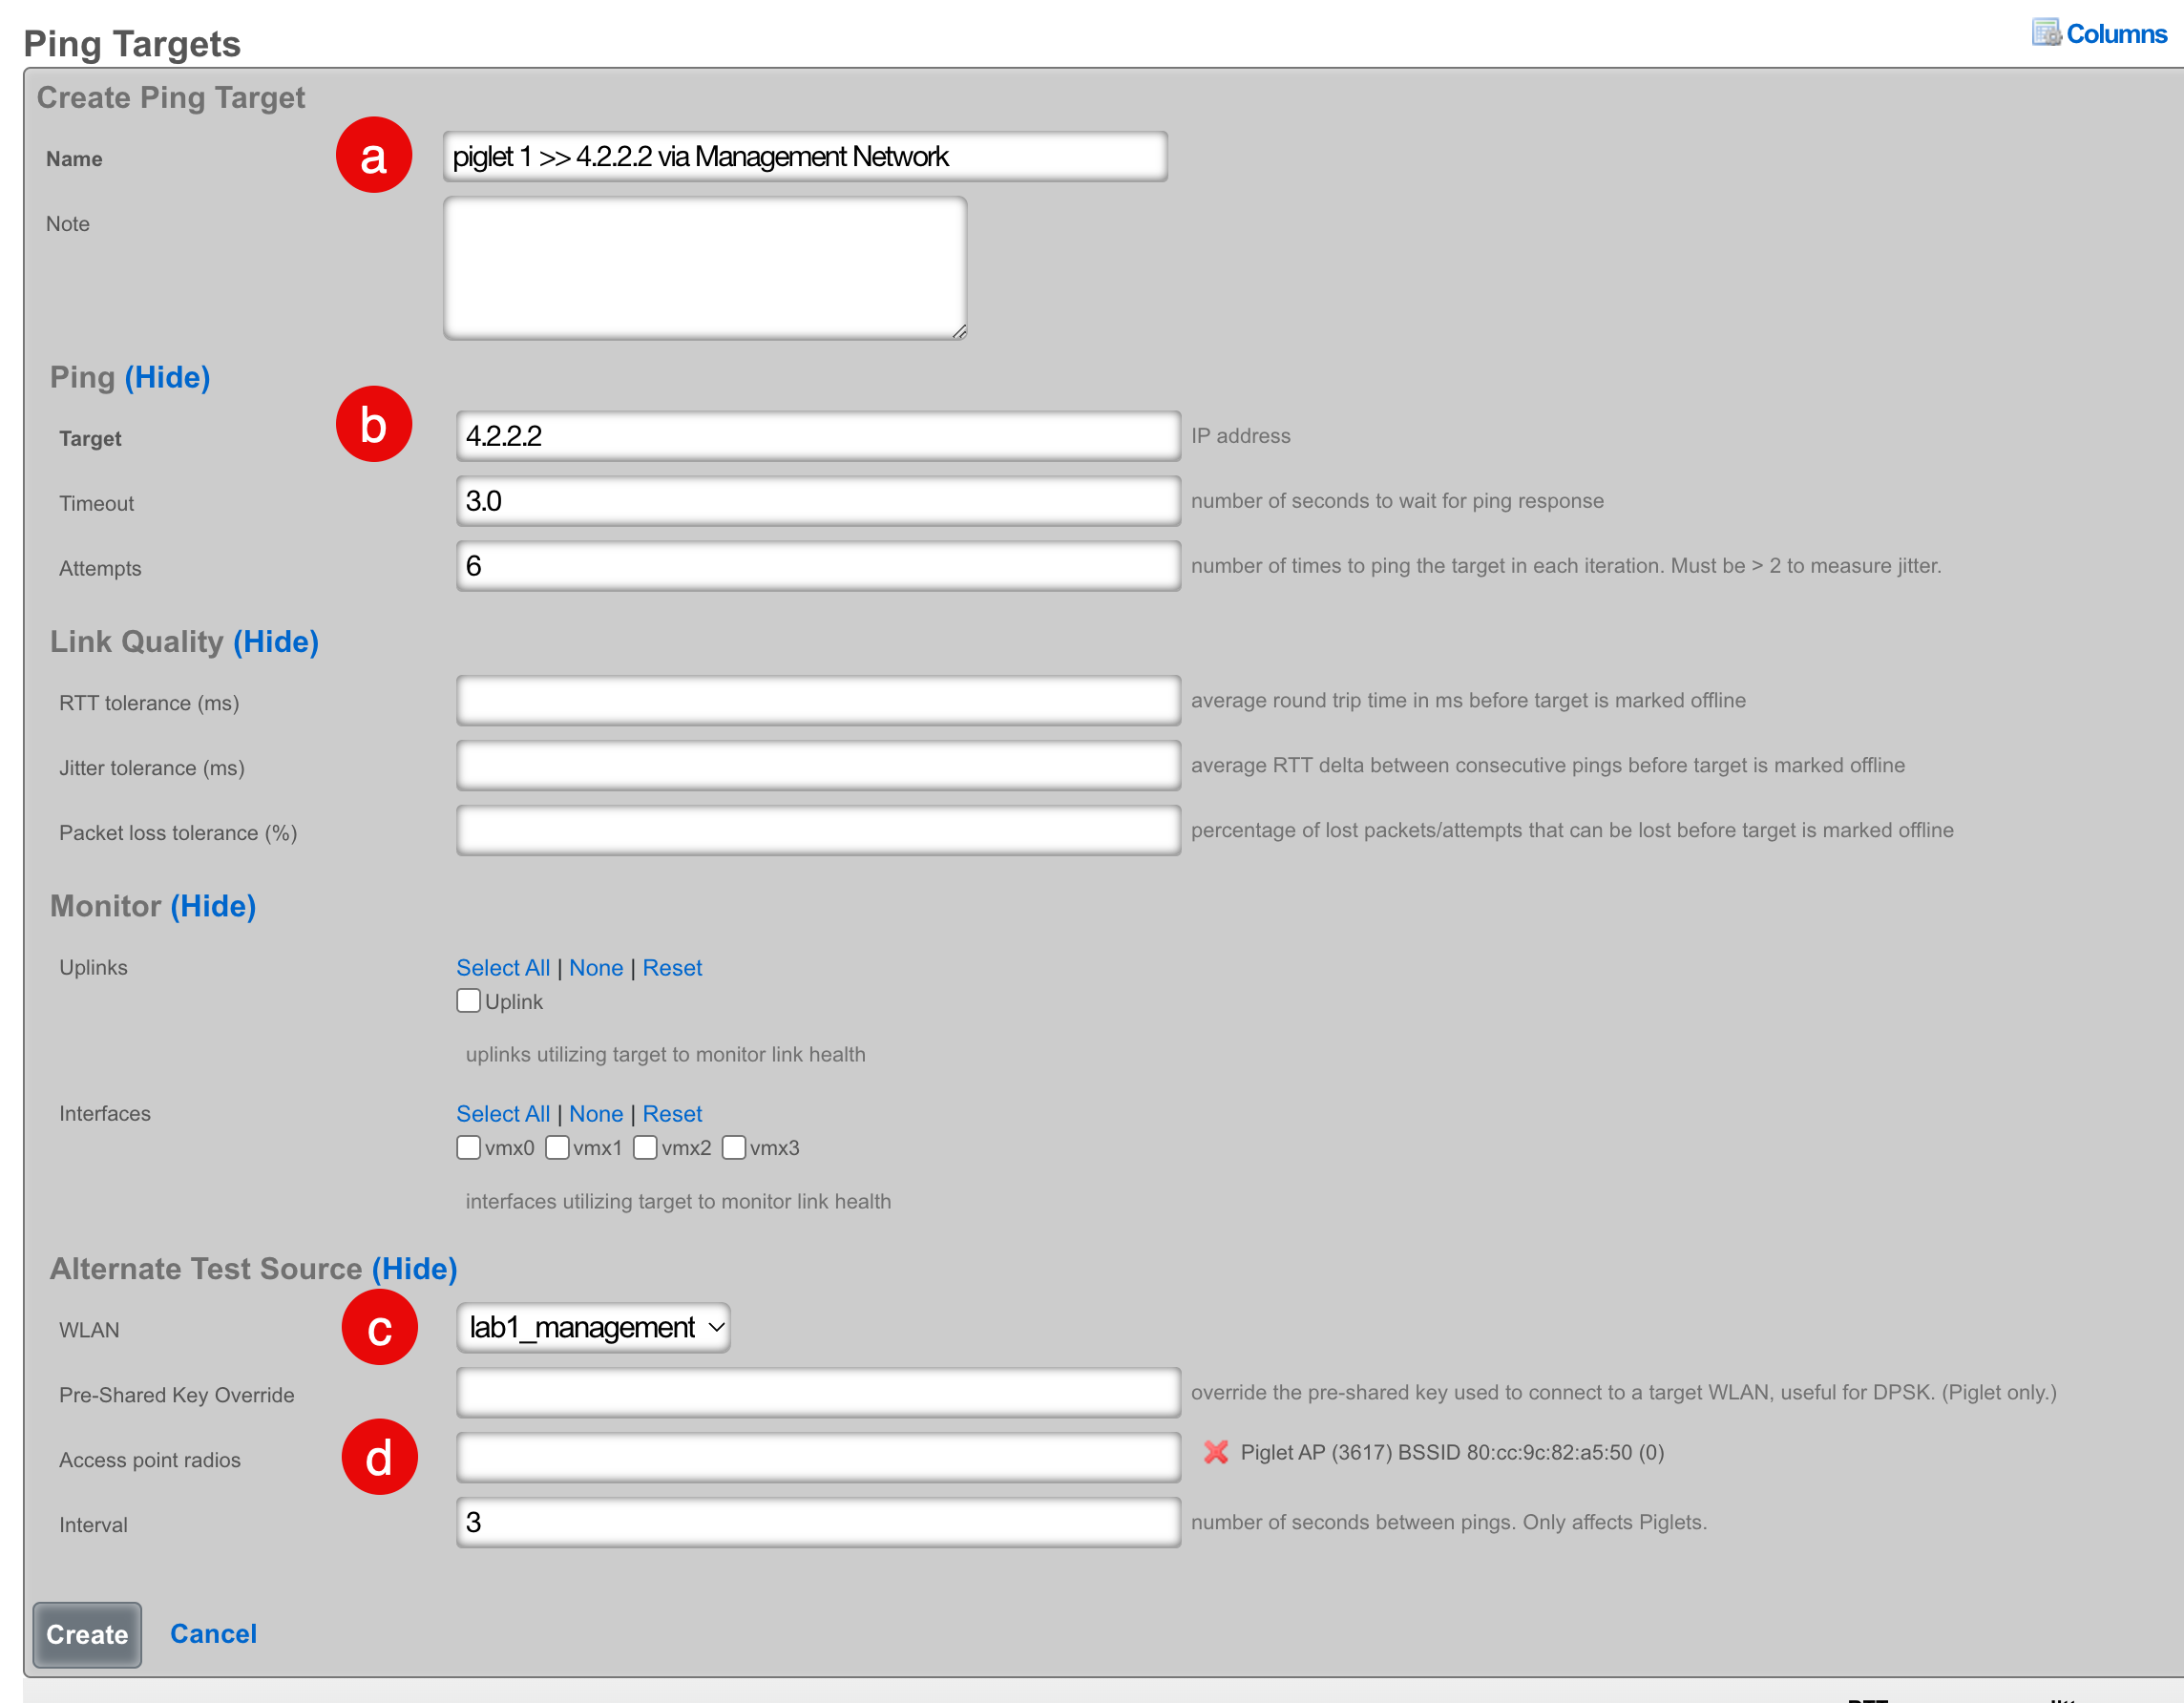
- Configure the ping target:
- Select a meaningful name that accurately reflects the purpose
- Select the destination address to ping
- Select "Wired" to use the wired interface, or select a WLAN to use a wireless interface
- Select the Piglet and radio that the ping should source from
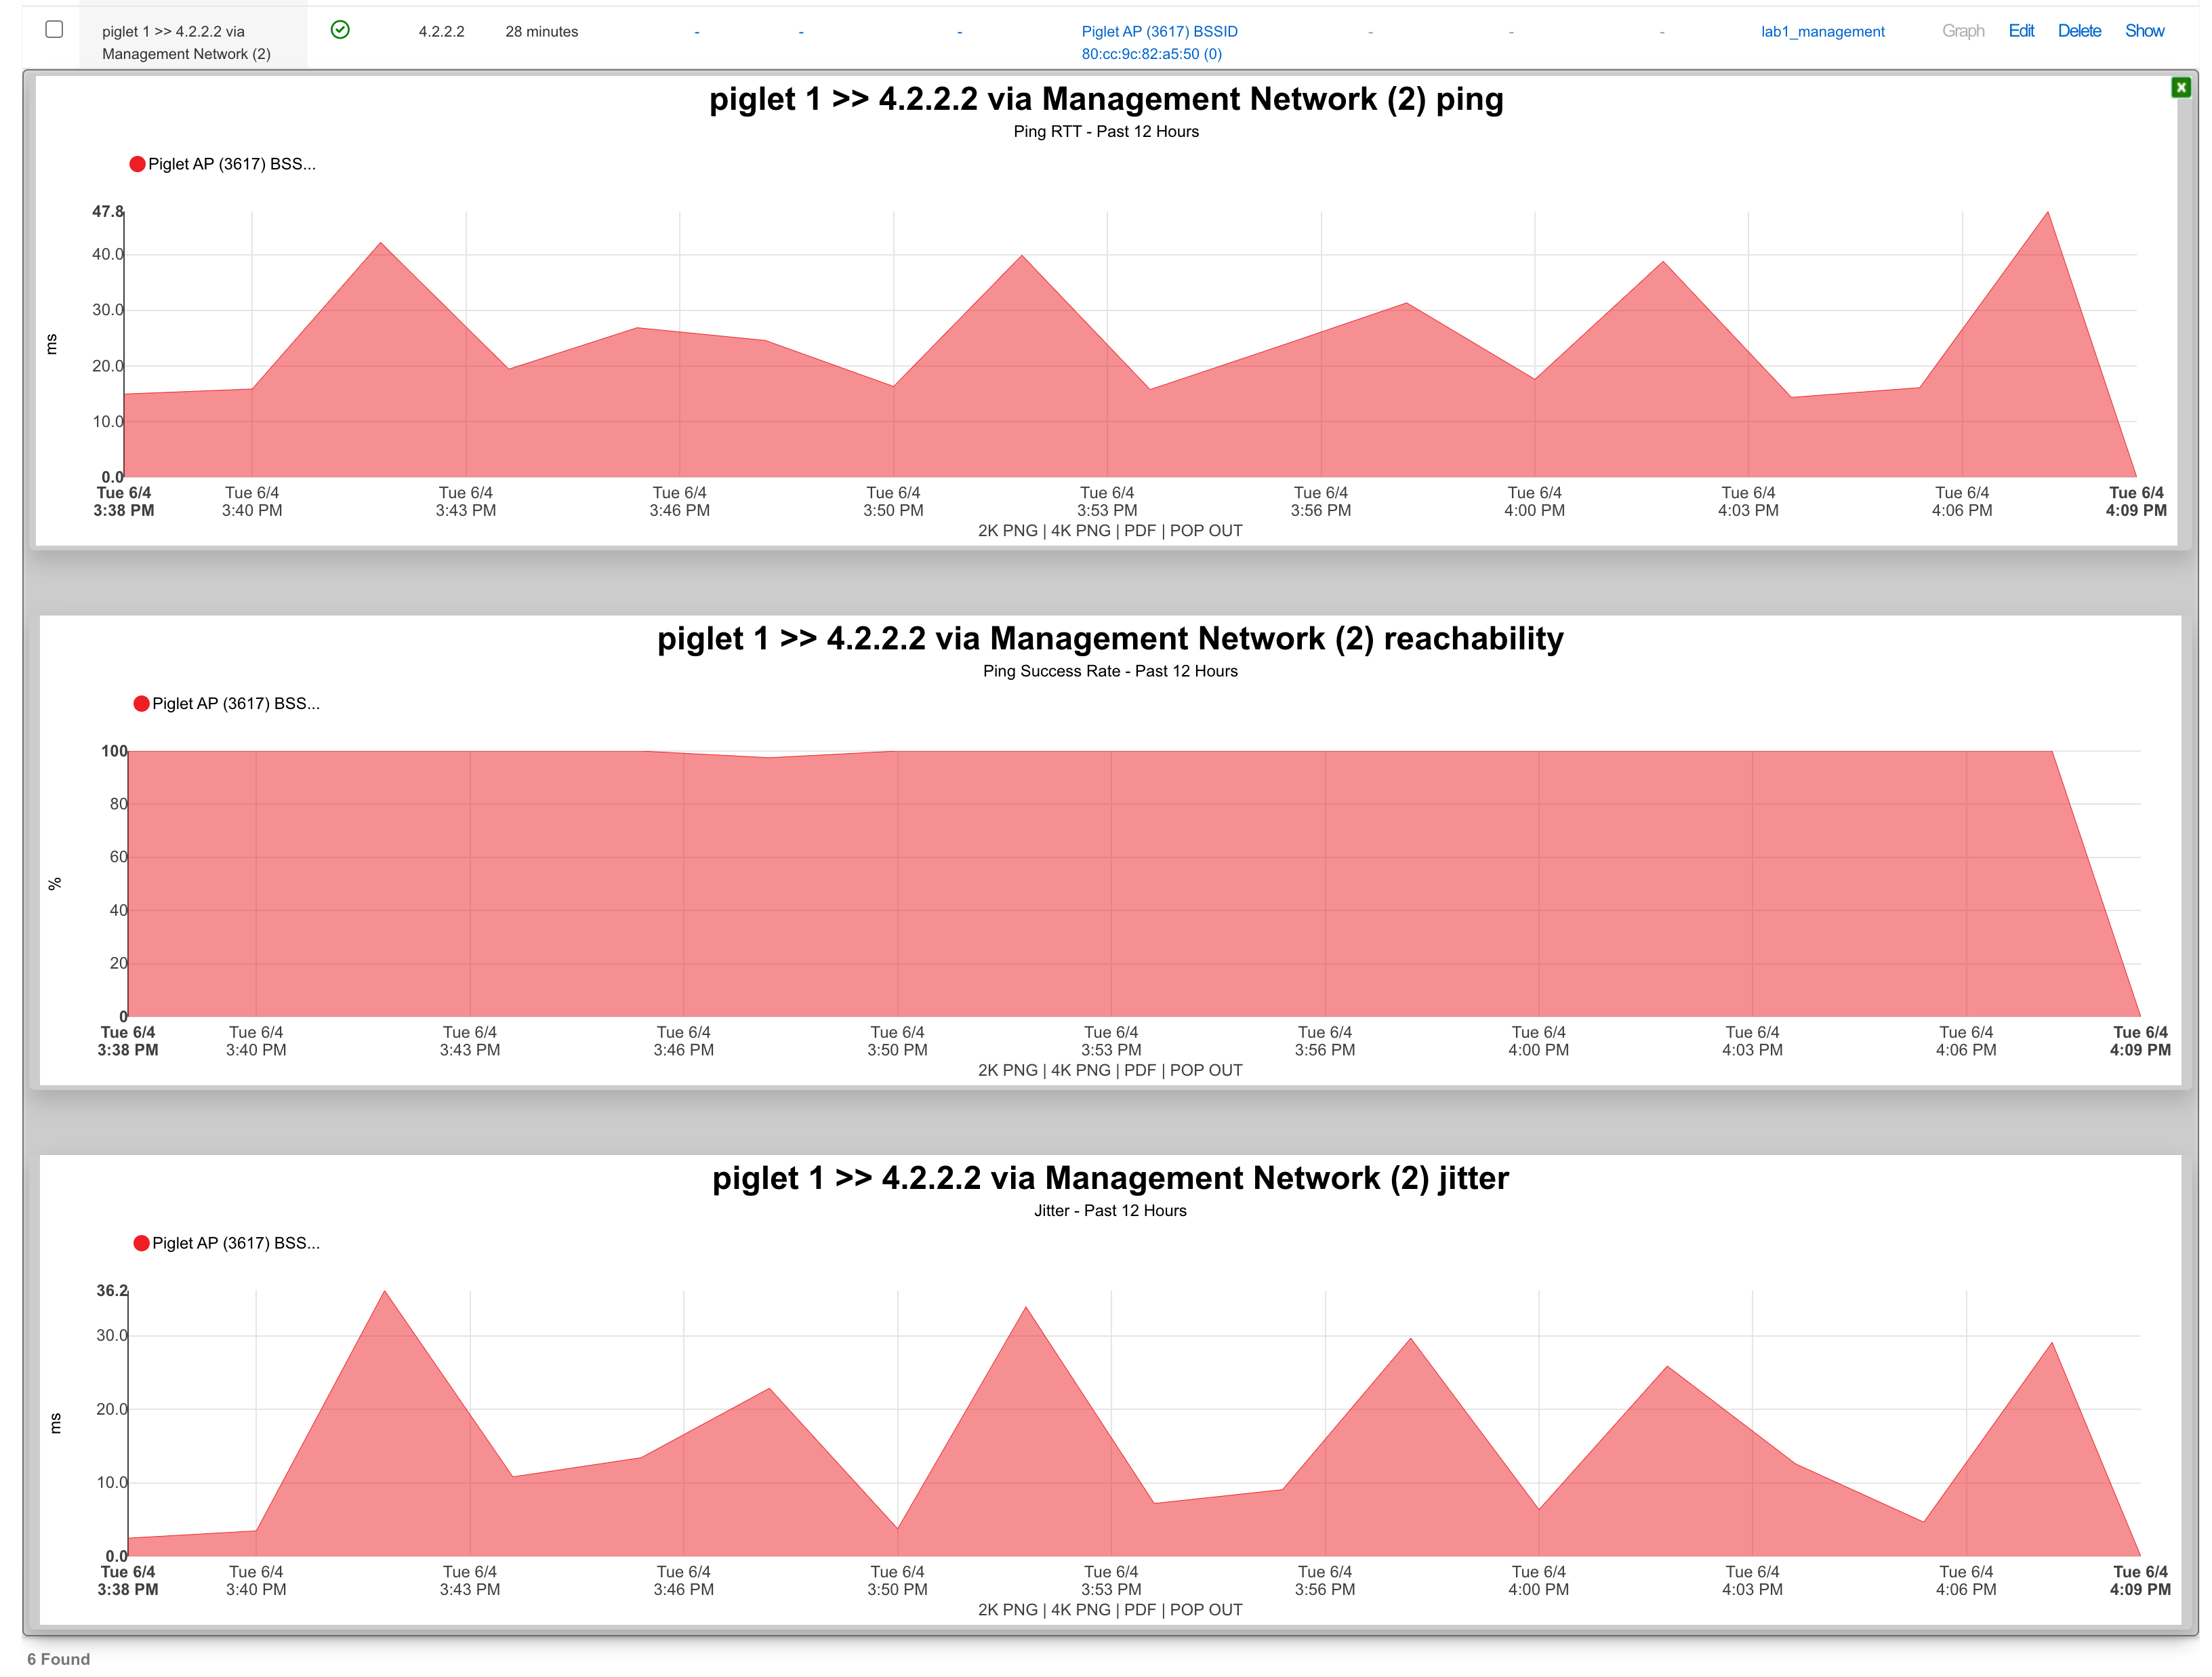
Viewing Ping Results
There are two methods to view results:
Method 1: Click "Graph" on the Ping Targets record

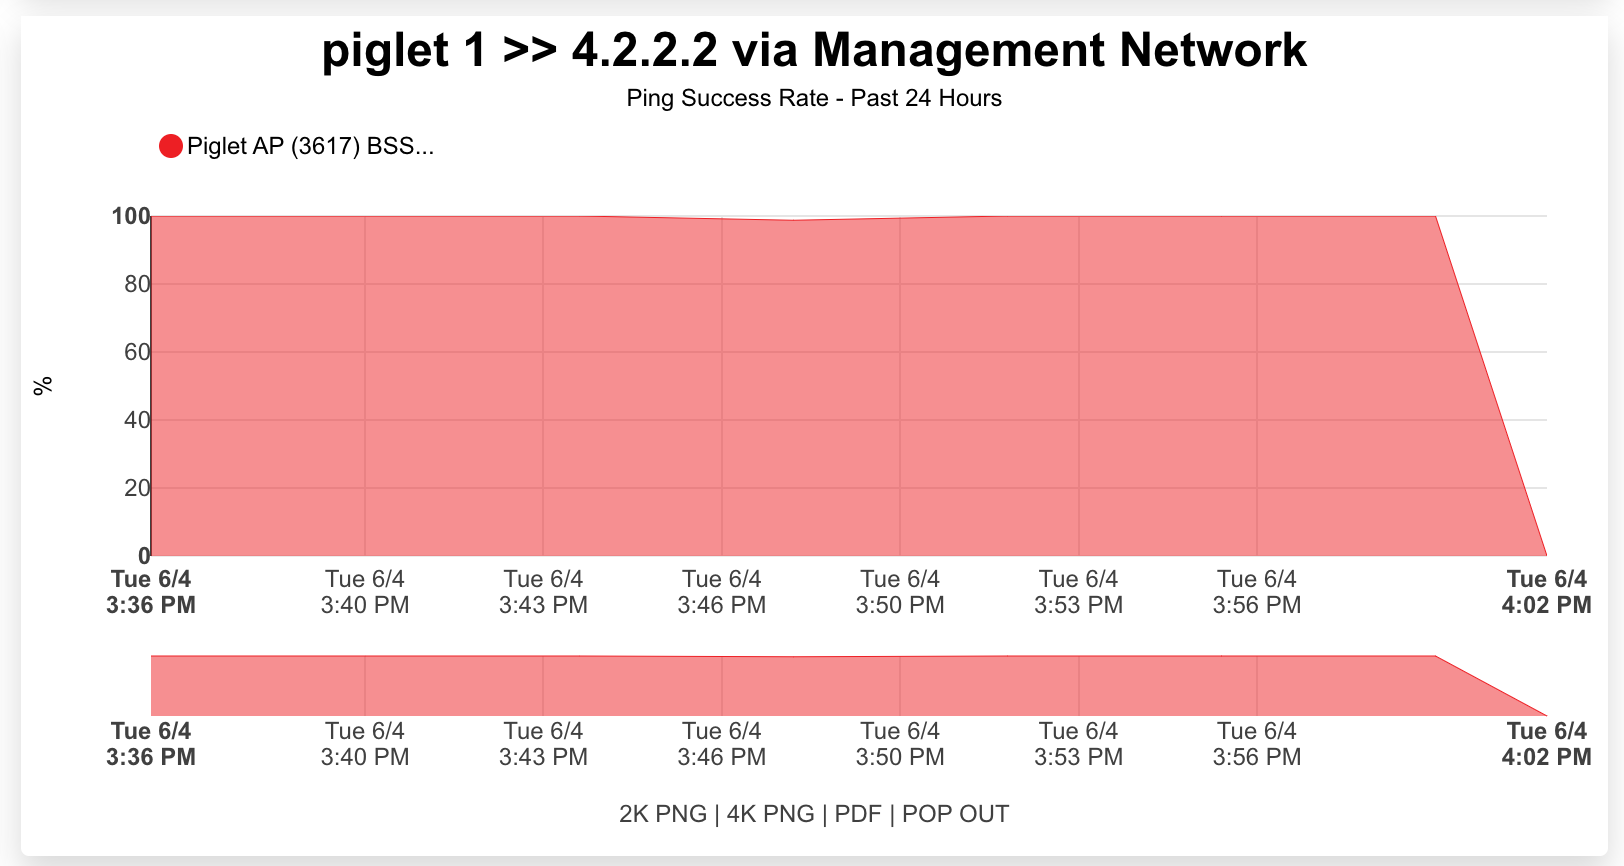
Method 2: Create a System Graph
- Navigate to Archives >> Reports >> System Graphs
- Click "Create New" on the System Graphs scaffold

- Configure the graph:
- Select a meaningful name
- Select the instrument to graph (several are applicable to ping targets)
- Select the period for data visualization
- Select the data interval for grouping results
- Select the ping target to be graphed
- Click "Create"
Speed Tests
Speed tests can be scheduled to run from any approved Piglet on either the wired or wireless connection.
- Navigate to Instruments >> Network Monitor >> Speed Tests
- Click "Create New" on the Speed Tests scaffold
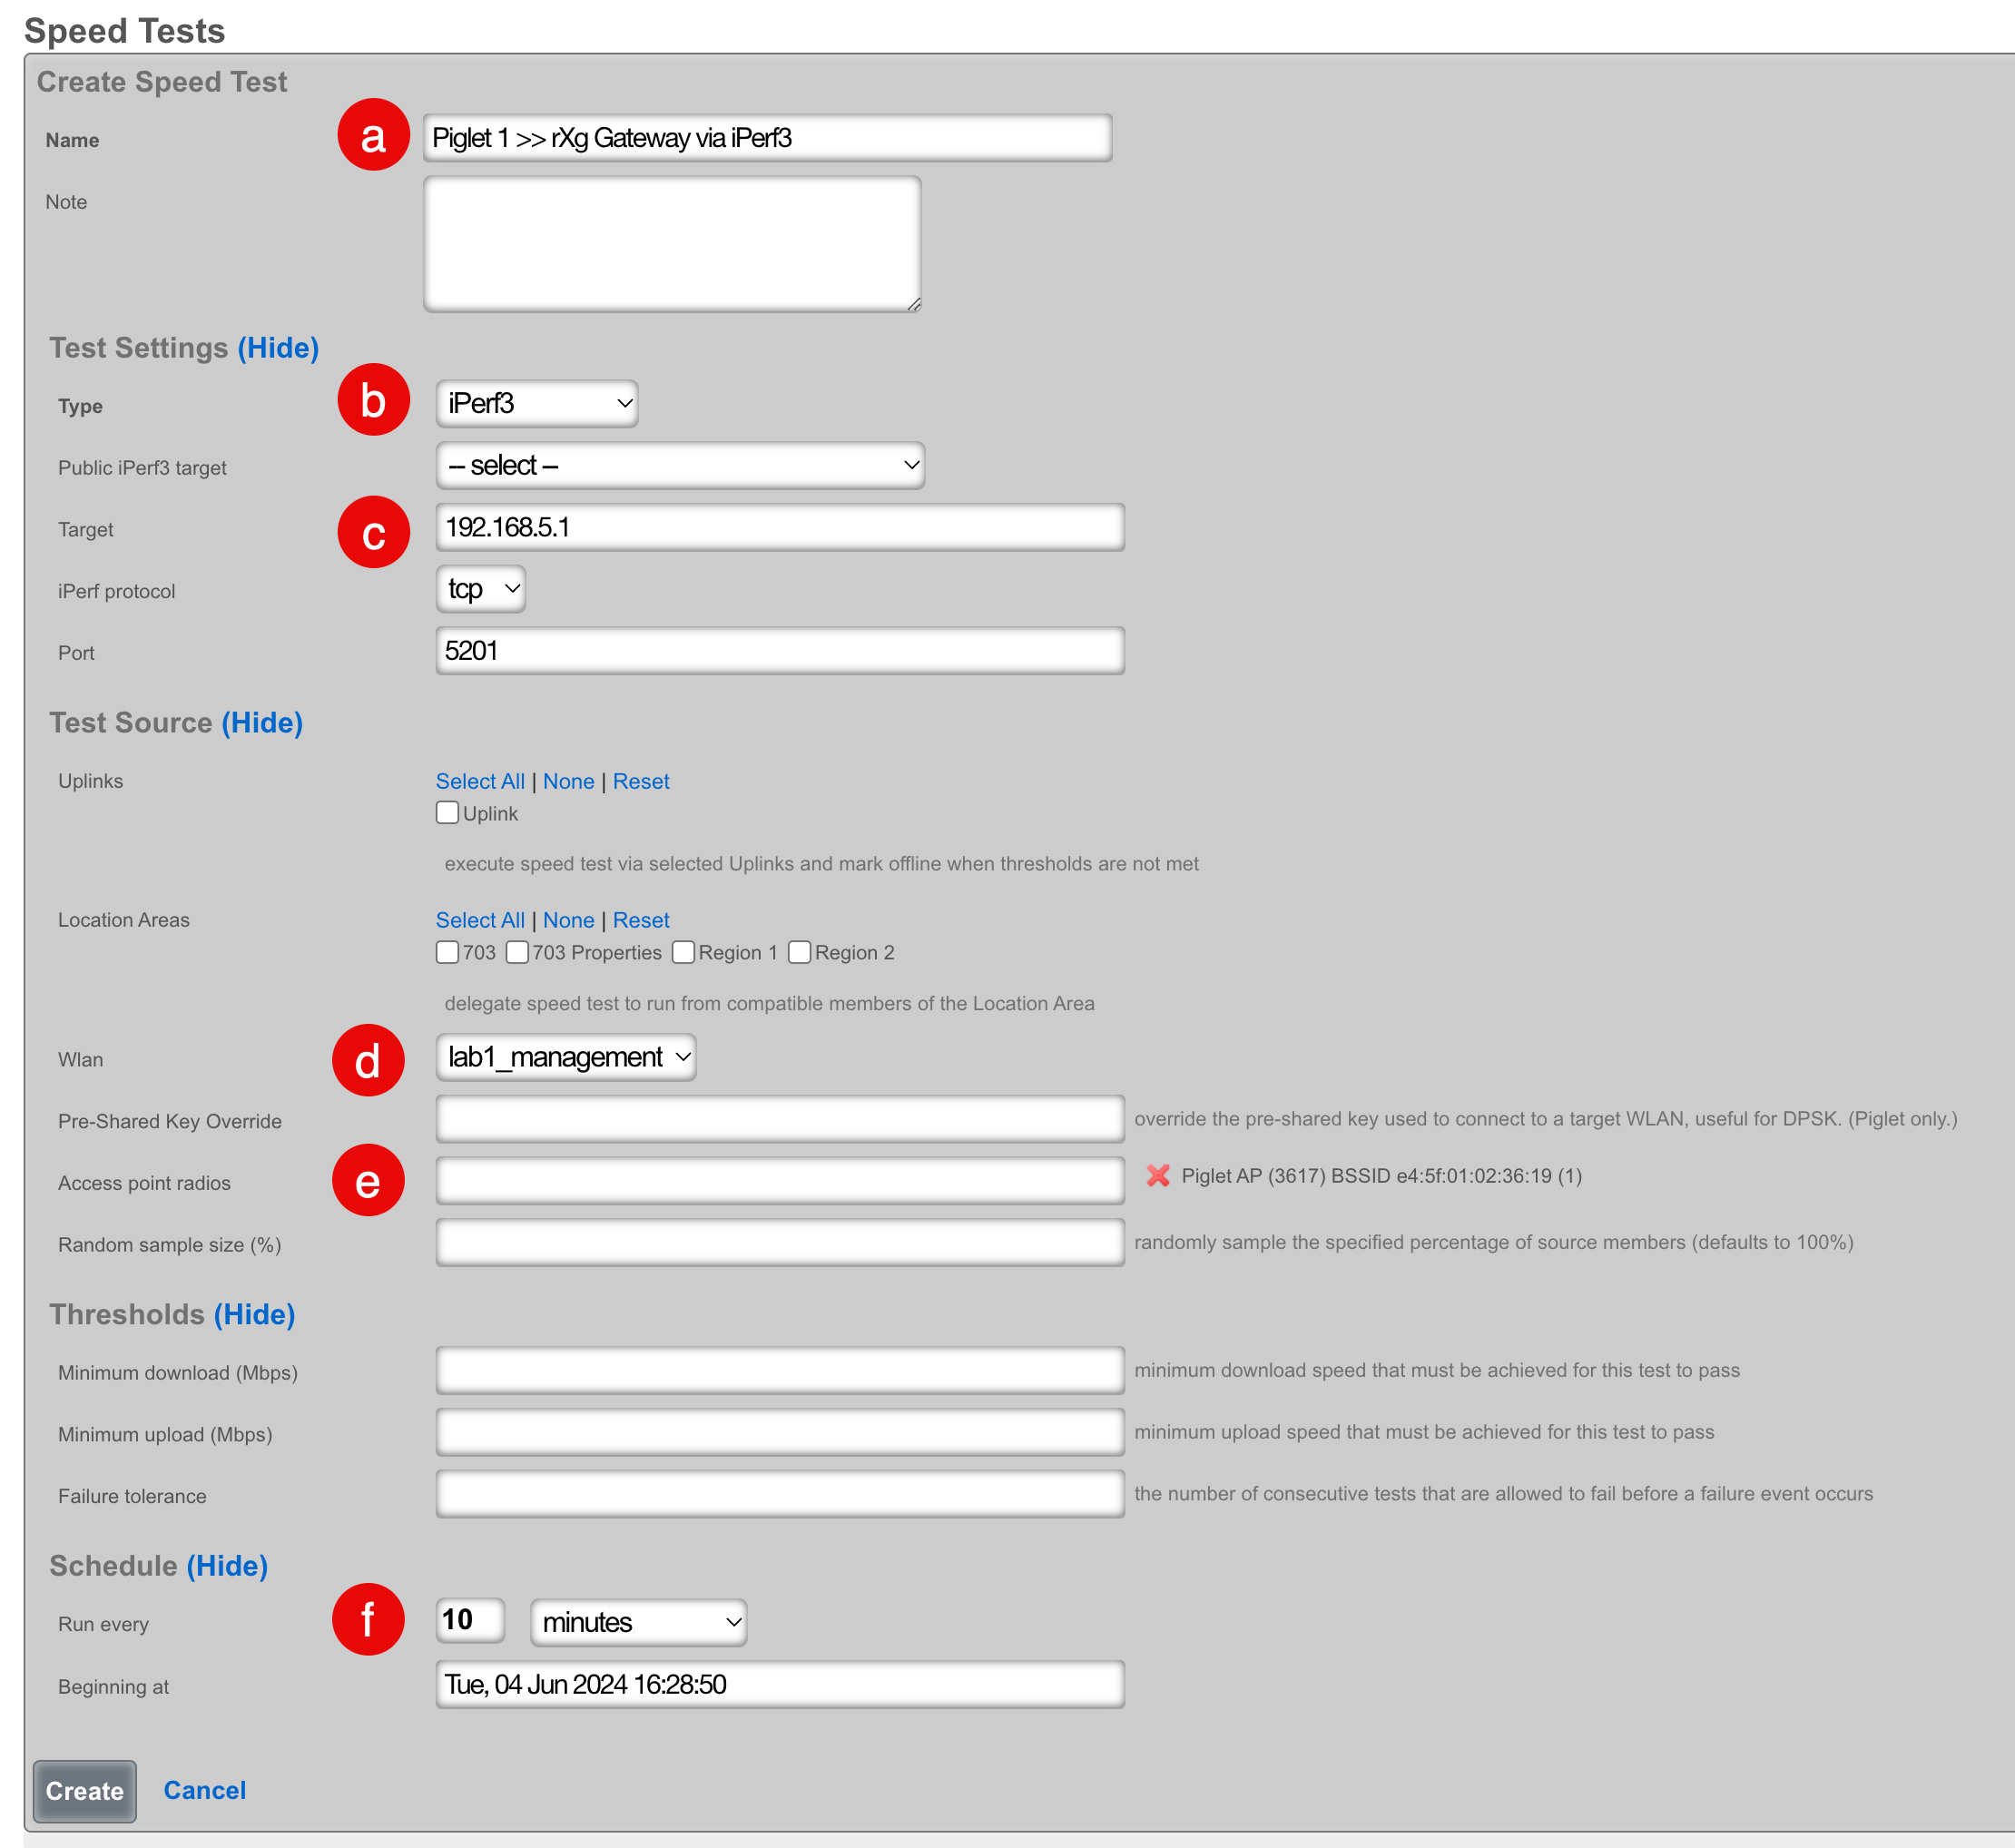
- Configure the speed test:
- Select a meaningful name that accurately reflects the purpose
- Select the type of speed test:
- iPerf3: Choose from public targets or specify your own target
- Speedtest.net: Automatically determines the closest server on the WAN
- If using iPerf3 without a public target, designate an iPerf3 server on the WAN or LAN of the rXg
- Select "Wired" to use the wired interface, or select a WLAN to use a wireless interface
- Select the Piglet and radio that the speed test should source from
- Select how frequently the speed test should run
- Click "Create"
Note: An iPerf server must exist prior to creating this test if using iPerf3 to the rXg gateway.
Viewing Speed Test Results
There are two methods to view results:
Method 1: Click "History" on the Speed Test record
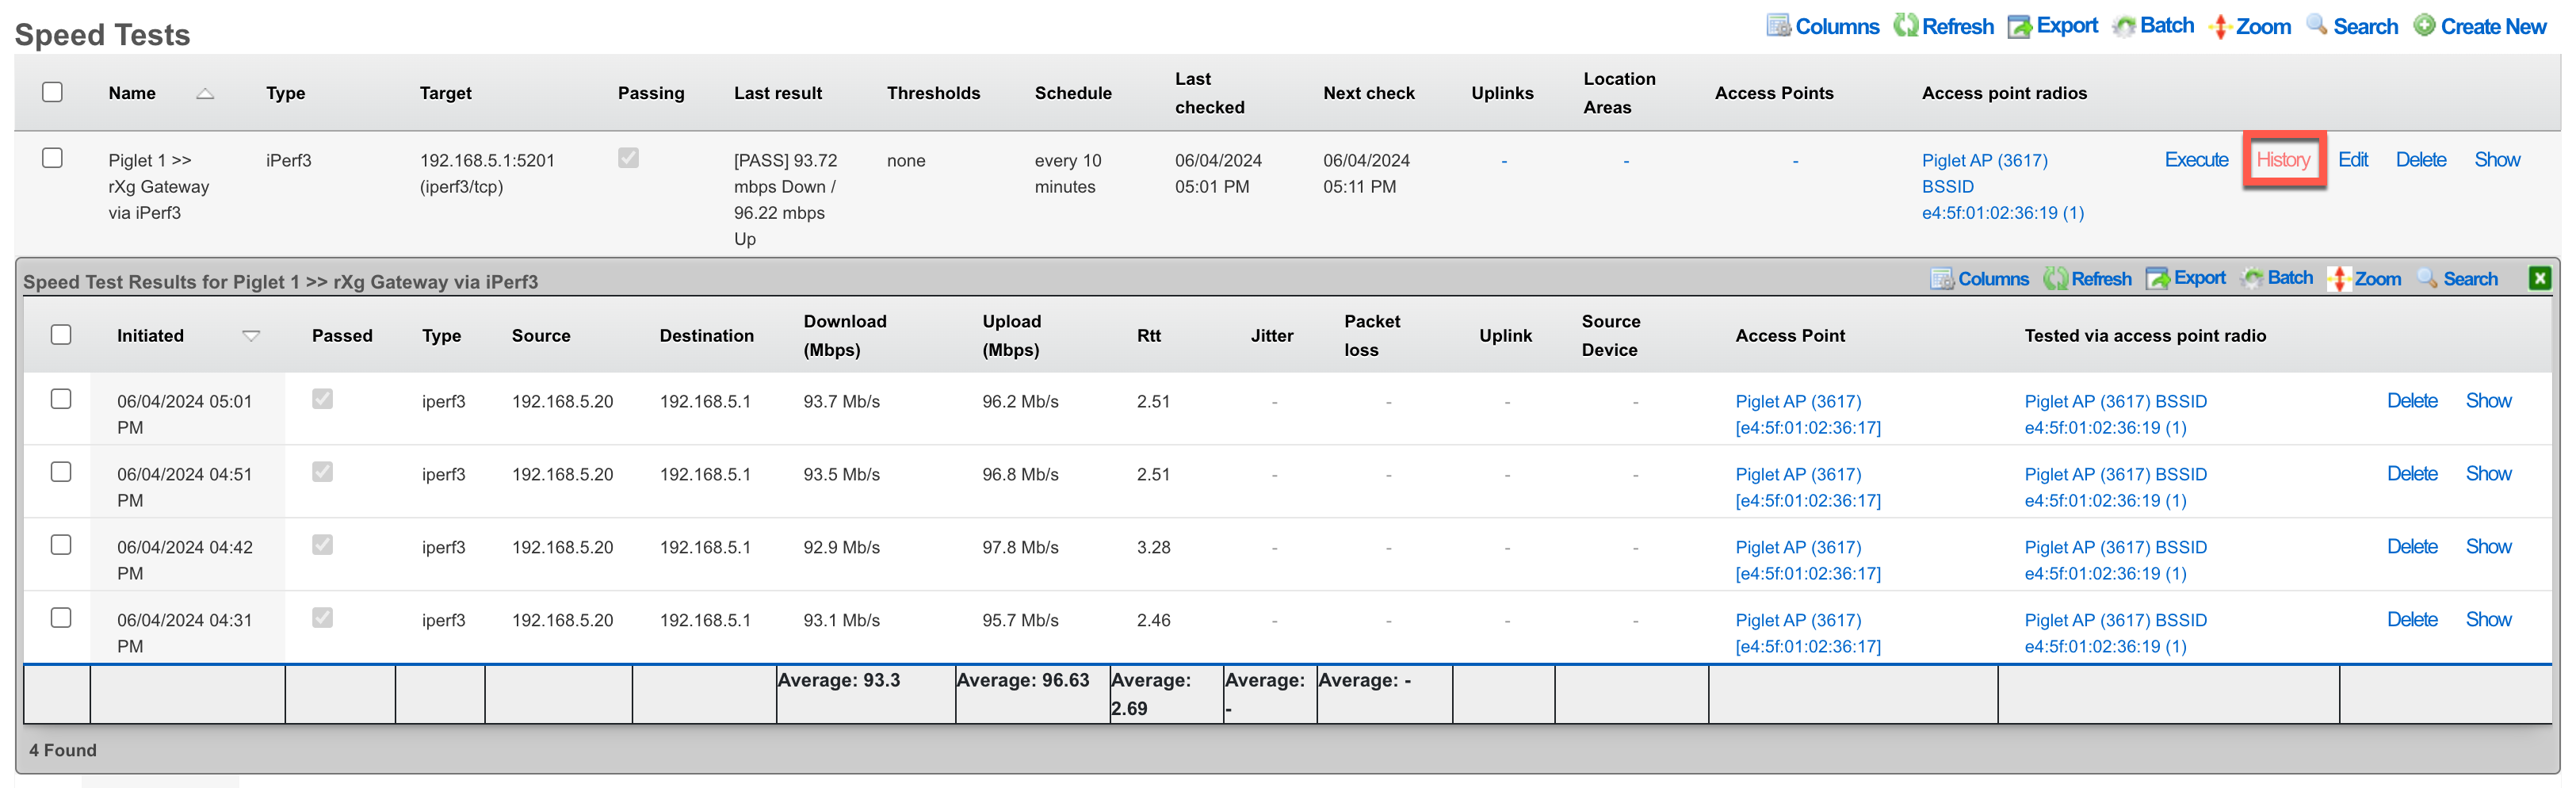
Method 2: Navigate to Instruments >> Network Monitor >> Speed Test Results

Remote Deployment
By default, the Piglet contacts its default gateway as the controller. For Piglets deployed on remote networks from the controller, you can specify the controller IP address through a custom DHCP option:
Option 43: suboption 1, type text, data: <IP address of rXg controller>
Note: The Piglet sends a Vendor Client Identifier (option 60) with the value "RG Nets".


