Bootstrap LAN
We will now configure the LAN side of the rXg.
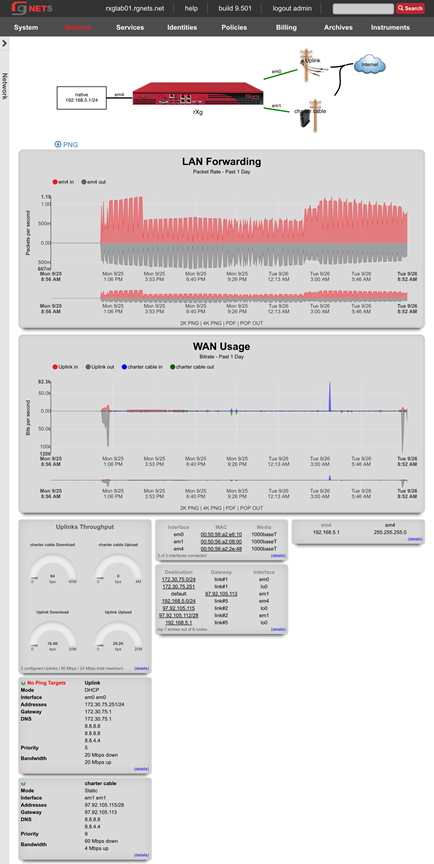
Review Network Dashboard
The network dashboard shows a dynamic overview of the current network topology as well as utilization info.
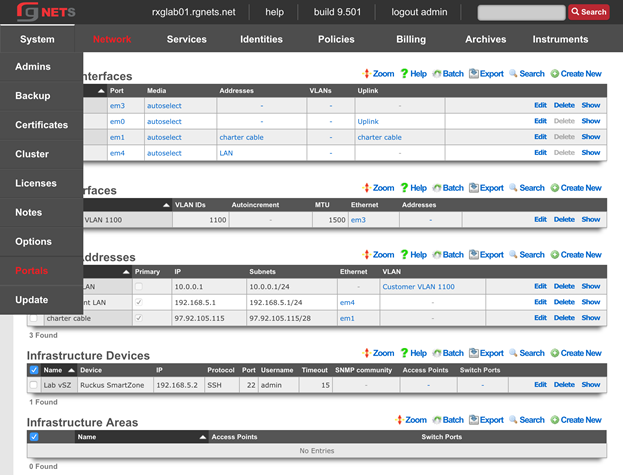
Network :: LAN
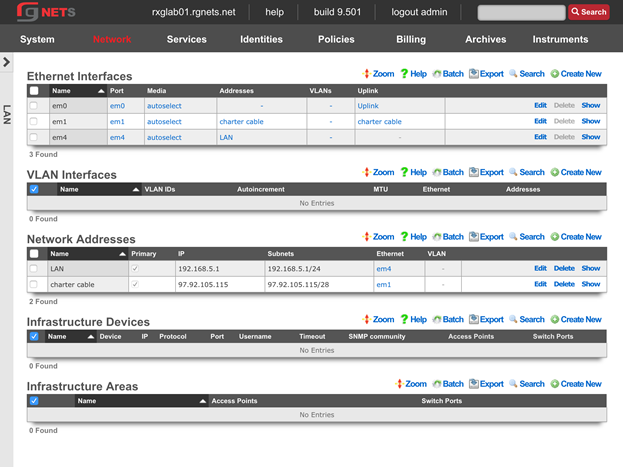
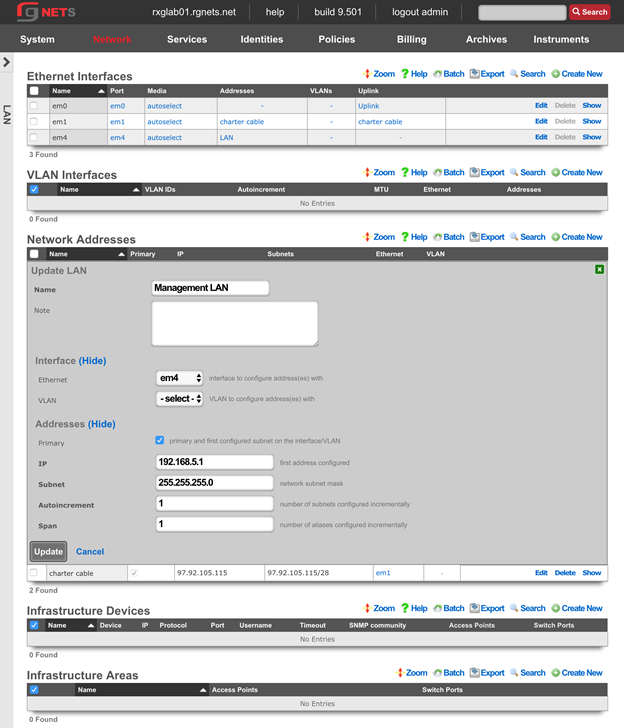
Edit the Management LAN Network Address
Change the subnet mask to be 255.255.255.0 (changing from a /30 to a /24).
Set autoincrement to 1
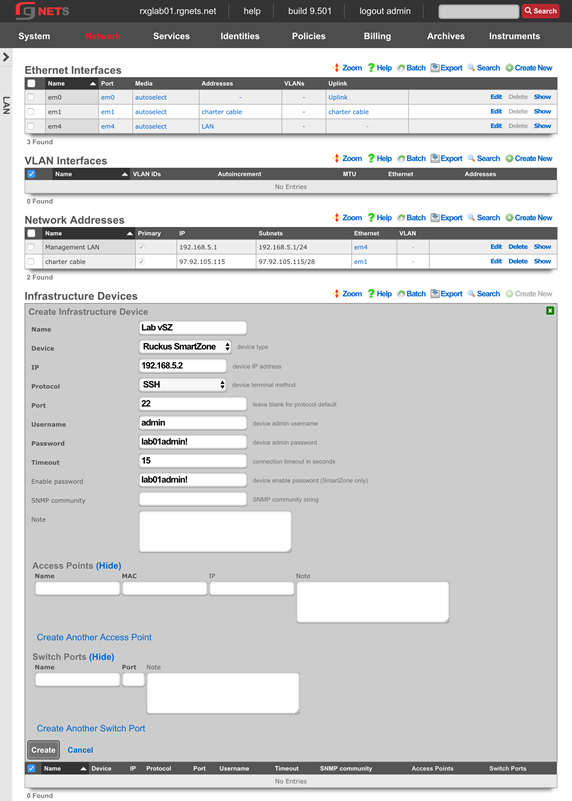
Create an Infrastructure Device
Create an Infrastructure Device for your labs wireless controller. In this case, it is a RUCKUS virtual SmartZone (vSZ).
| Field | Value |
|---|---|
| Device | RUCKUS SmartZone |
| IP | 192.168.5.2 |
| Protocol | SSH |
| Port | 22 |
| Username | admin |
| Password | lab01admin! *note: substitute lab number for 01 |
| Enable Password | lab01admin! *note: substitute lab number for 01 |
Creation of an Infrastructure Device allows the rXg to notify the RADIUS NAS (either the wireless controller or the wired switch) that a VLAN change has taken place, and that the connected device should be disconnected and immediately reconnected in order to re-initiate the RADIUS authentication process and be assigned the new VLAN tag assignment. Infrastructure Devices are also utilized by the conference tool to allow configuration changes such as the creation of WLANs for the duration of a conference.
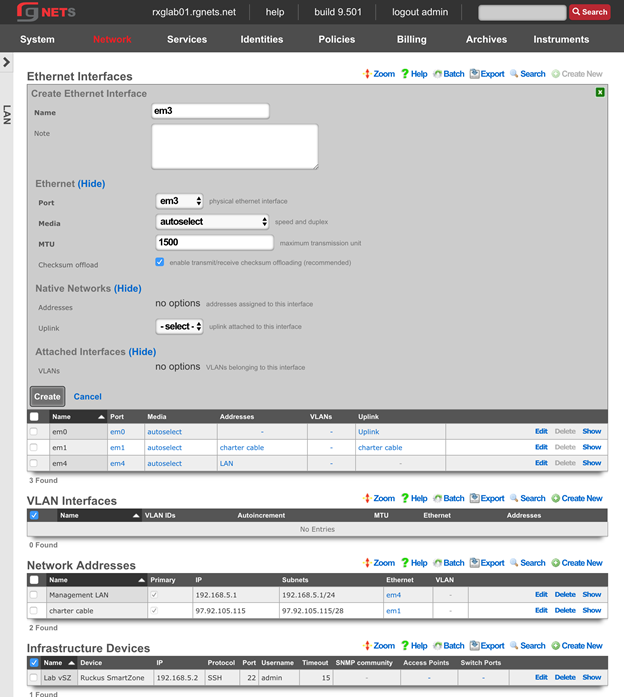
Create a new em3 Ethernet Interface
This interface will be the source of the VLAN-tagged traffic coming from our wireless infrastructure.
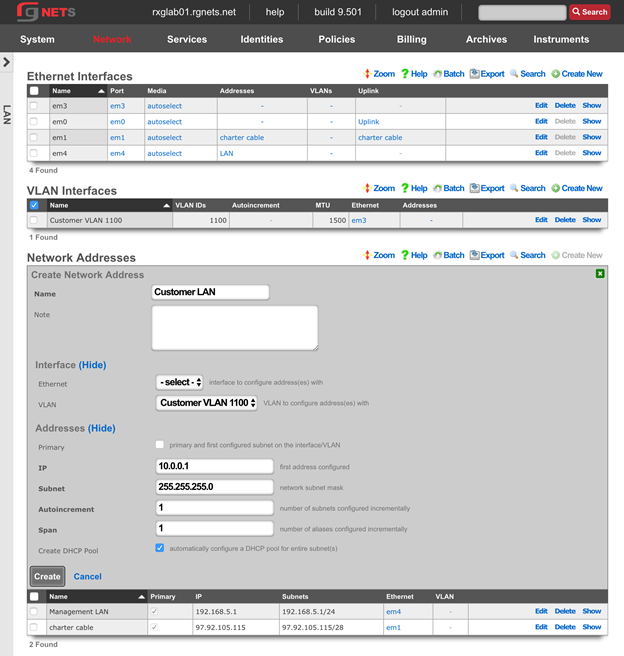
Create a new Customer VLAN
Click Create New in the VLANs scaffold.
Name it Customer VLAN 1100. Select our newly created em3 interface. Enter 1100 for the VLAN ID. Do not check auto increment.

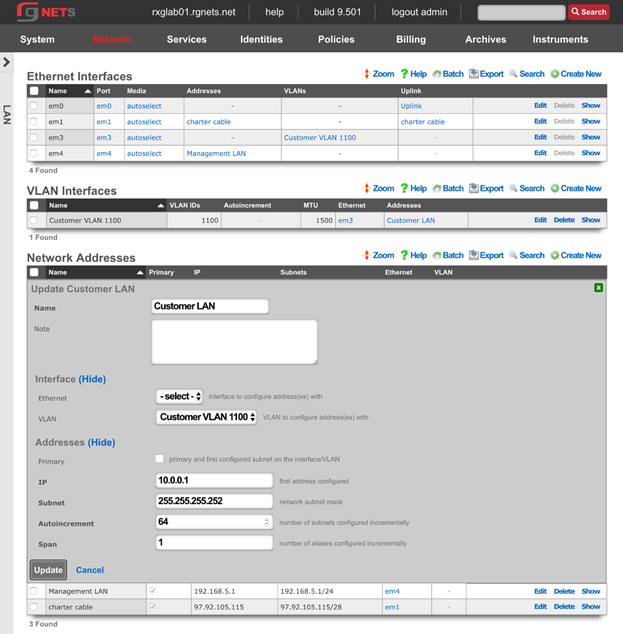
Create a new Customer Network Address
Click Create New in the Network Addresses scaffold.
Make sure Ethernet does not have a selection. Select our newly created VLAN (Customer VLAN 1100).
| Field | Value |
|---|---|
| Ethernet | - Select - *make sure this has no option selected |
| VLAN | Customer VLAN 1100 |
| IP | 10.0.0.1 |
| Subnet | 255.255.255.0 |
| Autoincrement | 1 |
| Span | 1 |
| DHCP pool | checked |
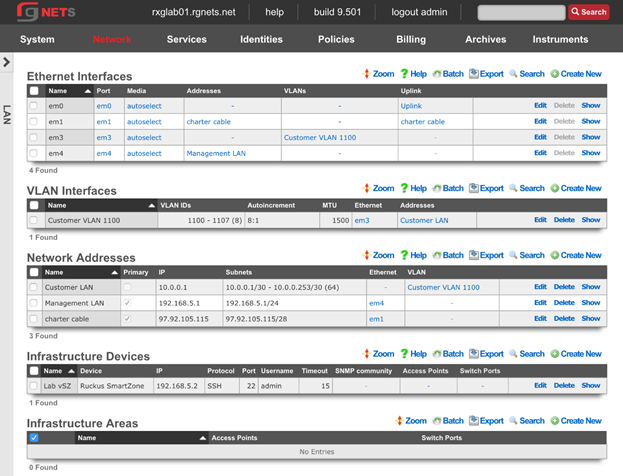
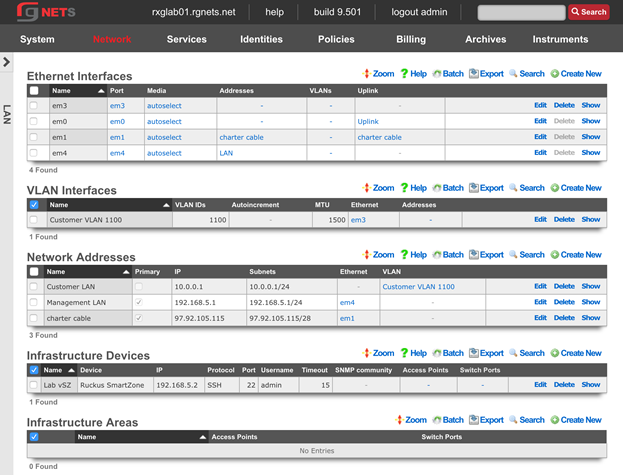
Final result
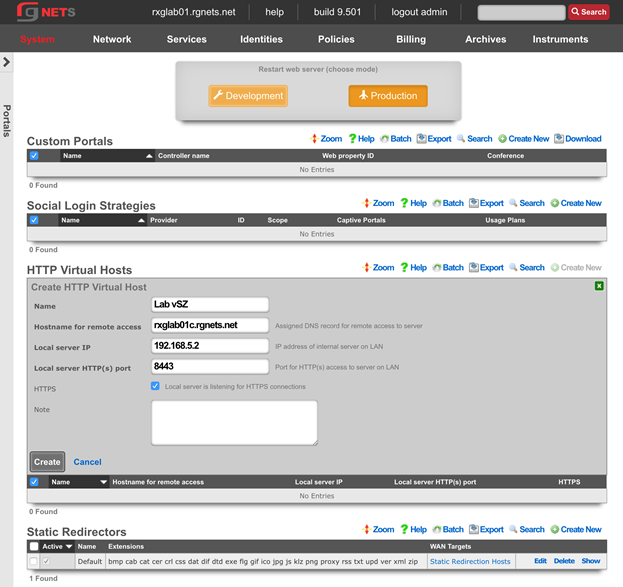
Navigate to System :: Portals
Create a new HTTP Virtual Host
An HTTP Virtual Host proxies web access to devices on the LAN based on the hostname of the request.
Click Create New in the HTTP Virtual Host scaffold.
Enter the FQDN of your wireless controller, as listed on your lab sheet.
| Field | Value |
|---|---|
| Hostname | Obtain from lab sheet |
| IP | 192.168.5.2 |
| Local server HTTP(s) Port | 8443 |
| HTTPS | checked |
ENABLE AUTOINCREMENTED VLANs
Edit the Customer LAN Network Address
Click Edit on the Customer LAN Network Address.
Change the Subnet to 255.255.255.252 (/30) and change Autoincrement to 64.
The rXg will automatically configure 64 contiguous /30 subnets to replace the single /24 subnet we created previously.
Note: Because 64 /30 subnets fit exactly into a single /24 subnet, we are still consuming the same overall network address space, and therefore do not need to edit our DHCP pools. If we had chosen a smaller or larger autoincrement number, the DHCP pool that was created automatically when this Network Address was created would now be invalid, raising a health notice and requiring manual intervention.
Edit the Customer VLAN
Click Edit on the Customer VLAN 1100 record in the VLANs scaffold.
Enable the Autoincrement checkbox.
Set the Autoincrement Ratio to 8.
Click Update.
If the autoincrement ratio were set to 1, the rXg would automatically create one VLAN interface for each autoincremented subnet in the associated Network Address (64 unique VLAN interfaces). Because we have set a ratio of 8, the rXg will create one VLAN interface for every 8 subnets. (64 subnets / 8 = 8 unique VLAN interfaces).
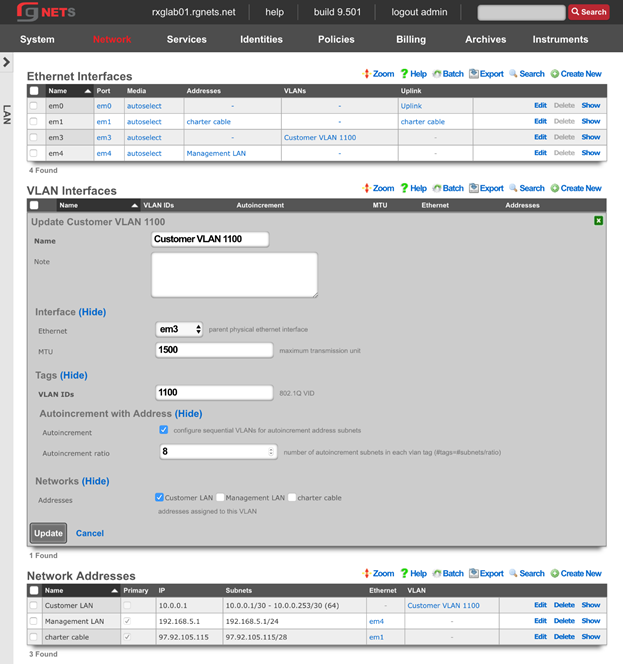
Final Result