Installation on VMware ESXi
Step 1: Set up switches
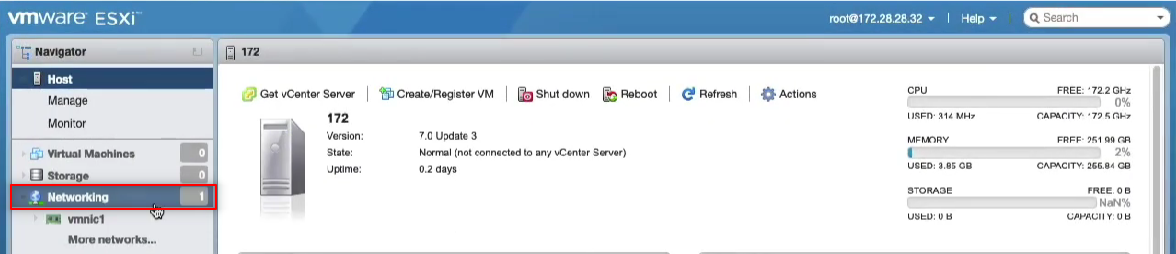
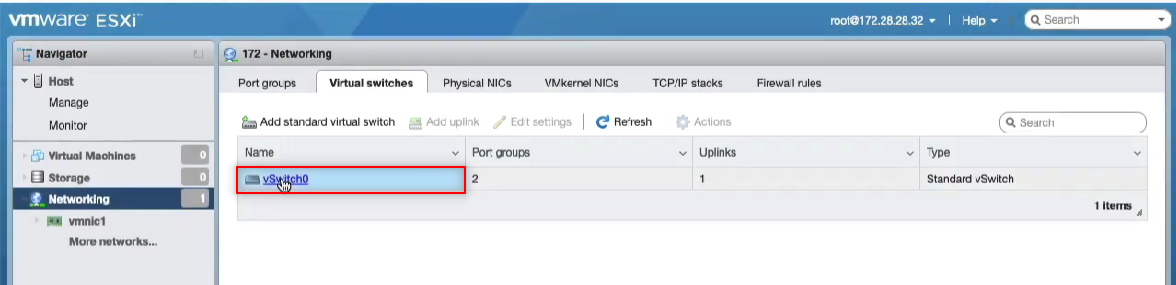
The rXg is a router, and thus it requires separate network segments for the WAN and LAN. A default VMware ESXI installation includes a single virtual switch. Youll need to edit the existing switch as well as create a second virtual switch.
Navigate to the networking settings and edit the default switch.
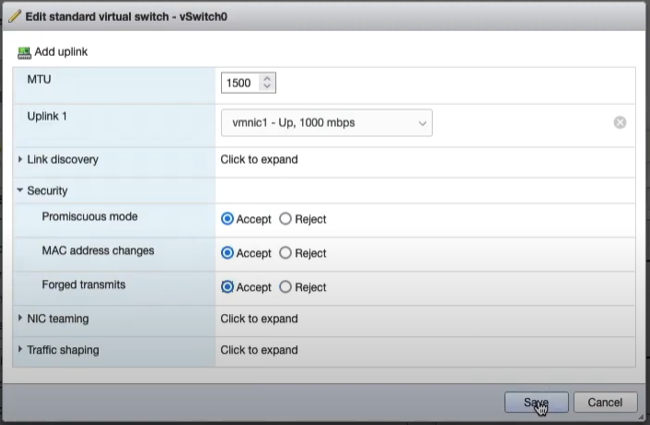
Click Actions >> Edit Settings and enable all the options under the security setting. This allows DHCP to pass.
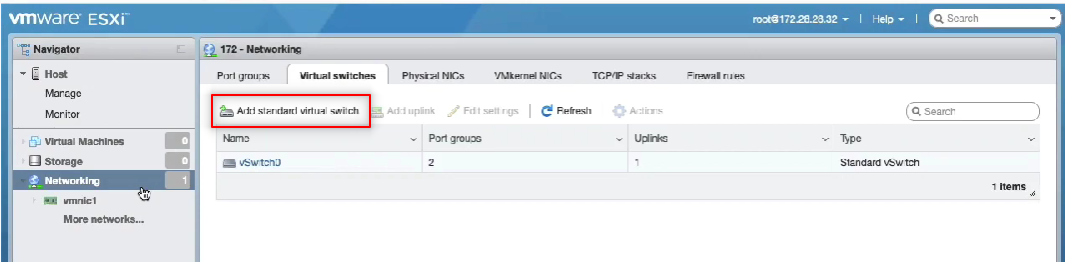
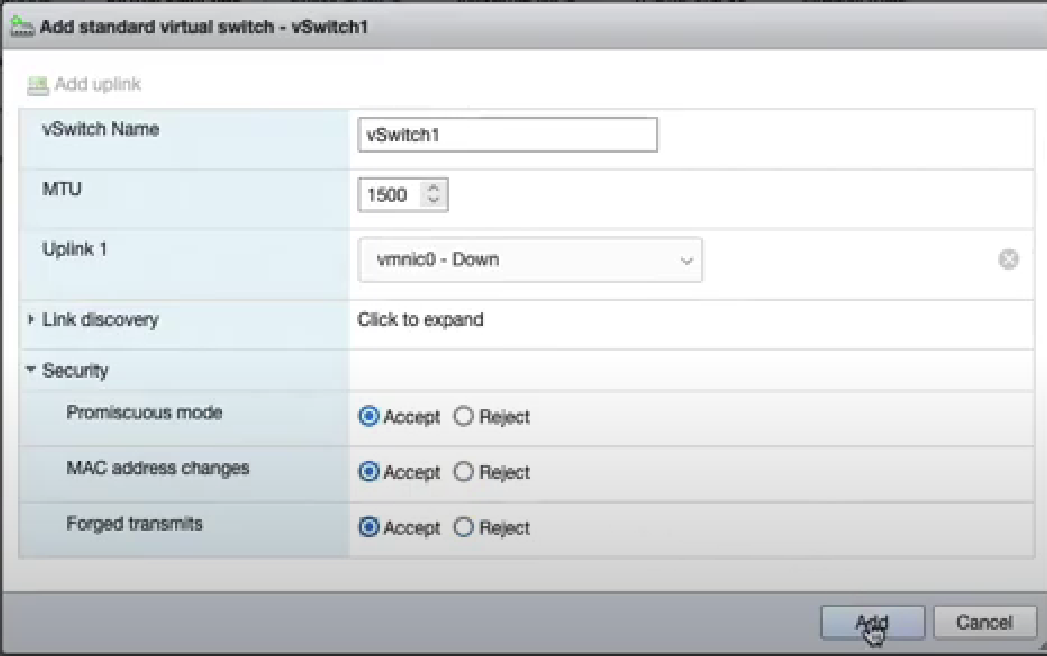
Create a second virtual switch and enable all the options under the security setting as you did before.
It is also possible to use the command line to easily create an arbitrary number of virtual switches. This is typically done to create a large number of isolated L2 segments within a single hypervisor. The command to create a single virtual switch on the ESXi CLI is:
esxcli network vswitch standard add -v VS_NAME
Here is a script that you can run on ESXi to create an arbitrary number of virtual switches:
if ["$#" -ne 1]; then max=8; else max=$1; fi
for i in `seq 0 $max`
do
  n=`printf "%02d\n" $i`
  esxcli network vswitch standard add -v isol_$n
done
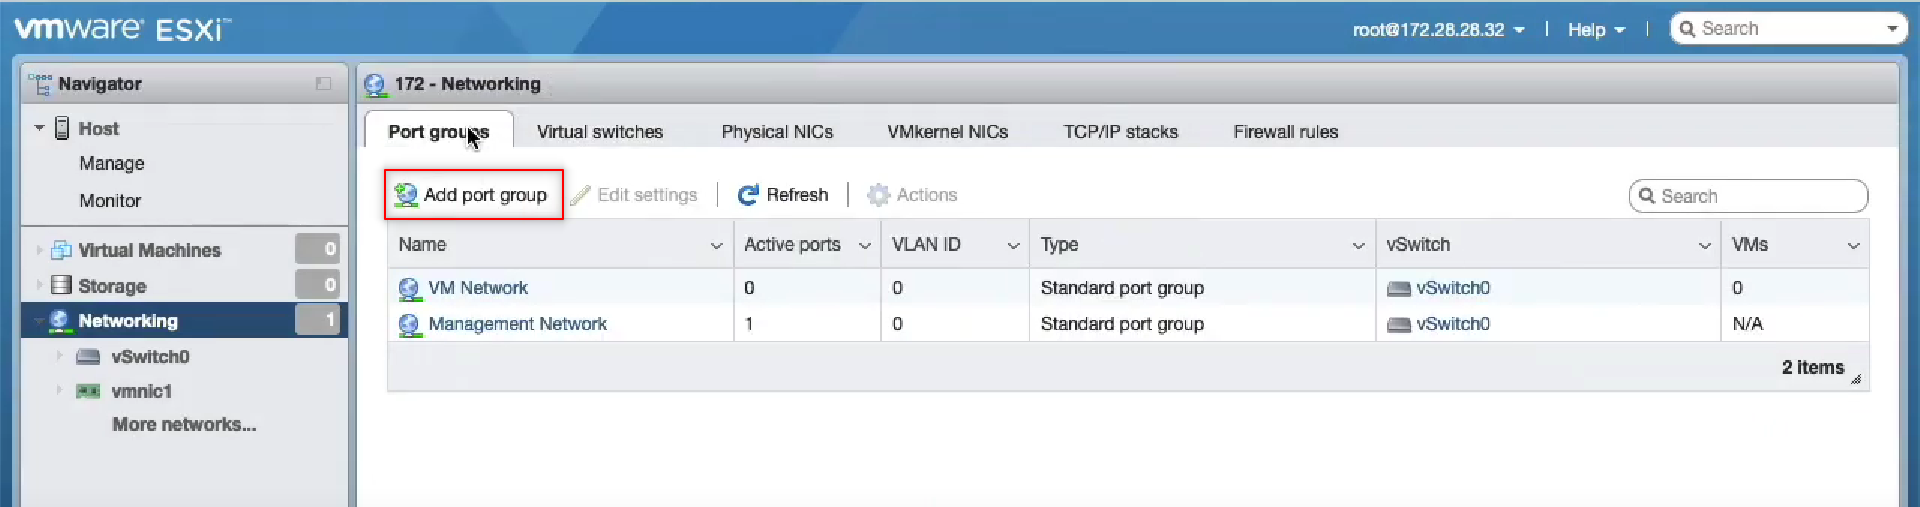
Step 2: Create port groups
You need to create port groups for the LAN and WAN. Navigate to the port groups tab and create the WAN port group.
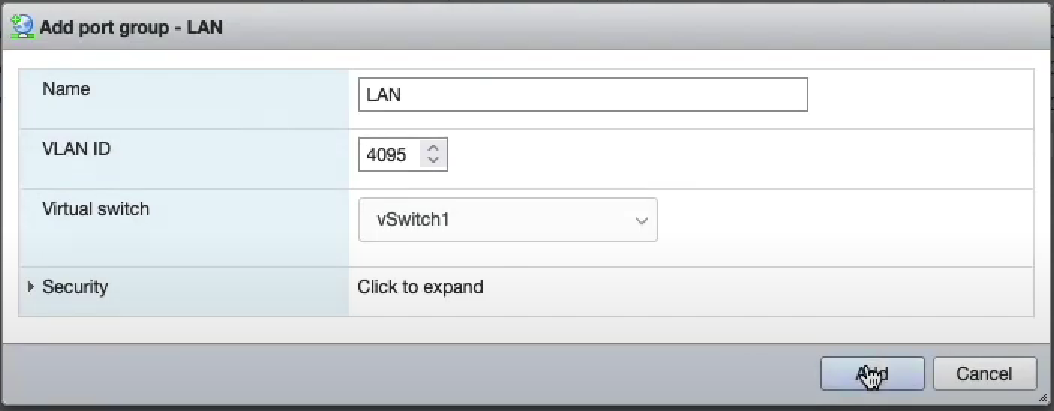
Attach the WAN port group to your desired switch attached to the interface. Repeat this for the LAN, attaching it to the other switch. You must set the VLAN ID of this port group to 4095 in order to enable it as a trunk port.

It is also possible to use the command line to easily create an arbitrary number of virtual switches. This is typically done to create a large number of isolated L2 segments within a single hypervisor. The command to create a single virtual switch on the ESXi CLI is:
esxcli network vswitch standard portgroup add -v VS_NAME -p VS_NAME_trunk
esxcli network vswitch standard portgroup set -p VS_NAME_trunk --vlan-id 4095
Here is a script that you can run on ESXi to create an arbitrary number of port groups:
if ["$#" -ne 1]; then max=8; else max=$1; fi
for i in `seq 0 $max`
do
  n=`printf "%02d\n" $i`
  esxcli network vswitch standard portgroup add -v isol_$n -p isol_$n_tnk
  esxcli network vswitch standard portgroup set -p isol_$n_tnk --vlan-id 4095
done
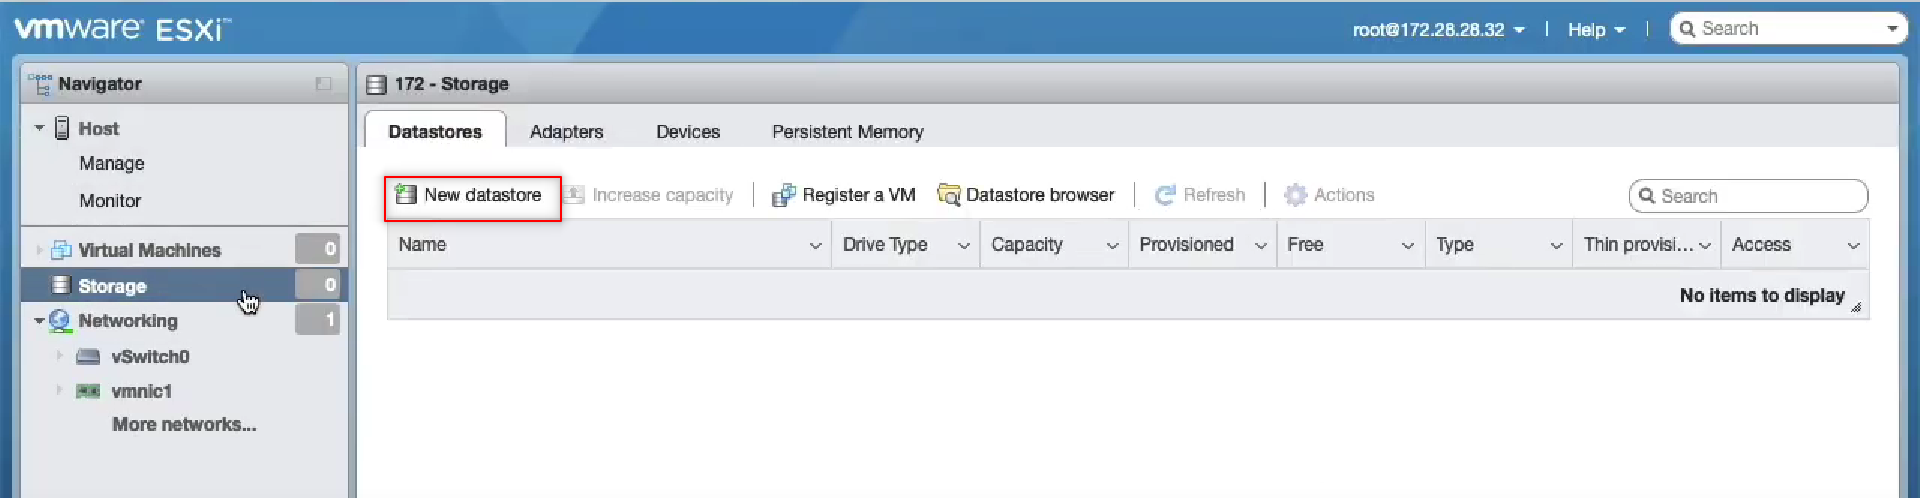
Step 3: Prepare the storage subsystem
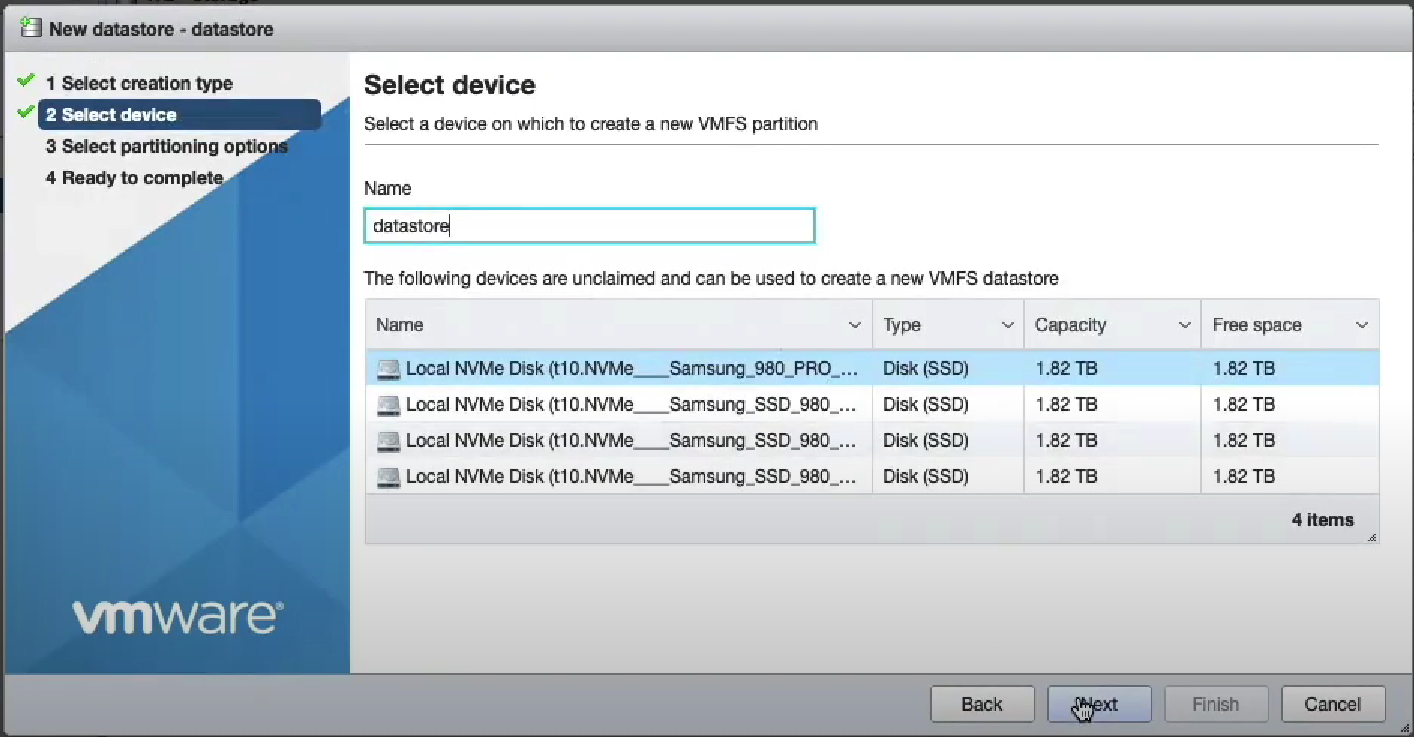
Navigate to the storage settings and select New datastore.
Format your new datastore as VMFS.

Name your datastore and click through to Finish.
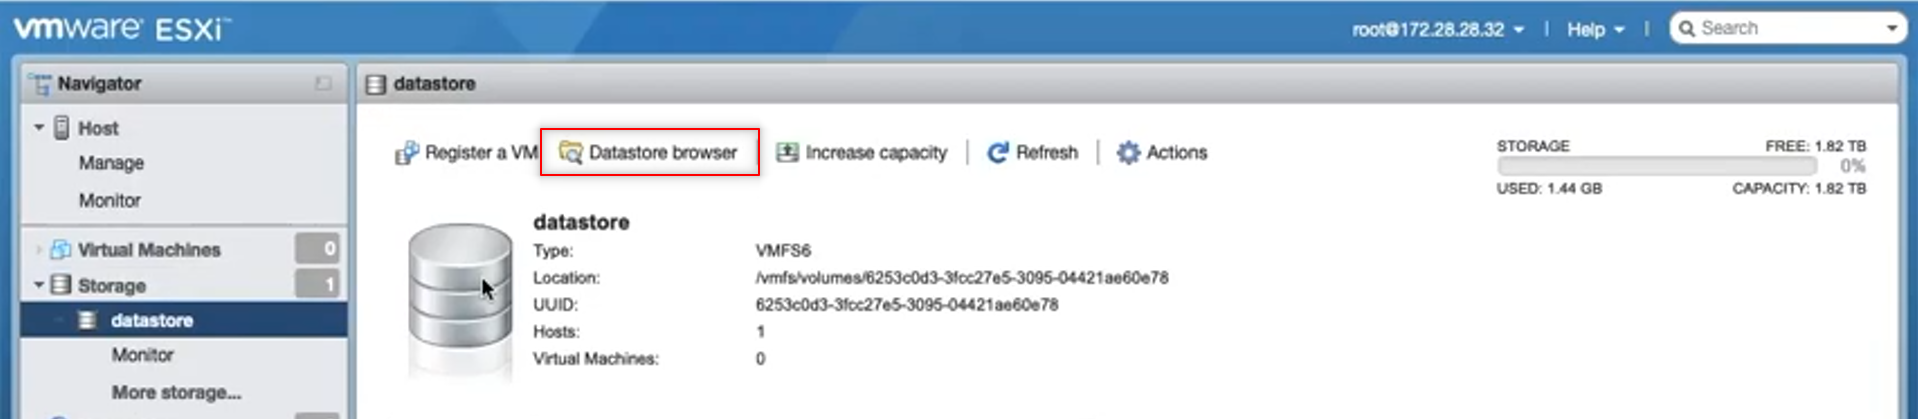
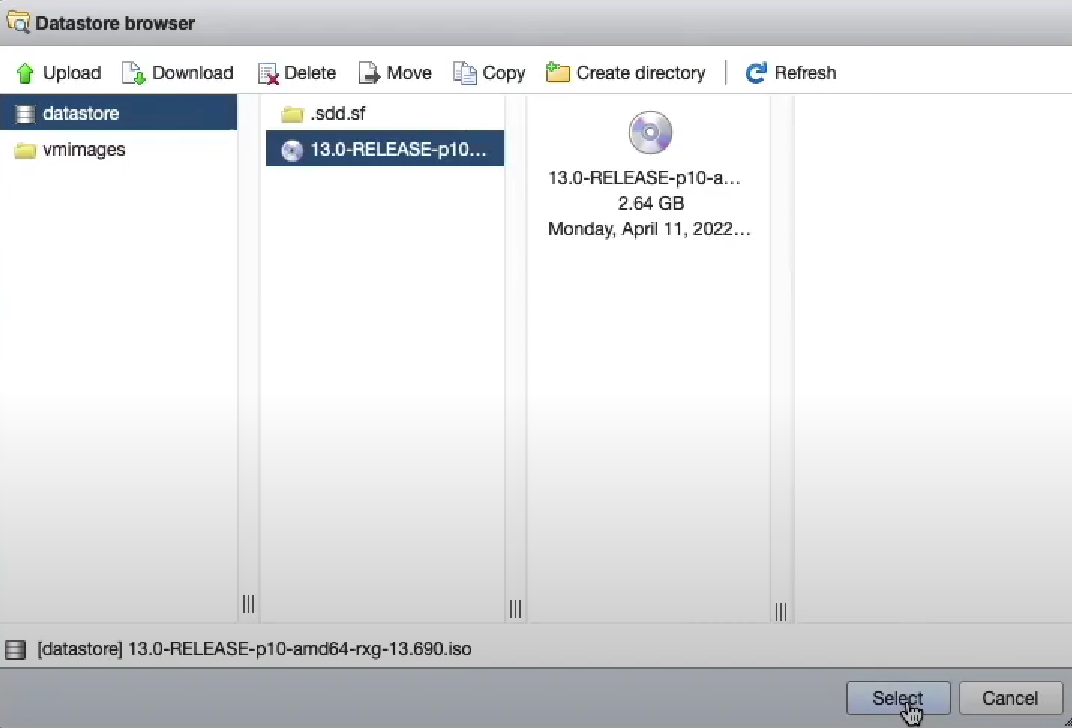
Step 4: Upload the rXg ISO to the ESXI datastore using the browser.
Click on the name of the datastore and Datastore browser.
Find Upload
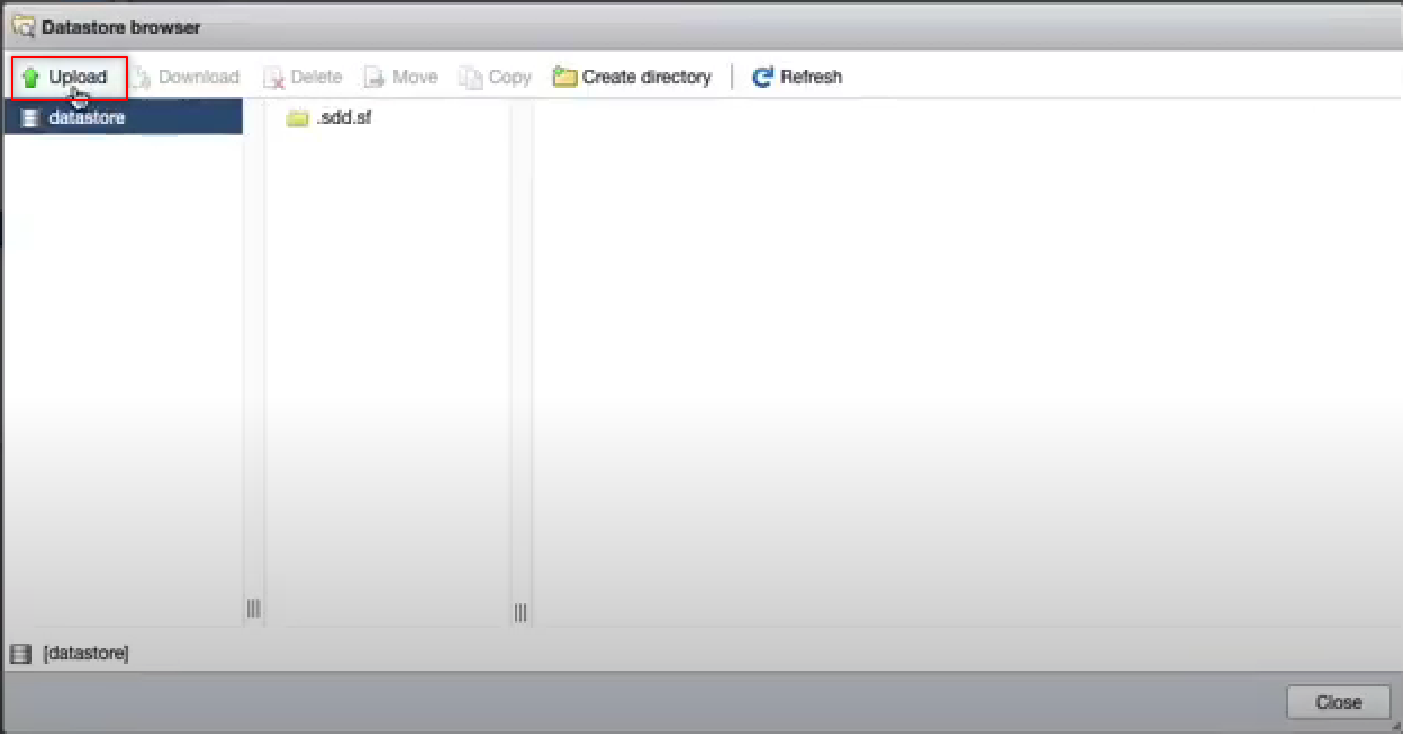
This may take a few minutes to complete. Select the uploaded file and close.
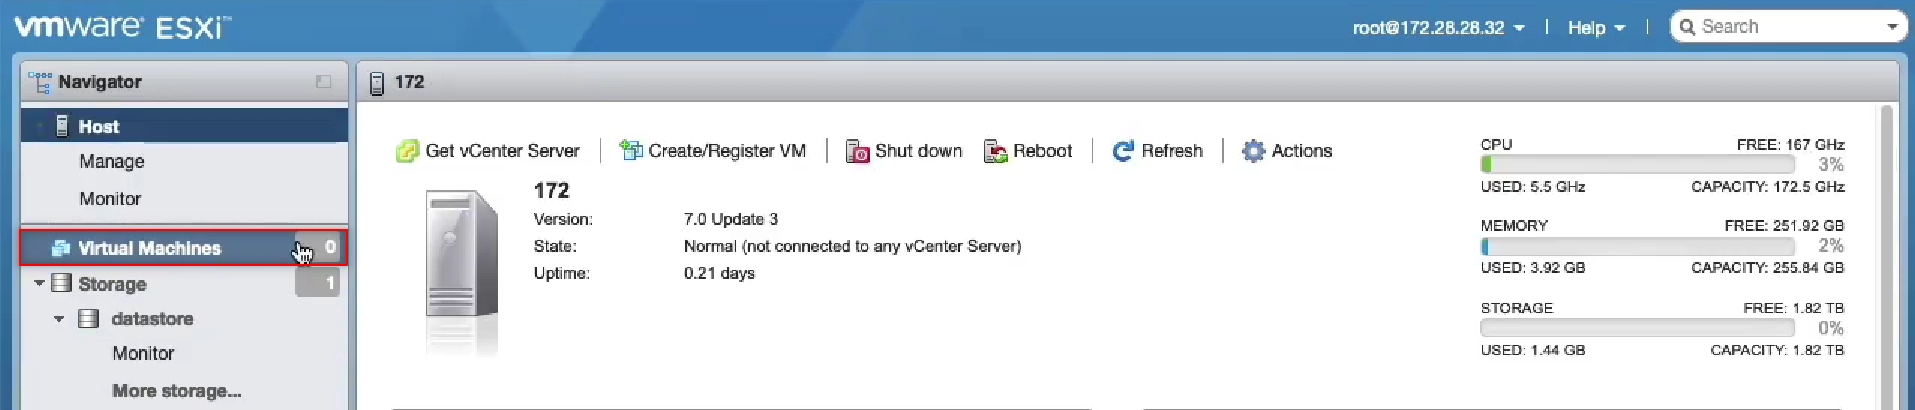
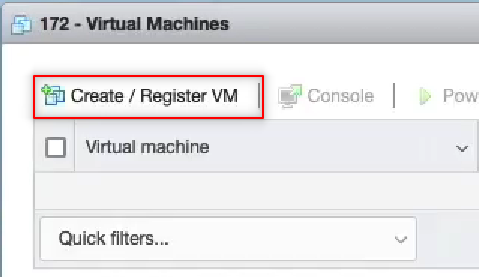
Step 5: Create the rXg virtual machine.
Select Virtual Machines from the menu on the left, and then Create / Register VM.
The guide will pop up on the screen. Select Next to move to Step 2: Select a name and guest OS. Choose Other as the Guest OS family and FreeBSD 13 (64-bit) for the Guest OS Version.
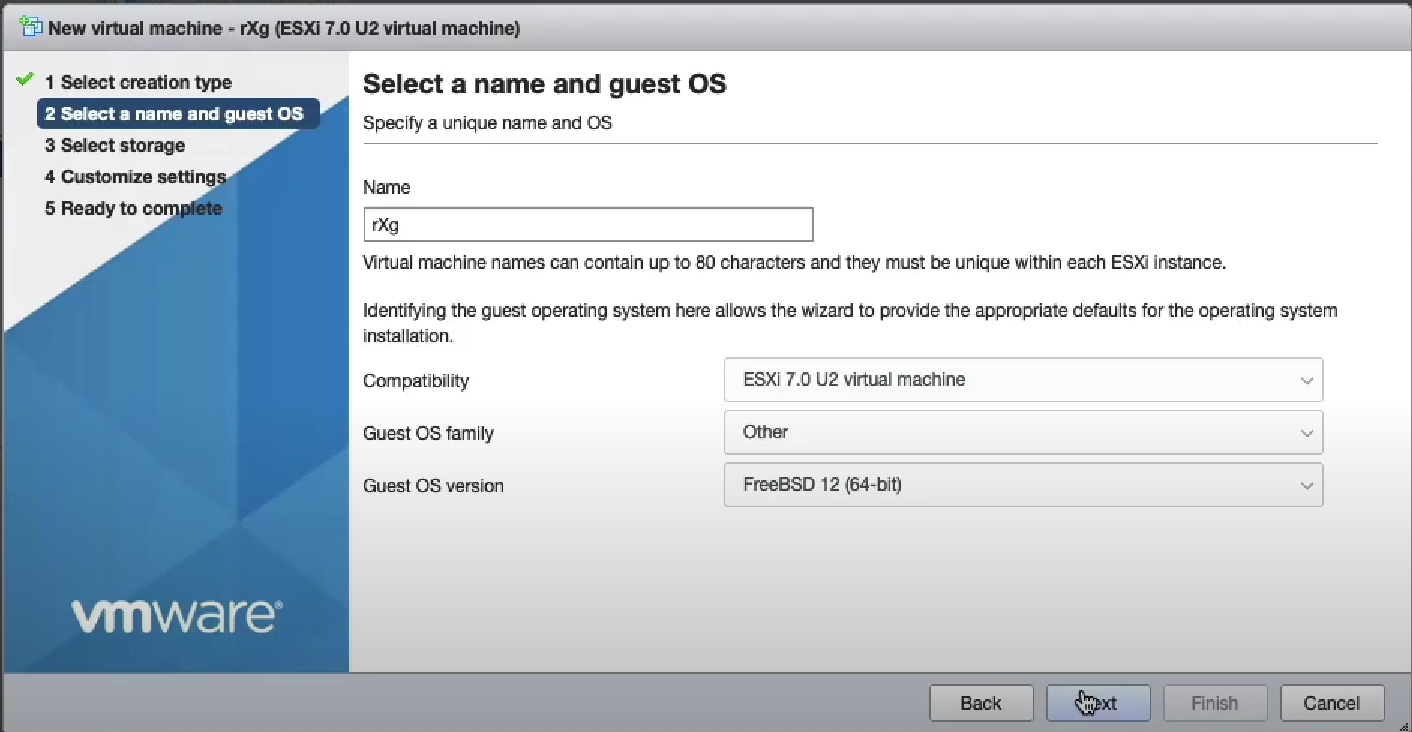
Click on Next two times.
In Step 4: Customize Settings, youll need to configure the CPU, RAM and disk settings based on the values required for this installation.

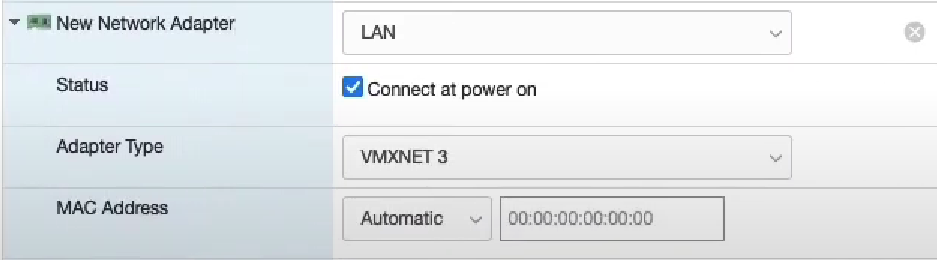
Add at least one more network adapter. In this example we have added three additional network adapters.
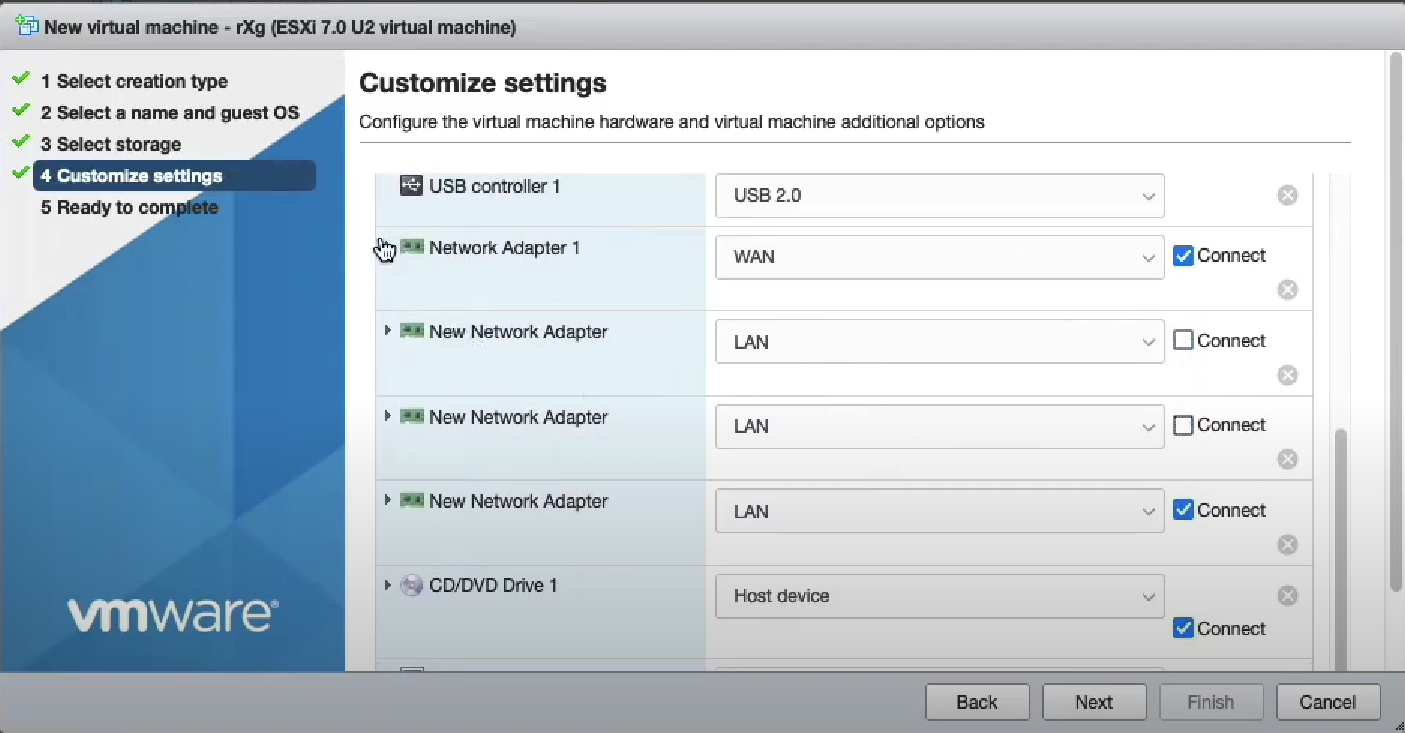
We use the VMX net 3 adapter type. Be careful to attach the network adapters to the appropriate port groups.
Finally, attach the rXg ISO file to the CDROM.

Click Next and Finish.
Select your newly created virtual machine and power on to start the installation.

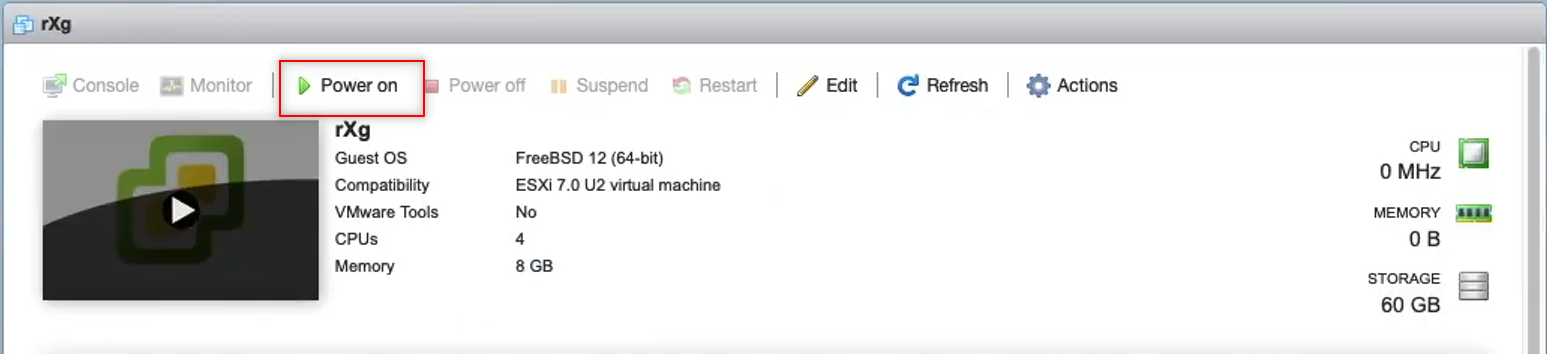
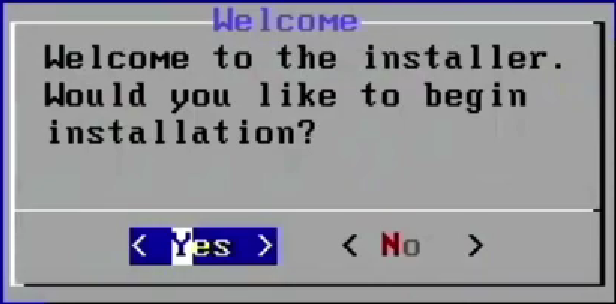
Installation will begin. Hit enter to proceed past the prompt.
The installation will take a few minutes to complete. Once the installation is complete, power down the virtual machine.


Step 6: Edit the settings of the virtual machine
Click on Edit and use the VM options tab.


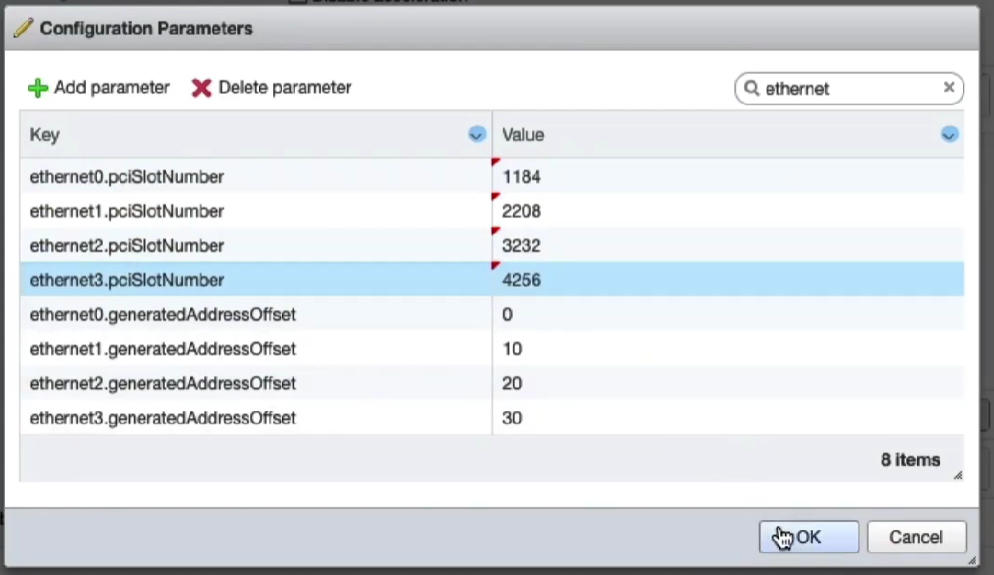
Select Advanced and Edit Configuration. Search for Ethernet.

Youll need to enter a reasonable sequence for the slot numbers to ensure that the Network Adapters line up with the virtual interfaces. In this example we use 1184, 2208, 3232, and 4256. These are known good values. If you need more we know that 5280, 6304 and 7328 work for the next few interfaces.
Save these settings and power on the virtual machine.
The rXg virtual machine will go through the initialization process. This will take several minutes. Once this is complete you may now proceed with accessing the web GUI.


