Fleet
The Fleet view allows the operator to configure the rXg to be used as a fleet manager or to join a node to an existing fleet manager.

The Fleet Nodes scaffold allows the operator to turn the rXg into a fleet manager and to add nodes to be managed.
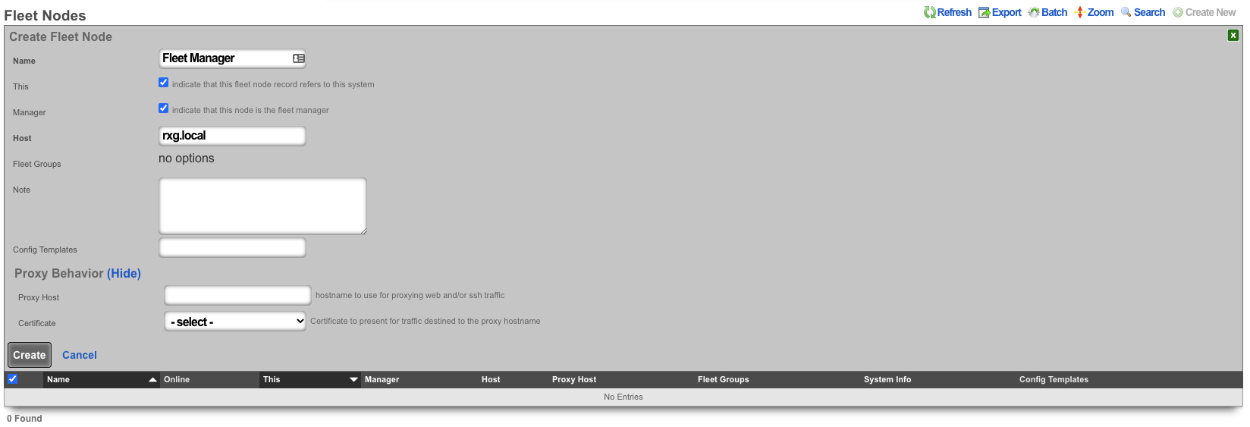
The name field is an arbitrary string descriptor used only for administrative identification. Choose a name that reflects the purpose of the record. This field has no bearing on the configuration or settings determined by this scaffold.
The this checkbox indicates that this fleet node record refers to this system.
The manager field, if checked, indicates that this node is the fleet manager.
The host field is used to enter the FQDN or IP address of the Node.
The key will contain the key to be used to authenticate with the fleet manager , or if on a fleet node, it will be a record of the key generated for the node by the fleet manager.
The ignore SSL cert errors field, if checked, will allow the fleet manager to ignore any certificate errors when communicating with the nodes. Note: this is not recommended.
The stat reporting interval field is the interval in seconds that the node will report its stats. When set on the fleet manager node, this value will set the default value, unless overridden on a node record. Default value is 10 seconds.
The fleet groups field allows the operator to set which fleet groups the node will belong to. It is possible for a node to belong to multiple groups.
The PMS properties field allows the operator to set which PMS properties the node belongs to (if configured).
The config templates field allows the operator to select which, if any, templates should be pushed to the node.
The software package field allows the operator to select an upgrade software package to push to the node.
The proxy hostname field is the hostname to use for proxying web and/or SSH traffic. When set on a fleet manager record, it enables cookie-based proxying via the operator portal. When set on a Fleet Node record, enables persistant anonymous Virtual Host behavior.
The certificate field sets the certificate to present for traffic destined to the proxy hostname.
The operator can use the Fleet Groups scaffold to create groups, which can then be used to control who can access those groups by specific admin or administrative roles.
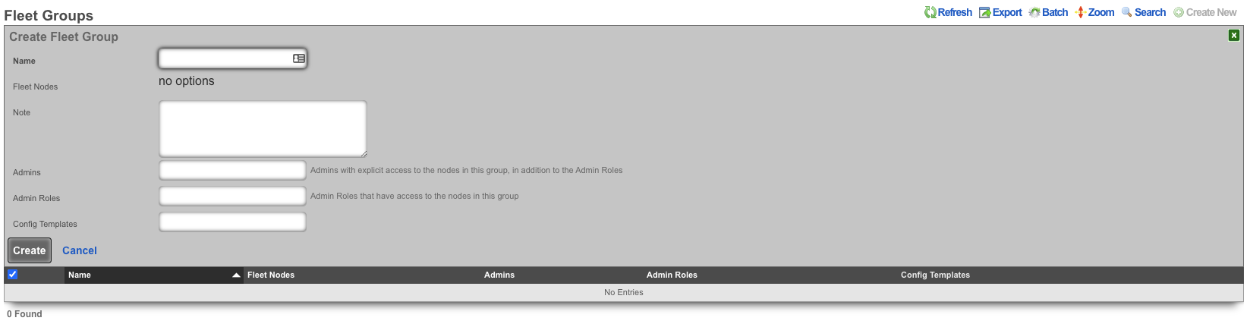
The name field is an arbitrary string descriptor used only for administrative identification. Choose a name that reflects the purpose of the record. This field has no bearing on the configuration or settings determined by this scaffold.
The fleet nodes field allows the operator to specify which nodes belong to the fleet group.
The note field is a place for the administrator to enter a comment. This field is purely informational and has no bearing on the configuration settings.
The admins field allows the operator to specify which admins will have explicit access to the nodes in this group, in addition to the admin roles.
The admin roles field allows the operator to select the admin roles that have access to the nodes in this group.
The config templates field allows the operator to push selected config templates to the nodes that are members of this group.
The Software Packages scaffold allows the operator to upload software packages that can then be pushed to fleet nodes for upgrades.

The name field is an arbitrary string descriptor used only for administrative identification. Choose a name that reflects the purpose of the record. This field has no bearing on the configuration or settings determined by this scaffold.
The file field allows the operator to upload an upgrade package to the fleet manager.
The remote URL field allows the operator to specify a URL to retrieve the package from (if not uploading via the file field).
The username field is used for HTTP authentication if required.
The password field is used for HTTP authentication if required.
The fleet nodes field allows the operator to specify which nodes the upgrade package should be pushed to. This is optional; the operator can use the Scheduled Upgrade scaffold to specify which nodes and when the upgrade should take place.
The Scheduled Upgrades scaffold allows the operator to schedule upgrades. Upgrades can be pushed out immediately or can be rolled out over several days, starting at a specific time of day.
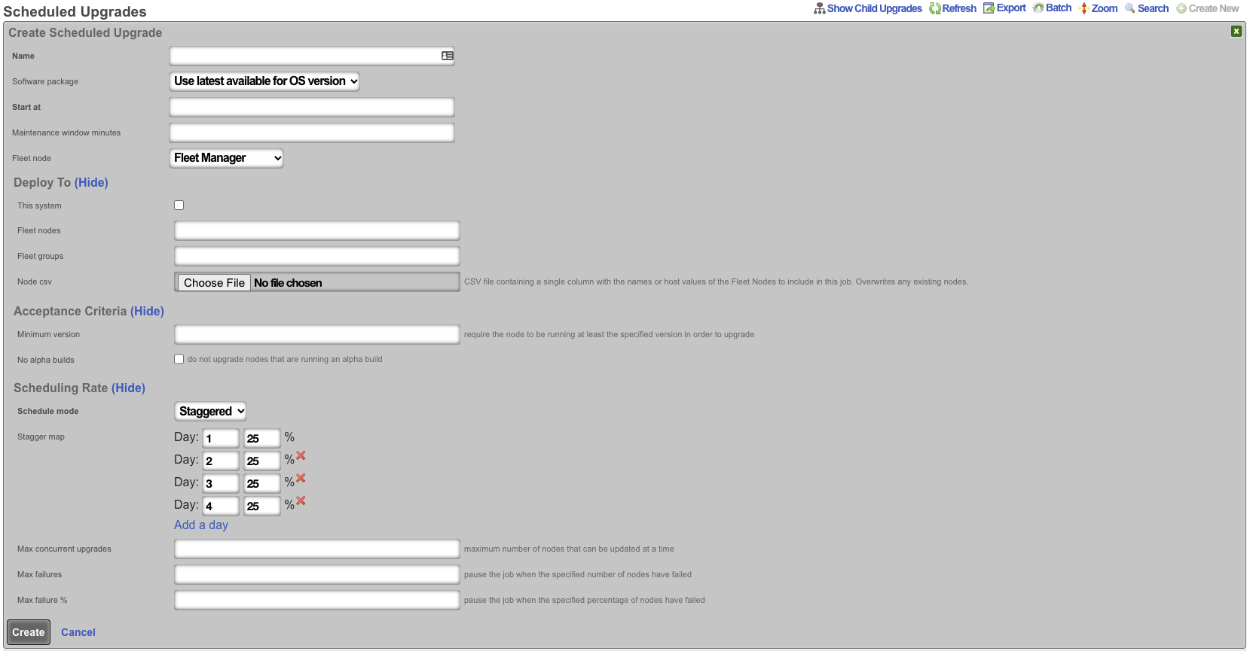
The name field is an arbitrary string descriptor used only for administrative identification. Choose a name that reflects the purpose of the record. This field has no bearing on the configuration or settings determined by this scaffold.
The software package field allows the operator to specify which upgrade package is scheduled for install. By default, it will be set to use latest available for OS version. The operator can also specify any software package that has been uploaded using the Software Packages scaffold.
The start at field allows the operator to specify on what day and at what time the upgrade will begin.
The fleet node field specifies the target node to upgrade. Use the fleet nodes or fleet groups fields to target multiple nodes at once.
The this system field specifies that the upgrade will also be pushed to the fleet manager.
The fleet nodes field allows the operator to select specific nodes that will be upgraded regardless of fleet group membership.
The fleet groups field allows the operator to select which fleet groups will be included in the upgrade. If a fleet group is selected, it will push the upgrade to all nodes that belong to that group.
The node CSV field allows the operator to upload a CSV file containing a single column with the names or host values of the fleet nodes to include in this job. This will overwrite any existing nodes that have been selected.
The minimum version field designates that the node must be running at least the specified version in order to upgrade.
If the no alpha builds box is checked, then nodes that are running an alpha build will not be upgraded.
The schedule mode field is by default set to immediate; if set to staggered , it allows the operator to set the number of days the upgrade will take place over and how many nodes should be upgraded per day. The number of days can be changed by deleting or adding a day.
The max concurrent upgrades field sets the maximum number of nodes that can be updated at a time.
The max failures field will pause the job when the specified number of nodes have failed.
The max failure % field will pause the job when the specified percentage of nodes have failed.
Fleet-Wide Compliance Checks
A fleet manager can audit configuration drift across its nodes via the Compliance view (System::Compliance). A compliance rule ties a known-good source a config template or a backend script to a schedule and a set of target nodes, then evaluates each node on that schedule. See the Compliance manual page for the full configuration reference. Remote checks have node-version requirements (config template rules require build >= 16.381, backend script rules require >= 16.621) older nodes show a warning icon on the dashboard with the minimum version they need.
Example Fleet Manager Setup
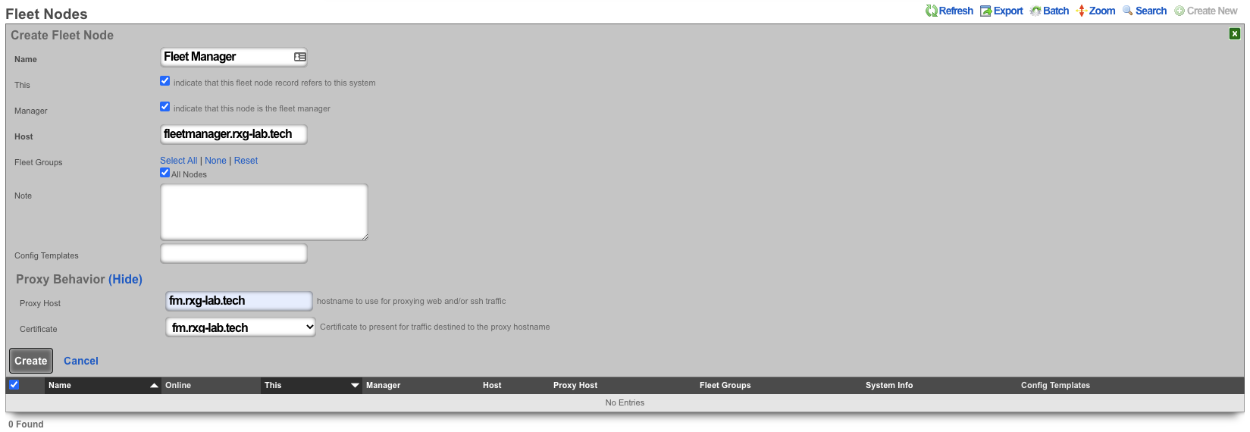
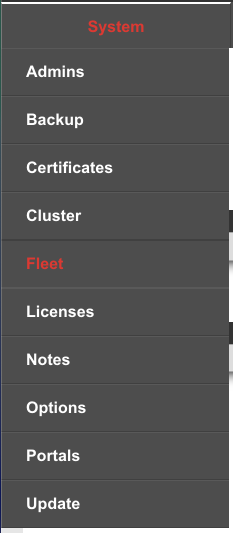
For initial fleet setup, navigate to https://FQDN/admin/menu/fleet.

Create a new fleet node. Name is arbitrary.
This box should be checked if the record being created is for the node being created.
Manager should be checked if the node being created will be the fleet manager node.
Host is the FQDN or IP address of the node.
Fleet groups should be selected to allow the node to be seen by specific groups.
Proxy host can be set if required for proxying web and/or SSH traffic. Select certificate to present for traffic destined to the proxy hostname. Click create.
Fleet groups can be used to group nodes together. For example, nodes can be grouped by property owner. Name is arbitrary.
Fleet nodes is used to select the nodes that will belong to the group.
The admin field sets admins with explicit access to the nodes in this group. The admin roles field sets the admin roles that have access to the nodes in this group.

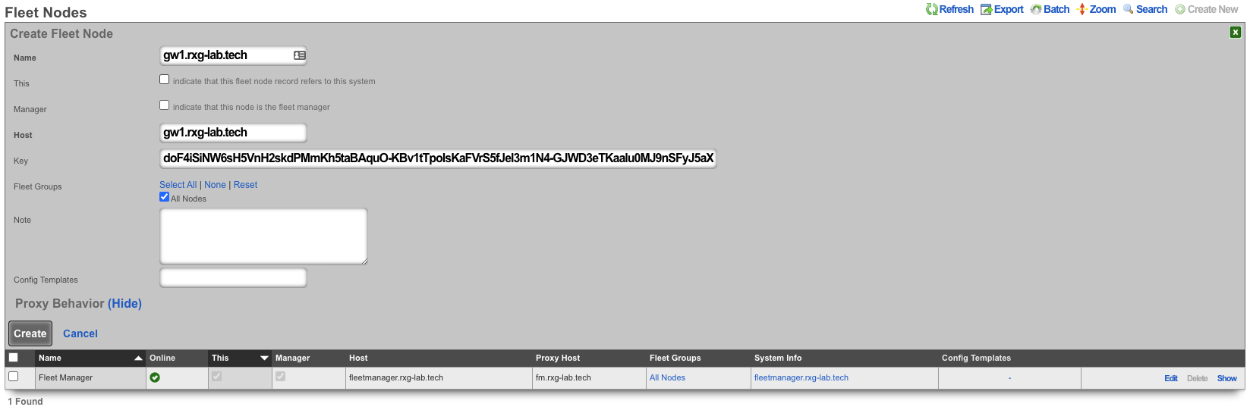
To add a node to the fleet manager navigate to System::Fleet on the fleet manager node.
Create a new fleet node record by clicking create new.

The name field is arbitrary. Leave both the this and manager boxes unchecked.
Enter the FQDN of the node in the HOST field. Select a group this node will belong to, if applicable. Copy the key in the key field. Click create.
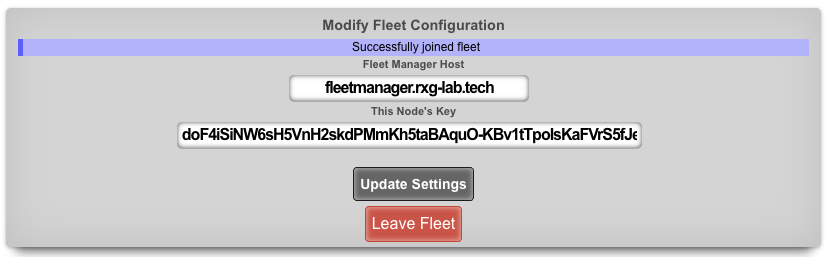
Navigate to https://FQDN/admin/menu/fleet on the node being added to the fleet manager. Enter the FQDN of the fleet manager into the fleet manager host field, and copy the key into this node's key field and click join.


Example Fleet Templates
The operator can use the fleet manager to push config templates to the nodes connected to the fleet manager. This can be done on a per-node basis or to specific groups as defined by the fleet groups.
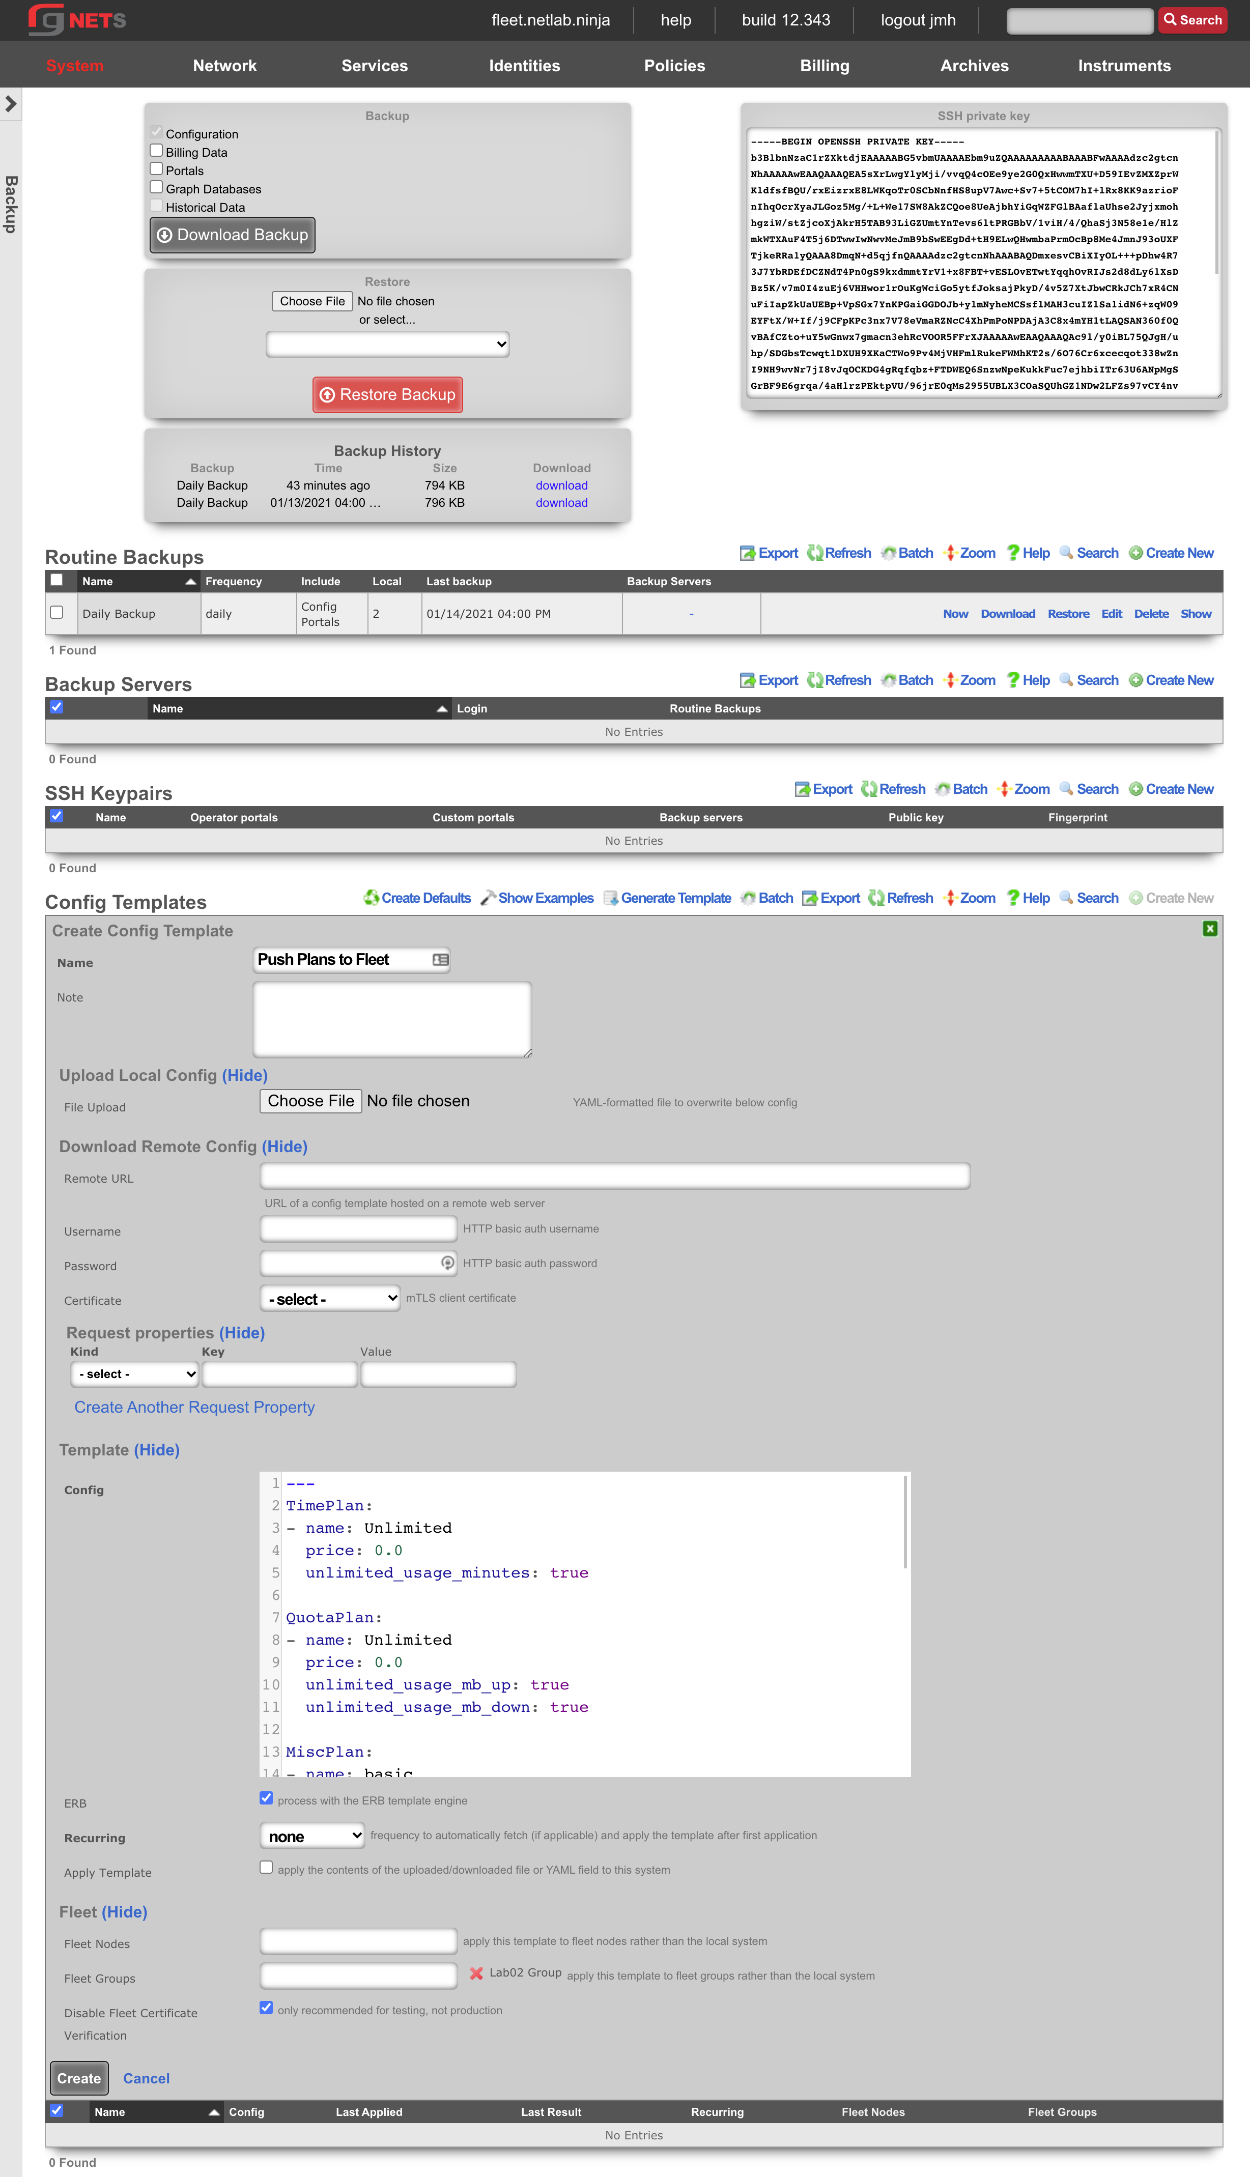
To push a config template to a node navigate to System::Backup on the fleet manager , and create a new config template.

In this example, a new usage plan will be pushed to nodes in the Lab02 group. The config template must be given a name.
The config to be pushed goes in the config field, or a .yml file containing the config can be added.
Lastly, we select Lab02 Group via the fleet group field. Optionally, the apply template box can be checked which will run the template after creation.
Below is an example showing that the config template was successfully applied to both fleet nodes in the group.

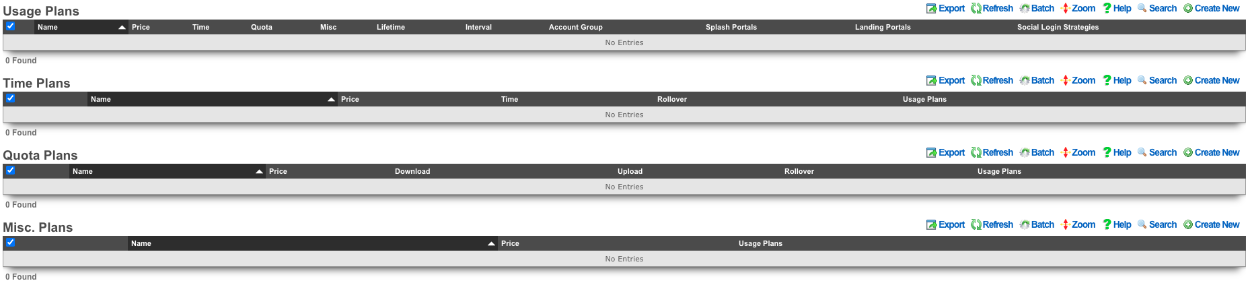
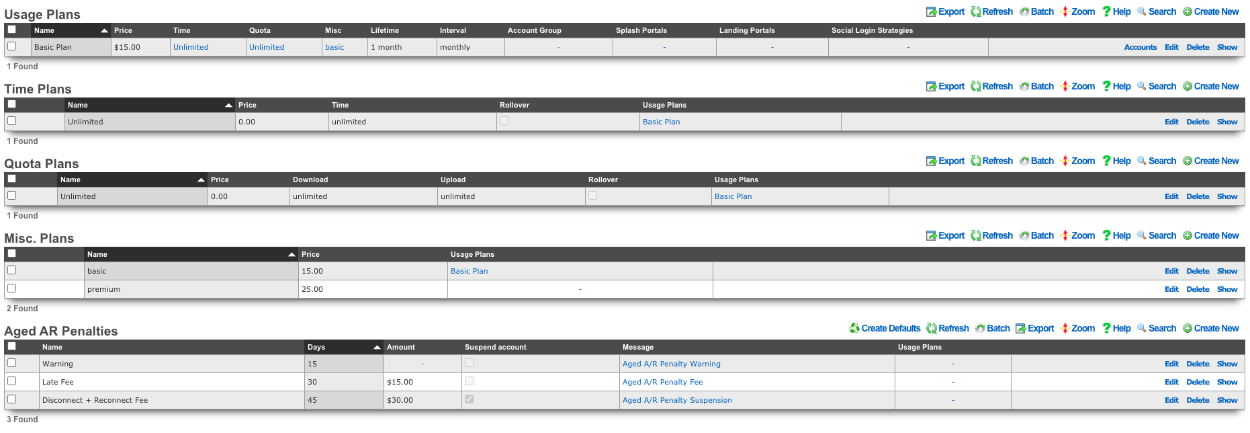
Below are two screenshots. The first is from Billing::Plans before the config template is applied, and the second shows the same scaffold after applying the config template.
Example Fleet Templates #2 - Speedtests
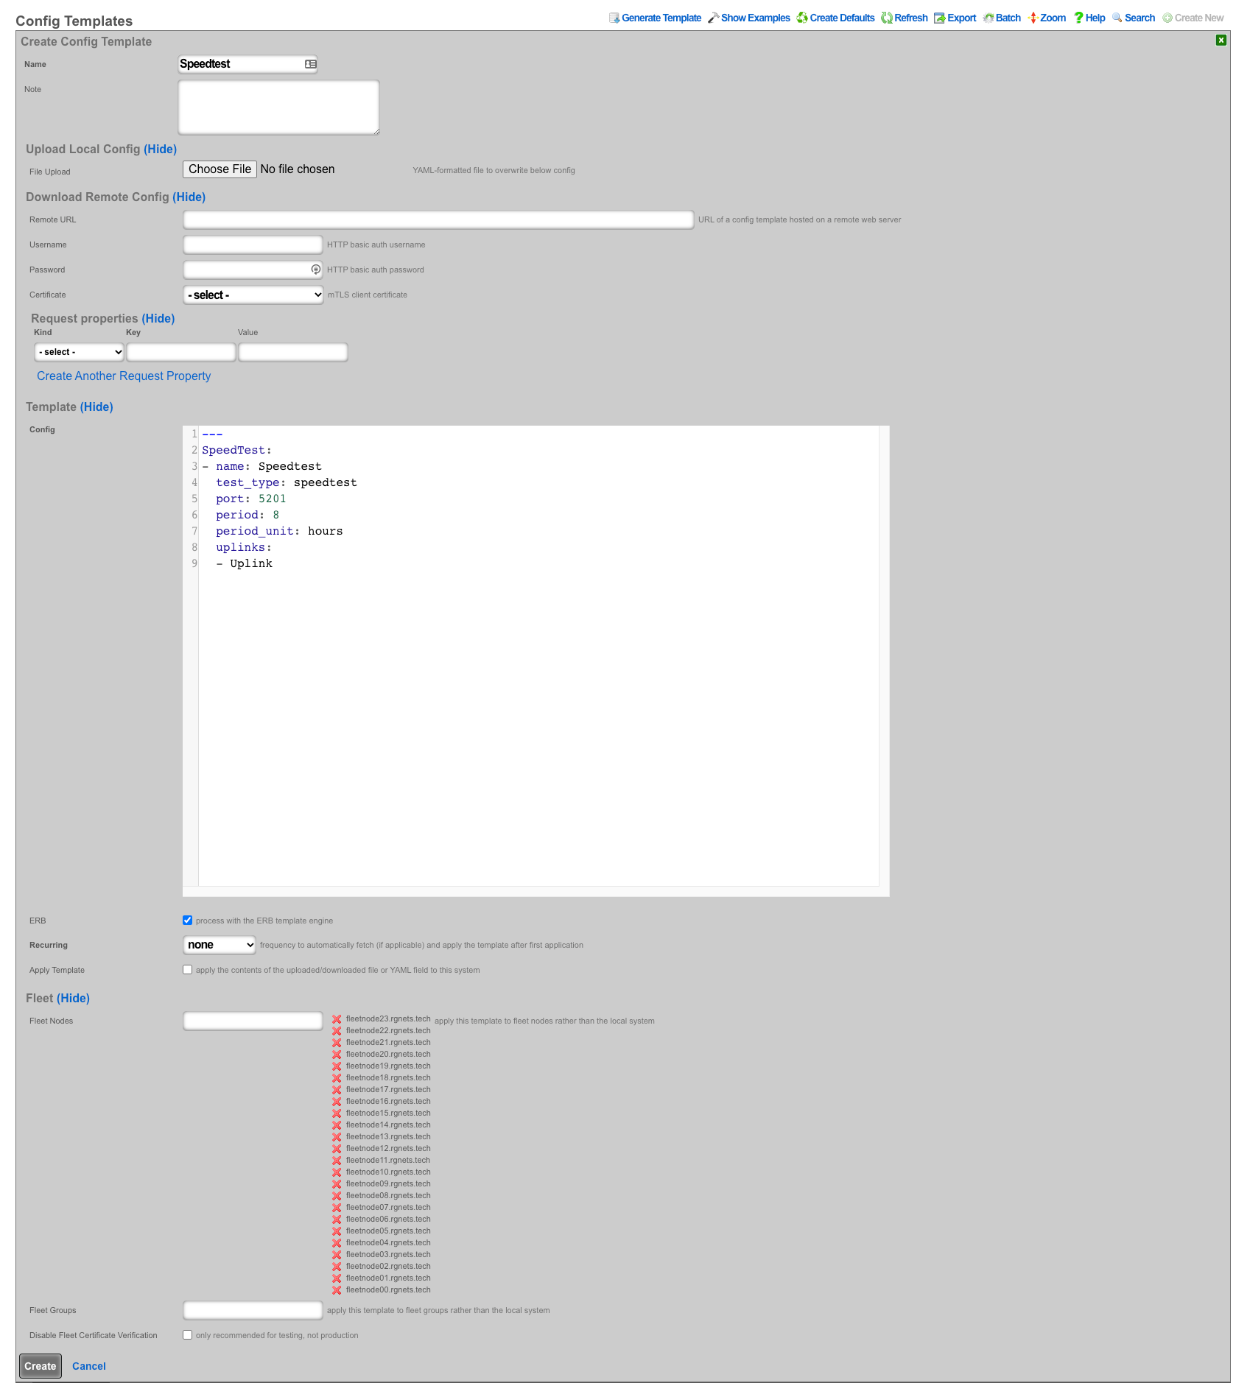
In this example, a template will be used to push speedtest config to all the nodes that the fleet manager controls. Navigate to System::Backup on the fleet manager , and create a new config template.
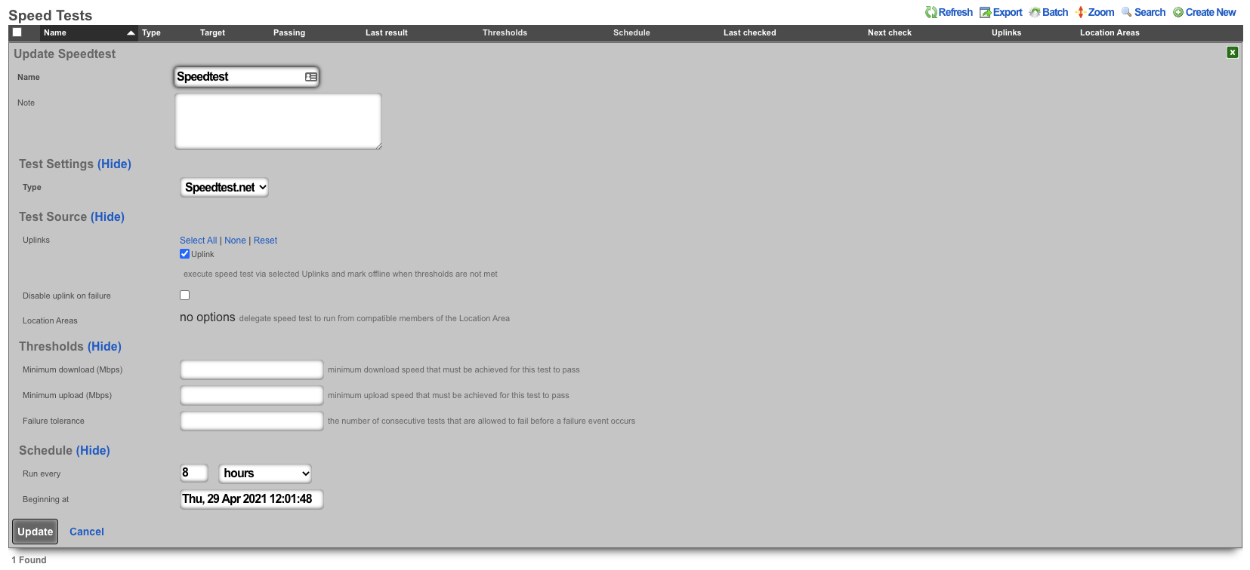
A speedtest will be configured on all fleet nodes which will then run a speedtest every 8 hours.
The config template must be given a name.
The config to be pushed goes in the config field, or a .yml file containing the config can be added.
Lastly, we want to select all nodes. Optionally, the apply template checkbox can be checked, which will run the template after creation. Click create.
Below is an example showing that the config template was successfully applied to all fleet nodes controlled by the fleet manager.

Below is a screenshot of the configuration of the speedtest pushed to all nodes.
Example Fleet Proxy Setup
Fleet proxy allows the operator to access nodes behind the fleet manager that may not be otherwise accessible due to ACL's in place. To setup the proxy feature we first need to create a certificate.
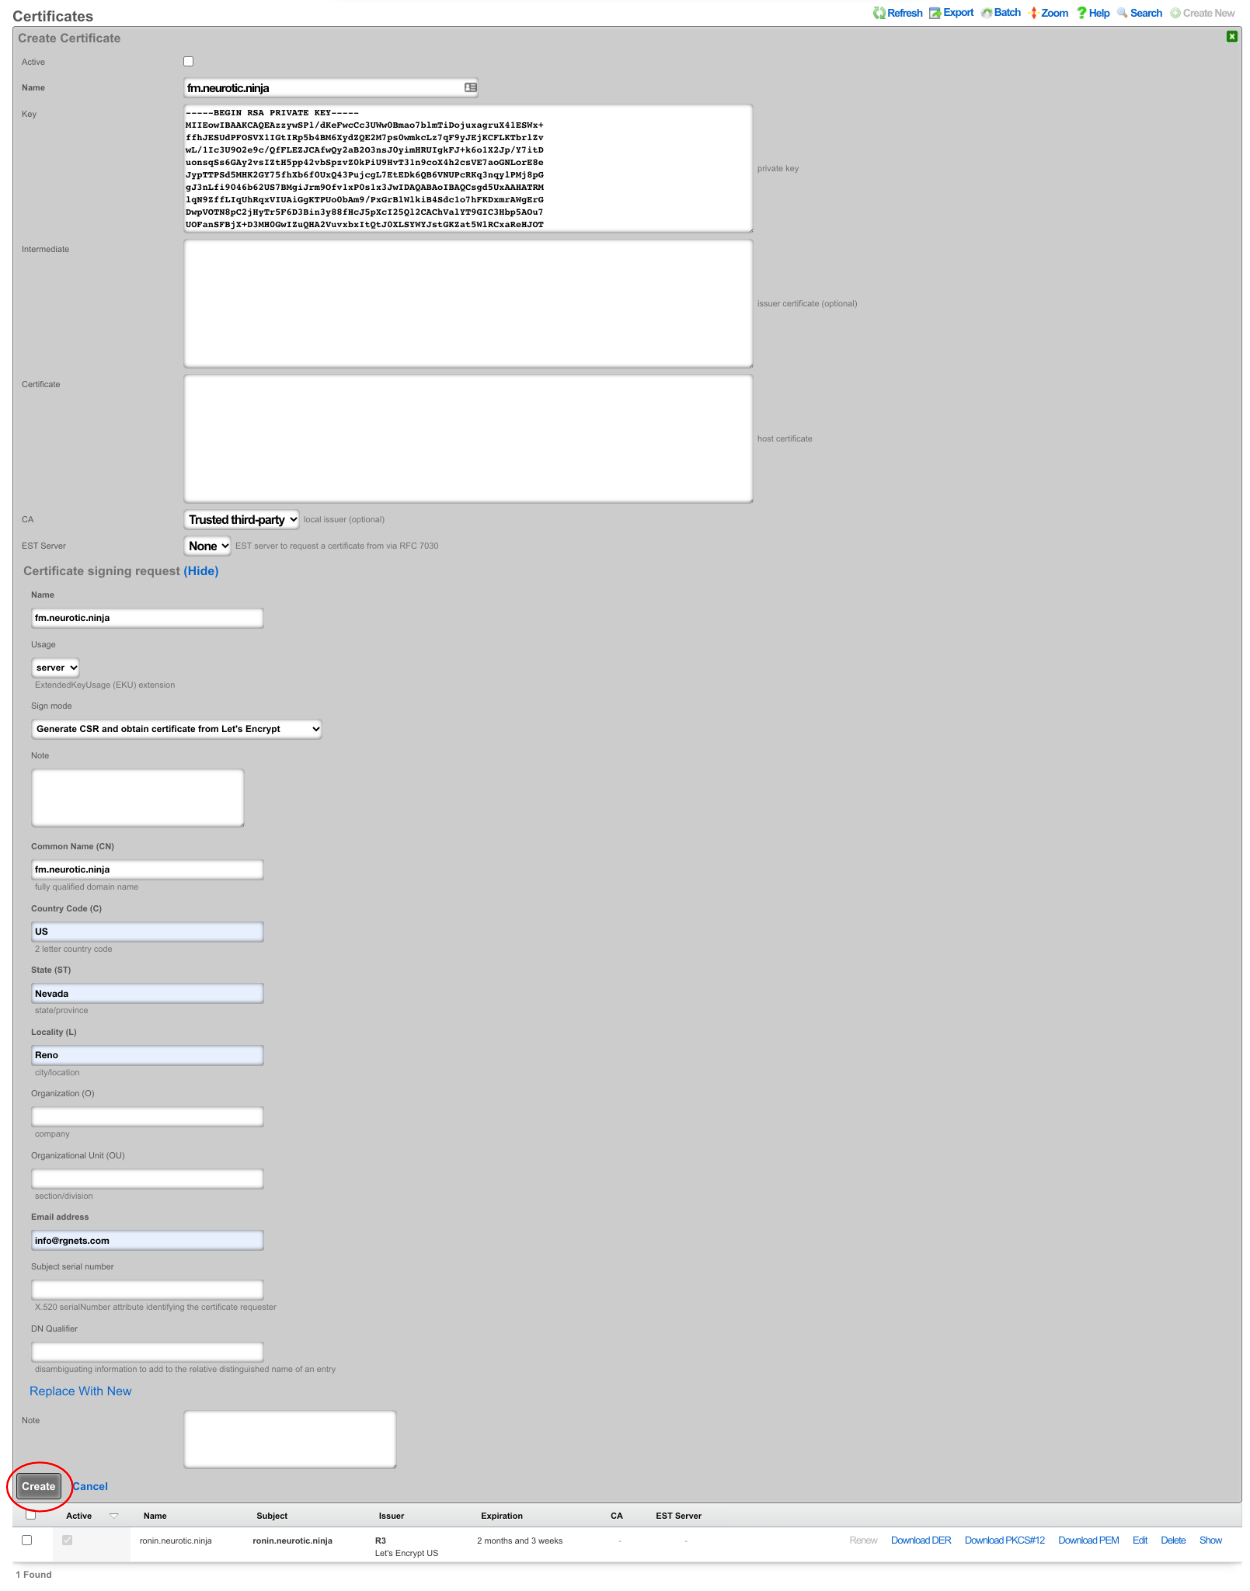
Navigate to System::Certificates and create a new certificate. Note: the domain name you are using for the certificate should resolve to the primary IP address of the fleet manager node.

Give the certificate a name , then scroll down to the certificate signing request section. Give that a name as well, leave usage set to server, and set the sign mode to generate CSR. Obtain certificate from Let's Encrypt.
Fill out the common name , country code , state , locality , and email address fields with the appropriate information (the other fields are optional). Click create. After a minute or so the new certificate will be retrieved.

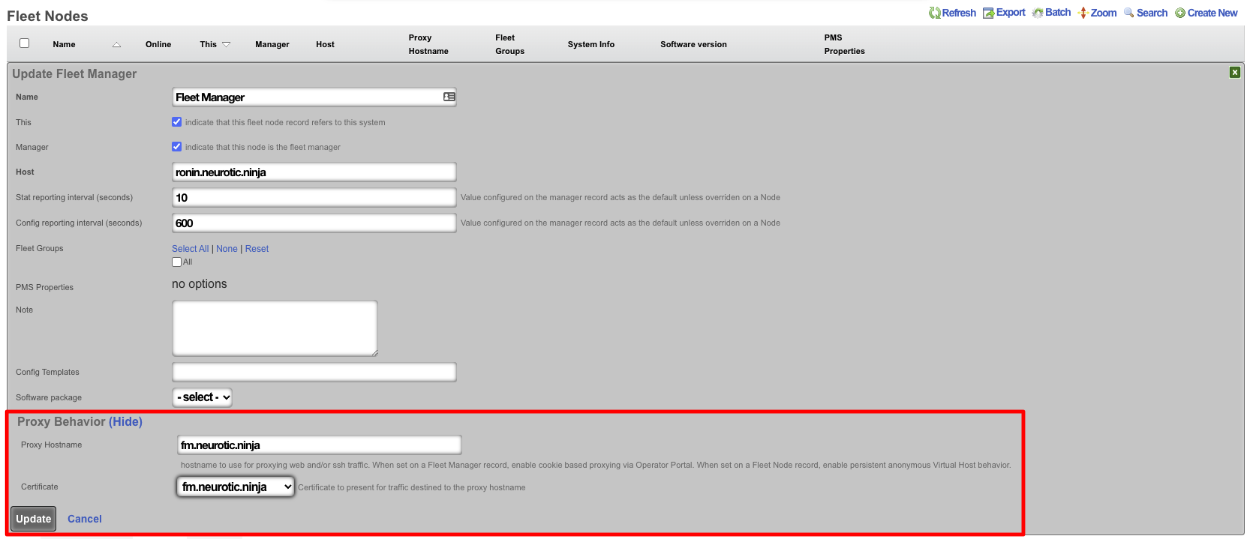
Now that the certificate is created, navigate to System::Fleet and edit the fleet node record for the fleet manager.

In the proxy behavior section, set the proxy hostname field to match the FQDN of the certificate created earlier. Select the certificate that matches the FQDN. Click update.

Navigate to the fleet operator portal and there will now be the option to proxy to each node, even nodes that would not be accessible, like the nodes in this example with private IP addresses on the WAN (which is not an officially supported deployment).
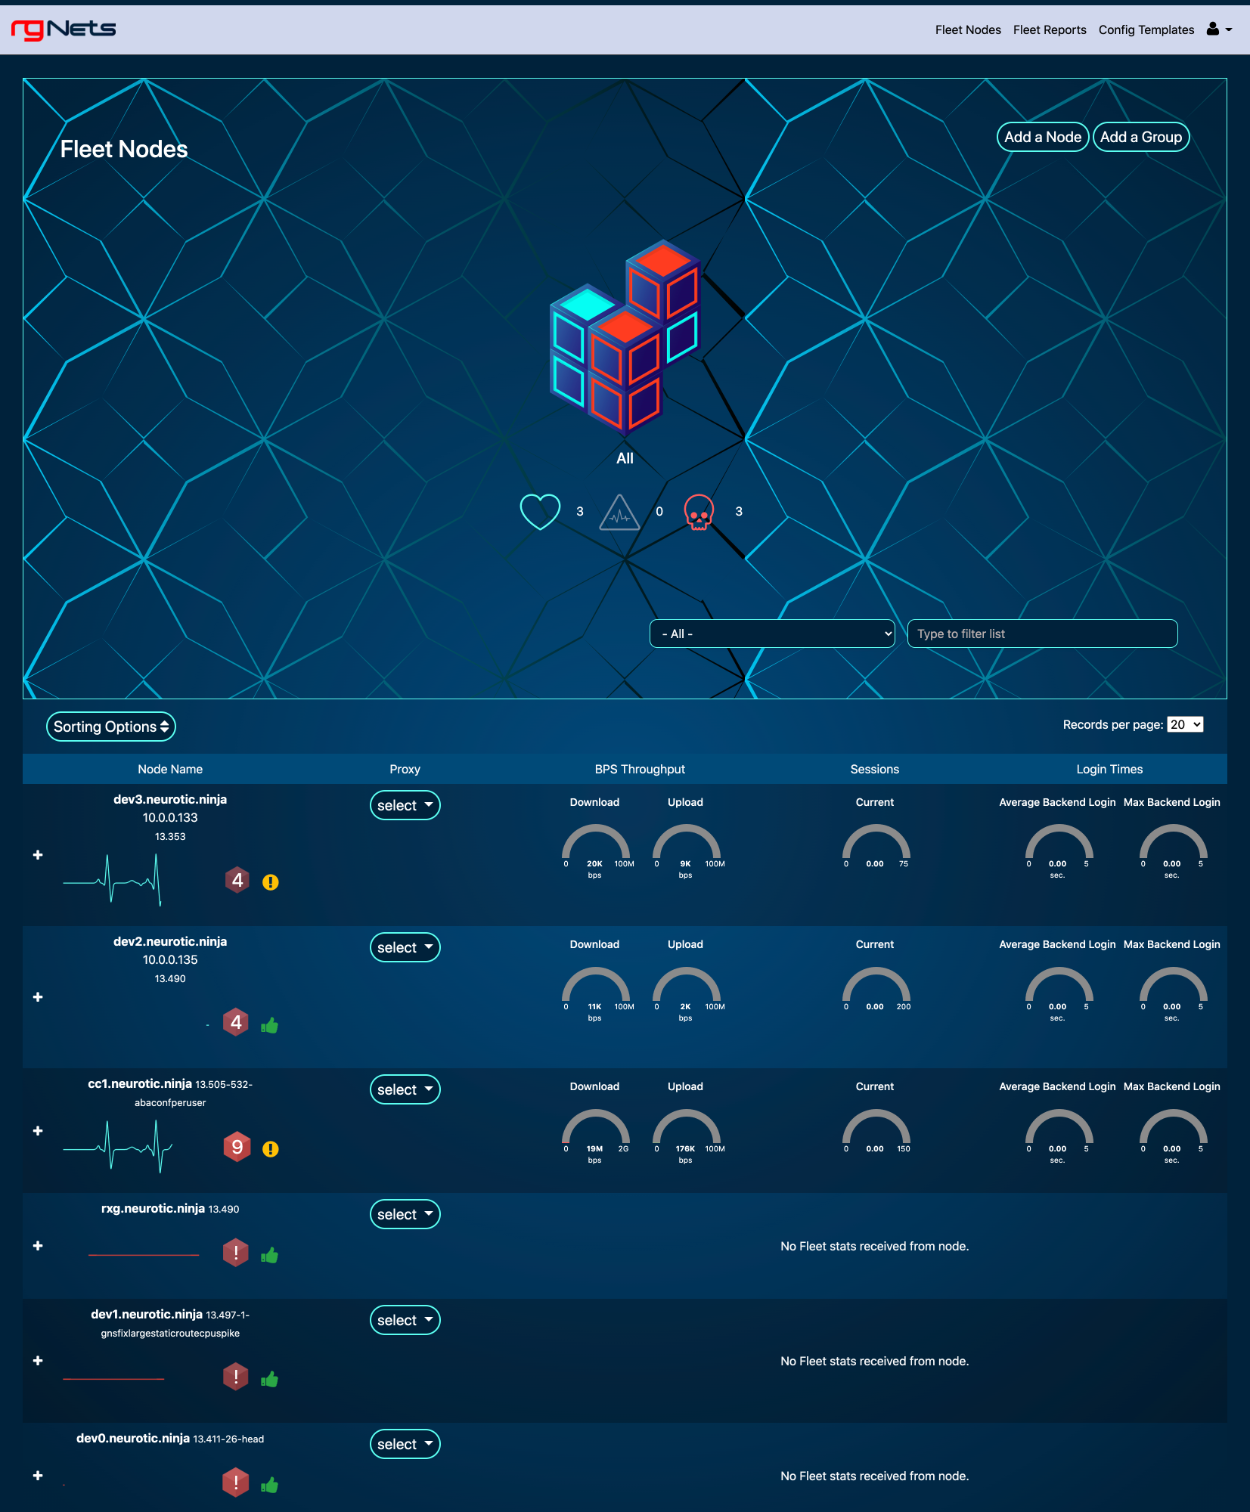
Now the fleet manager can be used as a proxy to either access the Admin UI or SSH. To access a node, click on the proxy drop-down for that node and select either admin UI or SSH.

Once the proxy is established the operator will have access to the admin UI of the fleet node , the proxy connection can be ended by clicking end proxy at the top of the admin UI.

Example Fleet Upgrade Setup
To setup a fleet upgrade the operator must first upload the software package that will be used for the upgrade. To upload the software package , navigate to System::Fleet and create a new software package.

Give the software package a name and choose the file, or enter the remote URL and username and password. For this example, the package will be uploaded directly. Once the file is chosen, click create.


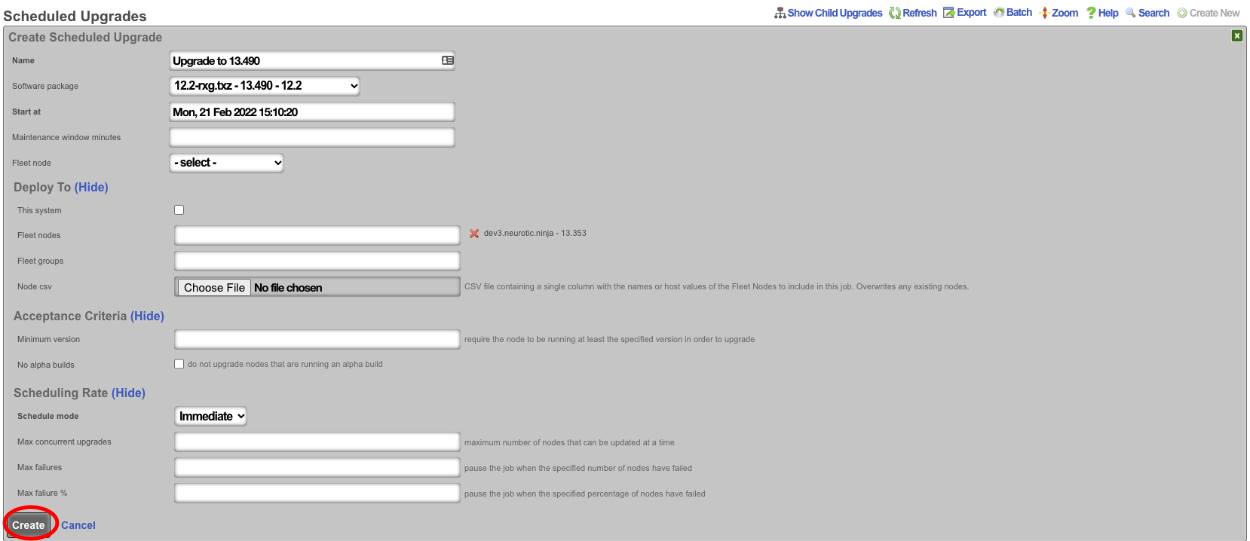
Next, create a new scheduled upgrade.

Give the schedule a name. Select the software package uploaded in the previous step. Select a start at date/time.
Next, select the fleet node or fleet groups that should be included in the upgrade. For this example, the scheduling rate will be left at immediate since we are only pushing the upgrade to single node. Click create.
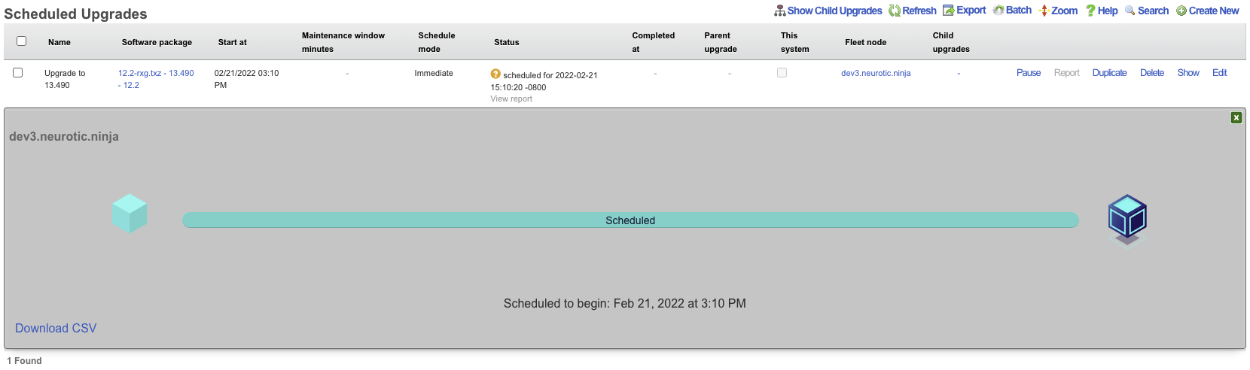
The operator can use the Scheduled Upgrades scaffold to view the status of the upgrade.