Conference Tool
The Conference Tool allows operators to create and manage temporary, isolated networks for events, meetings, and conferences. Each conference gets its own SSIDs, VLANs, credentials, and policies that are automatically provisioned when the conference starts and torn down when it ends.
Overview
A conference defines a time-bounded event with dedicated networking. When a conference begins, the system automatically:
- Creates WLANs (SSIDs) on Access Points in the associated Location Areas
- Provisions DHCP pools on the assigned VLANs
- Configures bandwidth queues, policies, and shared credentials
- Pushes SSID configurations to the wireless controller
When the conference ends, all of these resources are automatically cleaned up.
Prerequisites
Before setting up the Conference Tool, ensure the following:
- Infrastructure devices (switches and wireless controllers) must be in sync. Navigate to Network :: Wireless and Network :: Wired to verify. The Config sync status field should be green.
- At least one physical LAN interface (e.g.,
igb3) is configured. - Access Points are discovered and associated with the system.
Setup Instructions
Step 1: Create VLANs
Navigate to Network :: LAN and open the VLAN Interfaces scaffold.
The Conference Tool supports two types of networks:
- Per-User VLANs put each device (or a small group of devices) in its own VLAN, providing Layer 2 isolation between conference attendees.
- Non-Per-User VLANs place all devices in a single shared VLAN, allowing devices to communicate with each other on the same Layer 2 network.
Important: Create the VLAN first, then create the Address in Step 2 and associate it with the VLAN. An Address cannot belong to both an Interface and a VLAN simultaneously. If you create an Address without selecting a VLAN, it will be auto-assigned to a physical Interface, and you will need to clear the interface association before it can be moved to a VLAN.
Per-User VLAN
Click Create New on the VLAN Interfaces scaffold:
- Name: a descriptive name (e.g.,
Conference Per-User) - Physical Interface: select your LAN interface
- VLAN IDs: the starting VLAN tag (e.g.,
100) - Autoincrement: select
per-IP | auto-increment L2 w/ L3 | n tags = (subnets / ratio)— this creates a separate VLAN for each subnet (or group of subnets based on the ratio) - Ratio: the number of subnets to place in each VLAN tag (e.g.,
1for true per-user isolation)
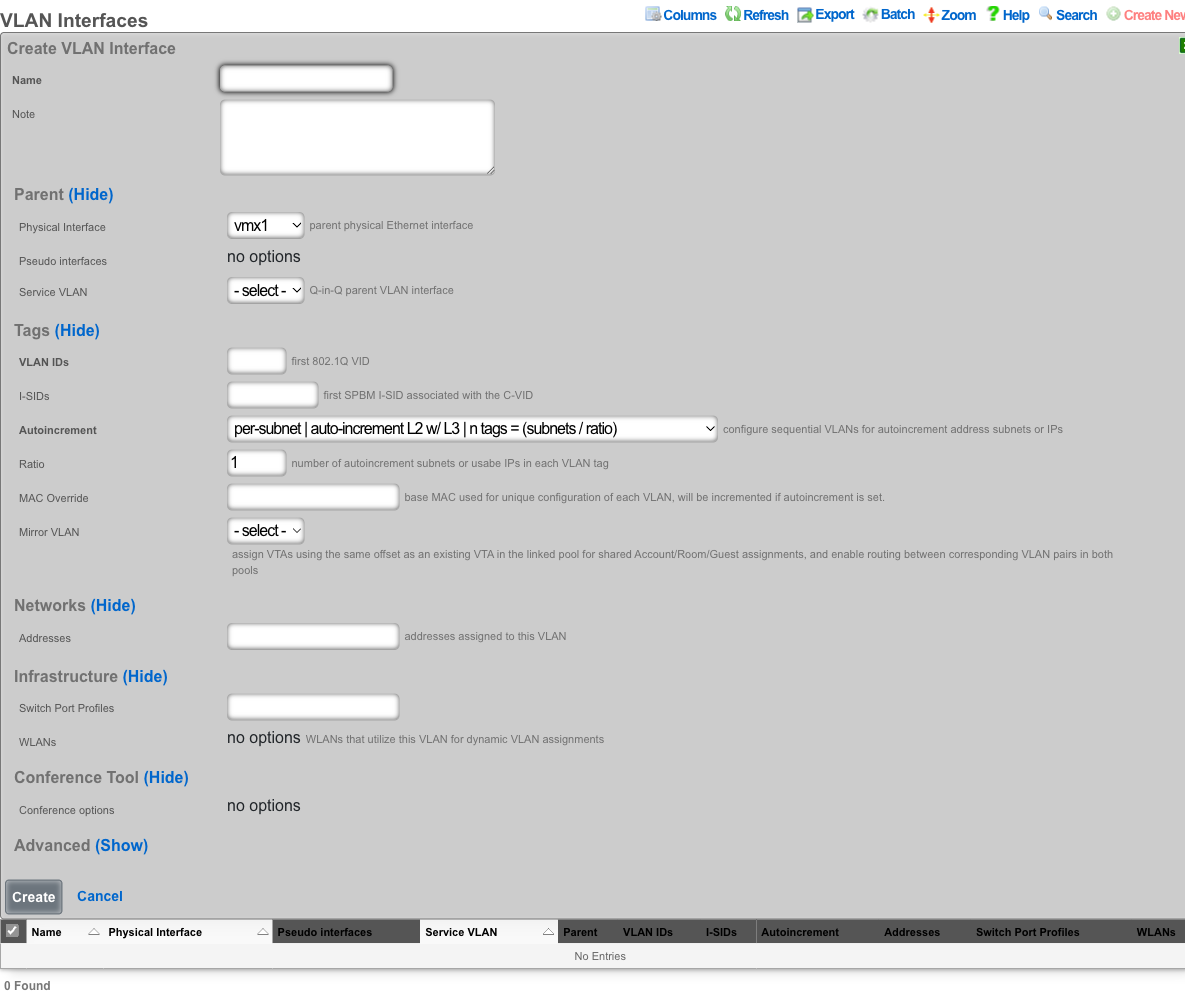
Non-Per-User VLAN
Click Create New on the VLAN Interfaces scaffold:
- Name: a descriptive name (e.g.,
Conference Shared) - Physical Interface: select your LAN interface
- VLAN IDs: the VLAN tag (e.g.,
99) - Autoincrement: select
none | single L2— all devices share a single VLAN - Ratio: leave at
1
Step 2: Create Network Addresses
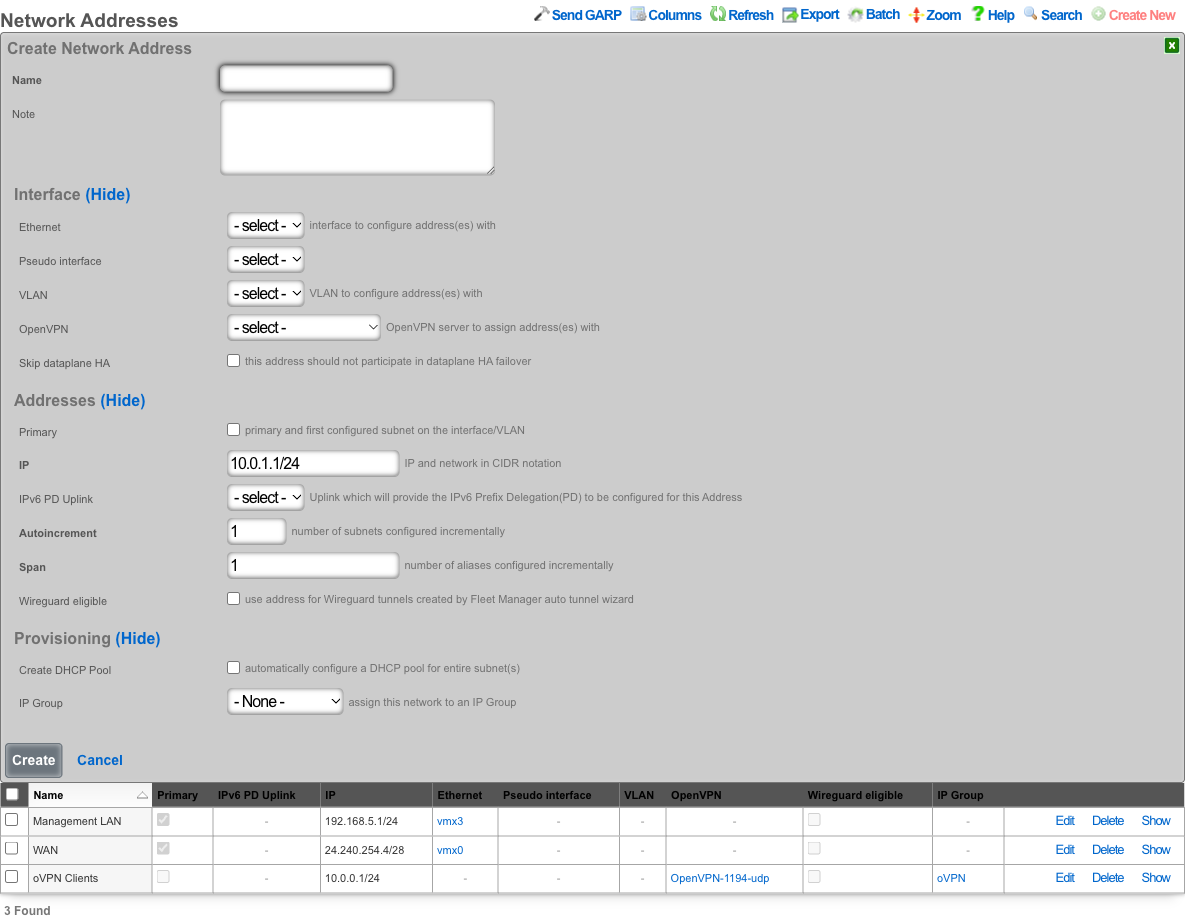
Navigate to Network :: LAN and open the Network Addresses scaffold. Create an Address for each VLAN created in Step 1.
Per-User Address
Click Create New:
- Name: a descriptive name (e.g.,
Conference Per-User) - VLAN: select the Per-User VLAN created in Step 1
- IP: the network address in CIDR notation (e.g.,
192.168.100.1/30). Use a small subnet like/30for per-user networking — each device gets its own subnet. - Autoincrement: the number of subnets to create (e.g.,
64). This should be large enough to accommodate the expected number of simultaneous conference attendees. - Create DHCP Pool: leave unchecked — the Conference Tool will automatically create and manage DHCP pools when conferences are active.
- IP Group: select Create New to automatically create an IP Group for this address space.
Non-Per-User Address
Click Create New:
- Name: a descriptive name (e.g.,
Conference Shared) - VLAN: select the Non-Per-User VLAN created in Step 1
- IP: the network address in CIDR notation (e.g.,
192.168.99.1/24) - Autoincrement: set to
1 - Create DHCP Pool: leave unchecked
- IP Group: select Create New
Step 3: Create Location Areas
Navigate to Network :: Infrastructure and open the Location Areas scaffold. A Location Area represents a physical conference space and maps Access Points and switch ports to that space.
Create a Location Area for each conference space:
- Name: a descriptive name for the space (e.g.,
Ballroom A,Meeting Room 101) - Conference APs: select the Access Points physically located in this space
- Conference Ports: select any switch ports in this space (optional)

Common Gotcha: Conferences will not create SSIDs unless Location Areas are associated with both the Conference Option (Step 4) and the individual conference. If your conference appears to be configured correctly but no SSIDs are being created, verify that Location Areas are properly assigned.
Step 4: Create a Conference Option
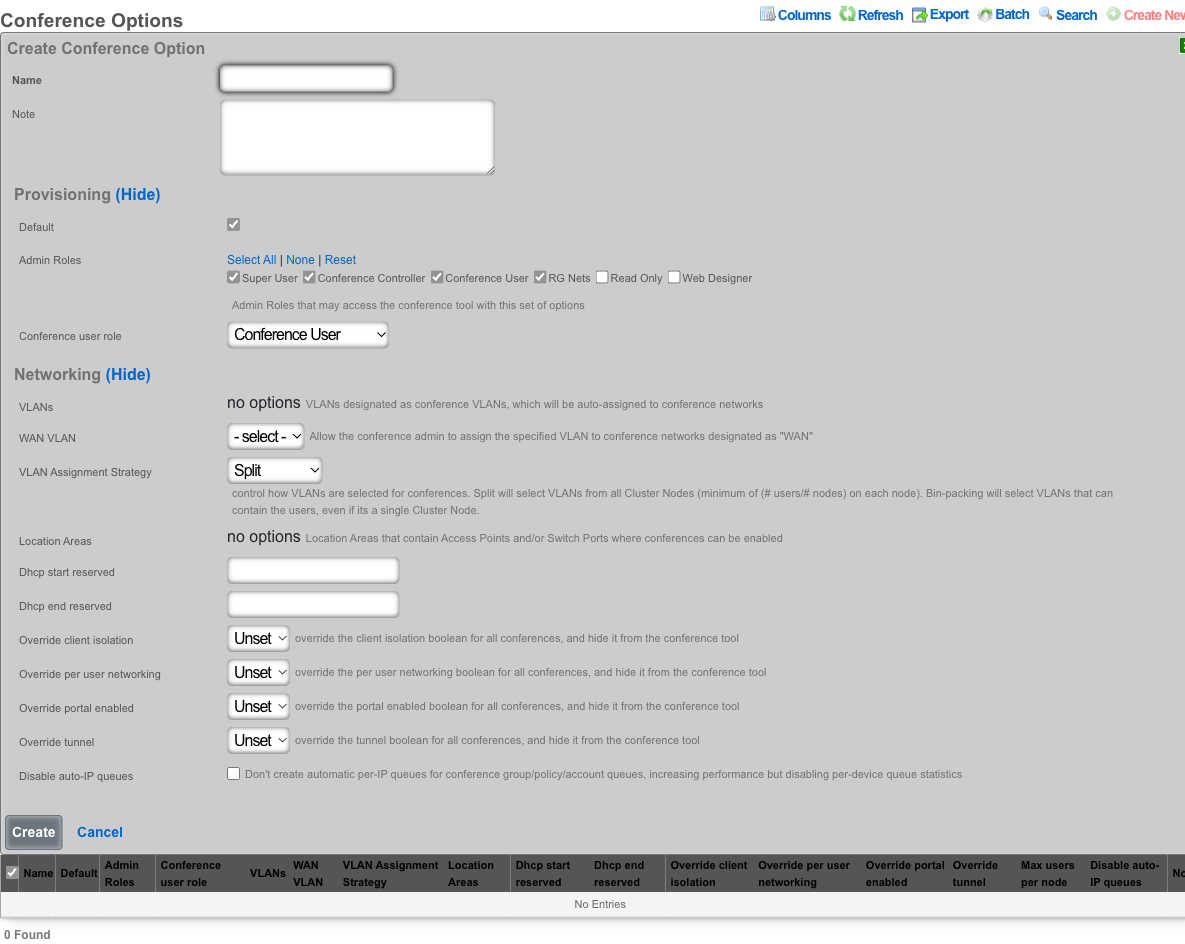
Navigate to Services :: Conference Tool and open the Conference Options scaffold. A Conference Option is a template that defines the defaults and constraints for conferences.
Click Create New:
General
- Name: a descriptive name (e.g.,
Default Conference) - Default: check this if it should be the default option used when creating new conferences
Provisioning
- Admin Roles: select which admin roles are allowed to access the Conference Tool with this option (e.g., Super User, Conference Controller, Conference User, RG Nets)
- Conference user role: select the admin role for delegated conference management. Admins with this role can manage their own conferences but not system-wide settings.
Networking
- VLANs: select the VLANs created in Step 1. These VLANs will be available for assignment to conference networks.
- WAN VLAN: optionally select a VLAN to allow conference admins to assign upstream WAN connectivity to conference networks.
- VLAN Assignment Strategy: controls how VLANs are distributed across cluster nodes.
- Split selects VLANs from all cluster nodes (minimum of users/nodes on each node), even on a single node.
- Bin-packing selects VLANs from nodes that can fully contain the users.
- Location Areas: select the Location Areas created in Step 3. These define where conferences can be hosted.
- DHCP start reserved / DHCP end reserved: number of IPs to reserve at the start and end of each DHCP pool created for conferences.
- Override client isolation: when set to On or Off, overrides the client isolation setting for all conferences using this option and hides the toggle from the Conference Tool interface. When set to Unset, the conference creator can choose.
- Override per user networking: same behavior as above, for per-user networking.
- Override portal enabled: same behavior as above, for captive portal.
- Override tunnel: same behavior as above, for tunnel mode.
- Max users per node: limits the number of conference users per cluster node.
- Disable auto-IP queues: when checked, disables automatic per-IP bandwidth queues for conference groups/policies/accounts, improving performance but removing per-device queue statistics.
Step 5: Create the Operator Portal
Navigate to System :: Portals and open the Operator Portals scaffold.
Click Create New:

- Name:
Conference(or any descriptive name) - Controller name:
conference— this becomes the URL path. The conference portal will be accessible athttps://<rxg-fqdn>/conference. Use only alphanumeric characters and underscores; do not use a name that conflicts with an existing controller. - Template: select Conference
- Admin Roles: grant access to the appropriate roles (e.g., Super User, RG Nets, Conference Controller, Conference User). If admin access is not properly configured, navigating to the conference URL will redirect back to the admin console.
After creating the Operator Portal, the webserver will restart automatically. Wait for the restart to complete before continuing.
Step 6: Access the Conference Tool
Navigate to https://<rxg-fqdn>/conference (or whatever controller name you chose in Step 5).
From the Conference Tool interface, you can:
- View the conference calendar
- Create new conferences by clicking on a date
- Edit existing conferences by clicking on calendar events
- Manage conference networks, SSIDs, PSKs, and attendee limits
- Send messages to conference participants
Troubleshooting
SSIDs not being created when a conference starts
The most common cause is missing Location Area associations. Verify that:
- Location Areas have Access Points assigned in the Conference APs field
- Location Areas are associated with the Conference Option (Step 4)
- Location Areas are associated with the individual conference when creating/editing it
- The wireless controller is in sync (Network :: Wireless, check Config sync status)
"Address is invalid" when associating an Address with a VLAN
This typically means the Address already belongs to a physical Interface. An Address cannot belong to both an Interface and a VLAN. Fix via the Rails console:
a = Address.find_by(name: "YourAddressName")
a.update(interface_id: nil)
Or delete and re-create the Address from the Network Addresses scaffold, selecting the VLAN instead of an Interface.
Conference portal redirects to admin console
This happens when the logged-in admin's role is not granted access on the Operator Portal. Edit the Operator Portal and ensure the appropriate Admin Roles have access checked in the Module Configuration section.
Conference disappears from calendar after editing dates
This is a known issue where the start/end date parser can silently fail, setting ends_at to nil. Ensure you are running a build that includes the fix for this behavior.


