Rotator
The rXg rotator service enables operators to simply and easily integrate content rotation into the captive portal web application. The system is designed to deliver zero-intervention advertising rotation via the captive portal web application to provide dynamic pre-authentication, post-authentication and interstitial advertising. In addition, the system can be used for a broad spectrum of other communication purposes other than advertising. For example, an operator may choose to use the rotator service to communicate late breaking news, integrate with third party messaging transport mechanisms or photographic galleries and real-time web cameras.
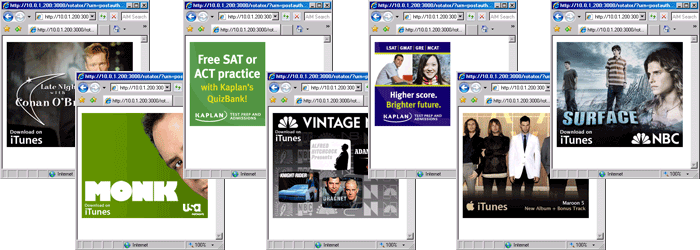
The rotator service may be directly accessed via an HTTP request to the rXg with a suffix of rotator. The URN parameter must be specified to identify a particular rotator set that is to be accessed. Since the rotator service is accessible via a URL, it can be integrated into any third party display mechanism capable of making HTTP requests. For example, using a web browser connected to the LAN side of a newly installed rXg, open the URL:
https://rxg.local/rotator/?urn=postauth.
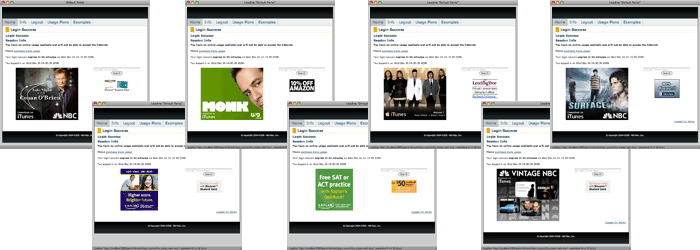
The postauth URN is a demonstration rotator that is part of the default rXg installation. It contains a series of advertisements that are displayed on the post-authentication landing page of the default portal. Reloading the web browser window will result in the rotation of the advertisements that are present in the chosen rotator.
The rotator service is implemented as a Ruby on Rails controller so that it may be easily integrated into the captive portal web application. Each time the captive portal page is loaded, the rotator displays a different payload.
To add a rotator to a captive portal page, edit the page and insert the following embedded ruby code where you would like the rotatee payload to be inserted:
<!-- Basic single rotator -->
<%= render partial: 'rotator', locals: { urn: 'postauth' } %>

<!-- Multiple rotators with count -->
<%= render partial: 'rotator', locals: { urn: ['promo', 'seasonal'], count: 2 } %>

<!-- All rotatees from a rotator -->
<%= render partial: 'rotator', locals: { urn: 'homepage', count: 0 } %>
The urn parameter must be replaced with a string corresponding to a rotator scaffold entry. You can also specify an array of URNs for random selection, and use the count parameter to control how many rotatees are displayed (0 for all). Incorrect specification of a rotator with a matching urn field will result in an error message being embedded into the portal page.
Advanced Integration Features
ERB Template Processing
The payload field supports ERB (Embedded Ruby) templating, allowing dynamic content generation:
erb
<div class="ad-container">
  <h3>Welcome <%= user.name if defined?(user) %></h3>
  <img src="/images/ad_<%= Time.current.hour > 12 ? 'afternoon' : 'morning' %>.png">
</div>
Multiple Rotator Selection
The rotator partial supports random selection from multiple rotators:
erb
<%= render partial: 'rotator', locals: { urn: ['promo1', 'promo2', 'seasonal'], count: 2 } %>
Content Layout
Rotator content is automatically arranged in groups of 3 for responsive layout. The system handles both clickable advertisements (with URL) and static content.
The rotator service is one of the many ways that the rXg enables operators to quickly and easily generate revenue from an end-user population. To maximize revenue, we strongly suggest that you partner with numerous affiliate programs that are appropriate to your end-user population. A good introductory text on affiliate programs is Make a Fortune Promoting Other People's Stuff Online: How Affiliate Marketing Can Make You Rich (ISBN 0071478132) by Rosalind Gardner. An excellent affiliate marketing recipe and ideas reference book is A Practical Guide to Affiliate Marketing: Quick Reference for Affiliate Managers & Merchants (ISBN 0979192706) by Evgenii Prussakov.

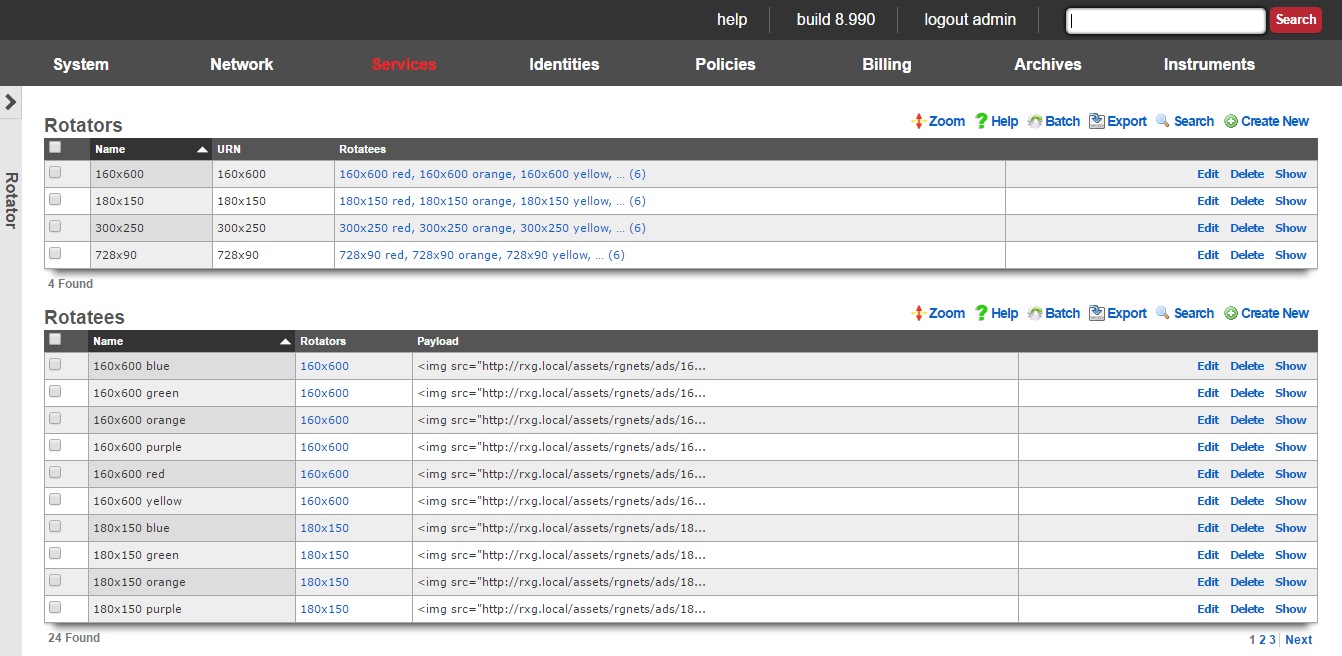
Rotators
An entry in the rotators scaffold creates a rotation group that can be integrated into the captive portal web application.
The name field is an arbitrary string descriptor used only for administrative identification. Choose a name that reflects the purpose of the record. This field has no bearing on the configuration or settings determined by this scaffold.
The URN field configures the uniform resource name that uniquely identifies this rotator. The URN is the parameter that is used to choose a specific rotator when incorporating the rotator service into a captive portal page.
The rotatees list enables the operator to select rotatees from the set of all rotatees to associate with this rotator. The rotator will choose one rotatee to display from among the associated rotatees.
The note field is a place for the administrator to enter a comment. This field is purely informational and has no bearing on the configuration settings.
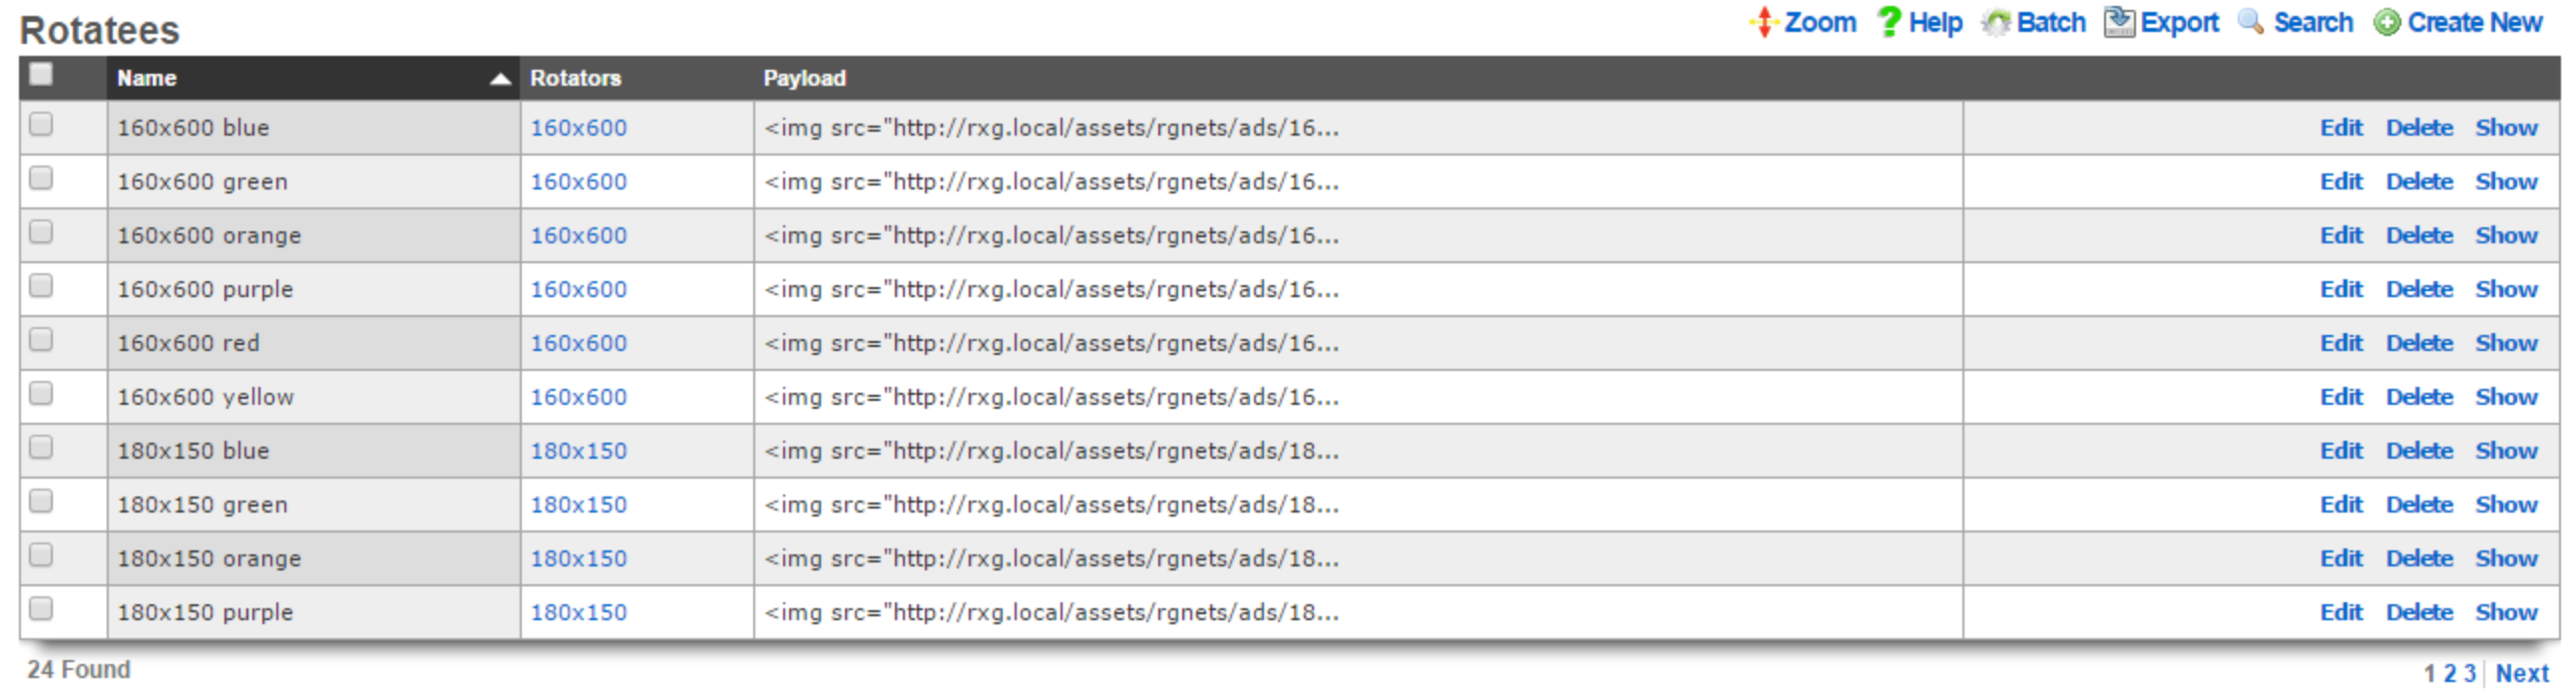
Rotatees
An entry in the rotatees scaffold creates a member of a rotator group and specifies the payload that should be displayed.
The name field is an arbitrary string descriptor used only for administrative identification. Choose a name that reflects the purpose of the record. This field has no bearing on the configuration or settings determined by this scaffold.
The rotator field defines one or more rotators for this rotatee to be associated with.
Content Management: Rotatees support multiple content types: - Payload field: HTML content with ERB template support for dynamic content generation - Content field: Rich text editor for WYSIWYG content creation - Image field: Direct image upload (JPEG, PNG, GIF, SVG, favicon up to 20MB) - Content Mode: Choose between "HTML" (payload) or "Rich Text" (content) editing
Note: Payload takes precedence over content when both are present. When an image is uploaded without payload content, the system automatically generates HTML payload code.
Click Tracking: - URL field: Destination URL when users click the advertisement
The note field is a place for the administrator to enter a comment. This field is purely informational and has no bearing on the configuration settings.
Display and track advertisements
Navigate to Services::Ad Rotator.
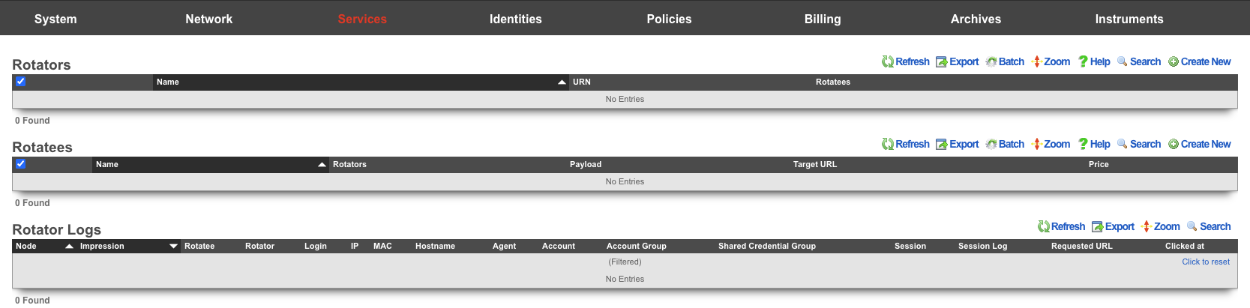
The default portal by default looks for a Rotator with a URN of default to display the Rotatees. Create a new Rotator. The Name field is arbitrary. Since the default portal looks for the URN of default set the URN field to default. Click Create.

Now that the Rotator has been configured, Rotatees can now be created that will contain the payload for the advertisement. In this example we will create Rotatees that will display on the main page of the default portal. Create a new Rotatee. The Name field is arbitrary. In the Rotators field check the default box. The Payload field contains the HTML content of the advertisement. The URL field contains the destination URL when users click the advertisement. Do note that if the Payload contains references to content hosted outside the rXg, then those domains must be whitelisted on the splash portal in order for the content to be displayed. Click Create.
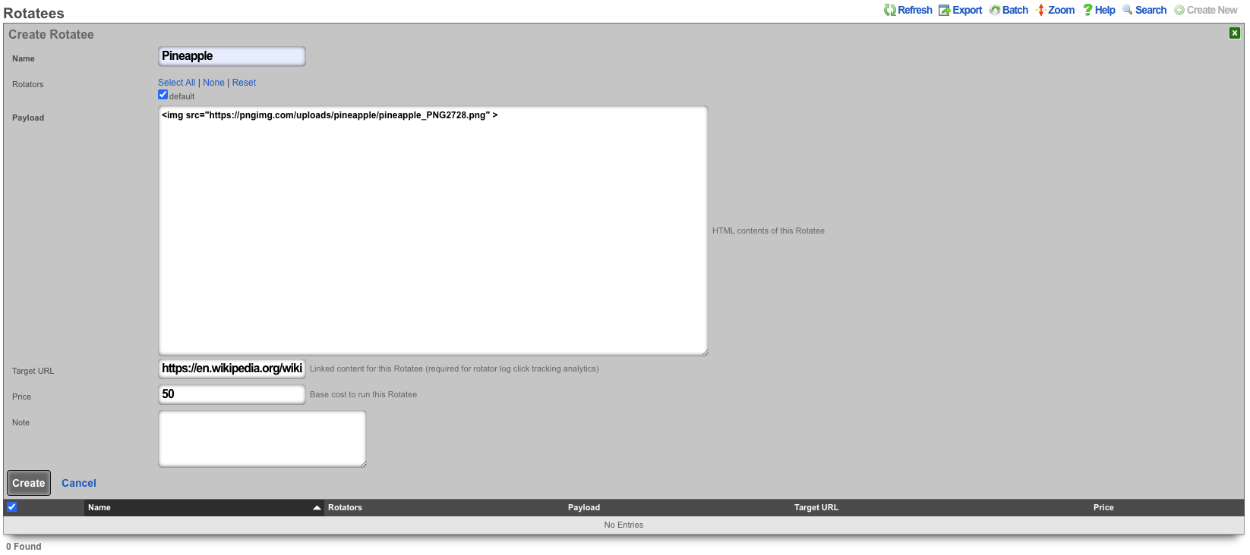
Repeat creating a Rotatee for each advertisement. In this example each advertisement is an image of fruit, and clicking on the advertisement image will link to wikipedia, but this could be the products homepage.

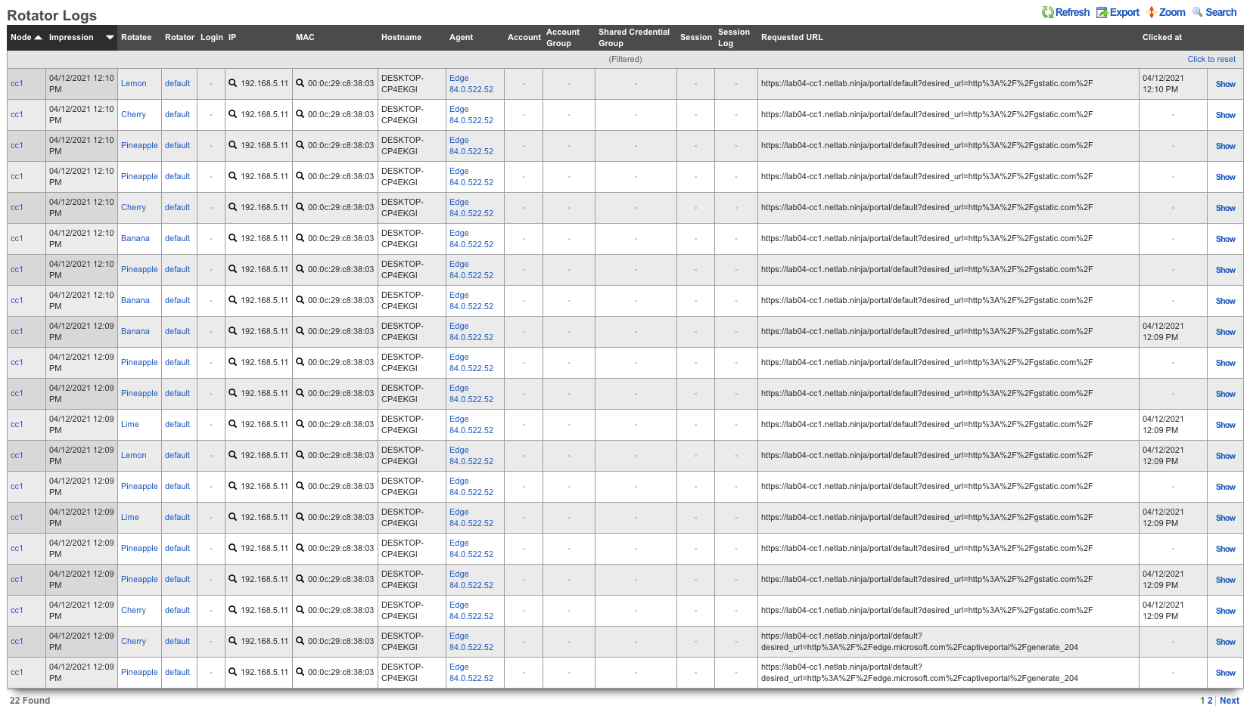
Rotator Logs provide comprehensive tracking for each advertisement impression:
Impression Tracking: Every rotatee display creates a unique log entry capturing: - Client identification (IP, MAC address, hostname) - Device information (browser, operating system, user agent) - Session context (login session, account, policy) - Original page URL where ad was displayed - Timestamp of impression
Click Tracking: When users click advertisements:
- System records exact click timestamp (clicked_at)
- Calculates conversion time (time between impression and click)
- Safely redirects to target URL
- Maintains click attribution to specific impressions
This enables detailed analytics including conversion ratios, click-through rates, and user behavior patterns.
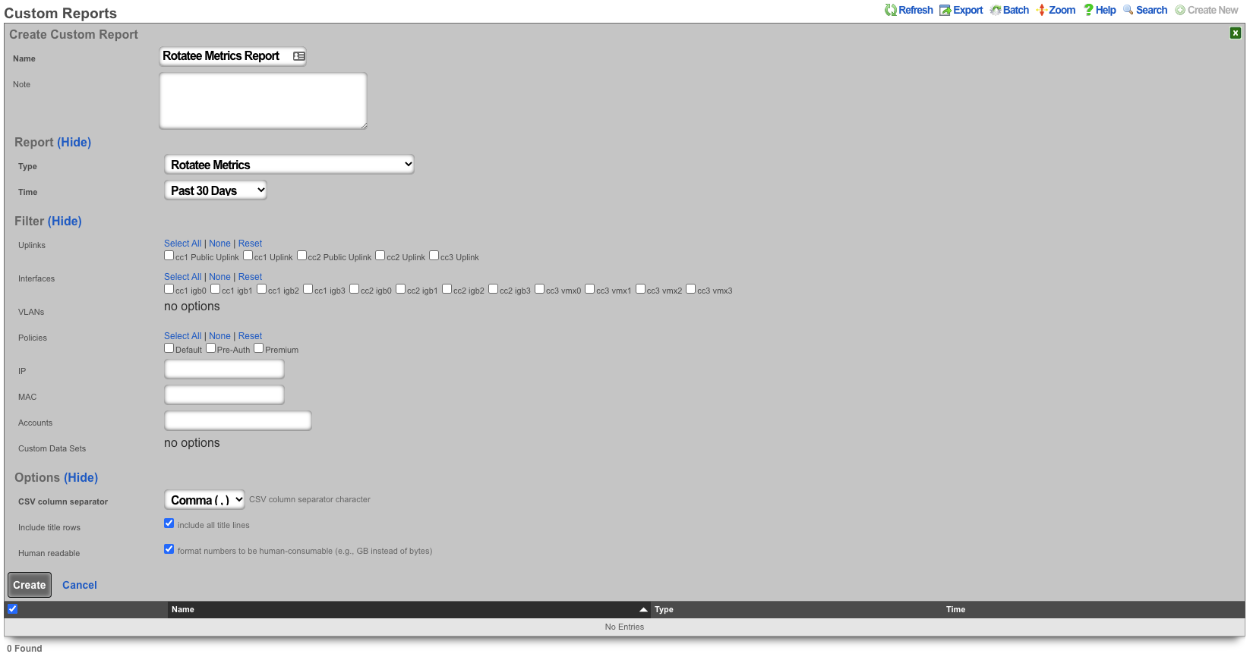
The operator of the rXg can create reports showing detailed information about the number of clicks and conversions related to each Rotatee. To create a custom report navigate to Archives::Reports::Custom Reports.

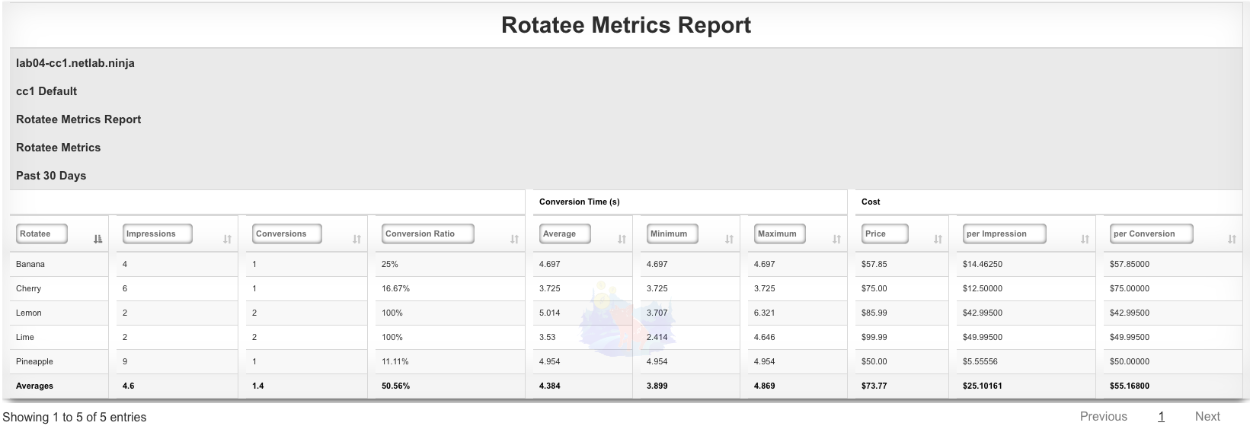
There are two reports specific to the Ad Rotators. The first one is the Rotatee Metrics Custom Report. Create a new Custom Report. The Name field is arbitrary. Under Report set the Type field to Rotatee Metrics. Set the Time field to the desired time. Everything else can be left to the defaults. Click Create.
The report can be viewed by clicking the view option on the left side of the scaffold. The Rotatee field shows the name of the Rotatee. The Impressions column displays the number of times the Rotatee was loaded and displayed. The Conversions column displays the number of times the Rotatee was clicked. The Conversion Ratio column displays the ratio of times Rotatee was loaded and clicked (Conversions divided by the number of Impressions). The Conversion Time(s) section of the report gives you the average, minimum, and maximum number of conversions. Lastly the Cost section of the report displays the Price paid, the per impression cost (Price divided by the number of impressions), and the per conversion price (Price divided by the number of conversions).
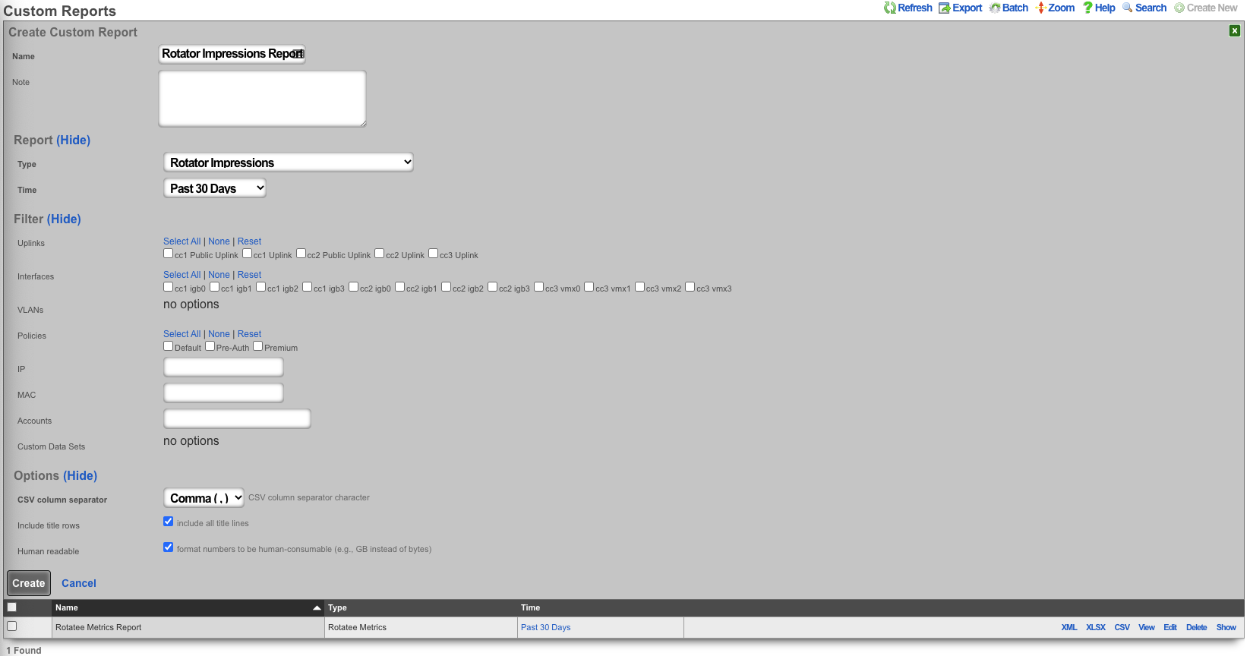
The second report is the Rotator Impressions report. Create a new Custom Report. The Name field is arbitrary. Under Report set the Type field to Rotator Impressions, and set the desired time for the report using the Time field. Click Create.
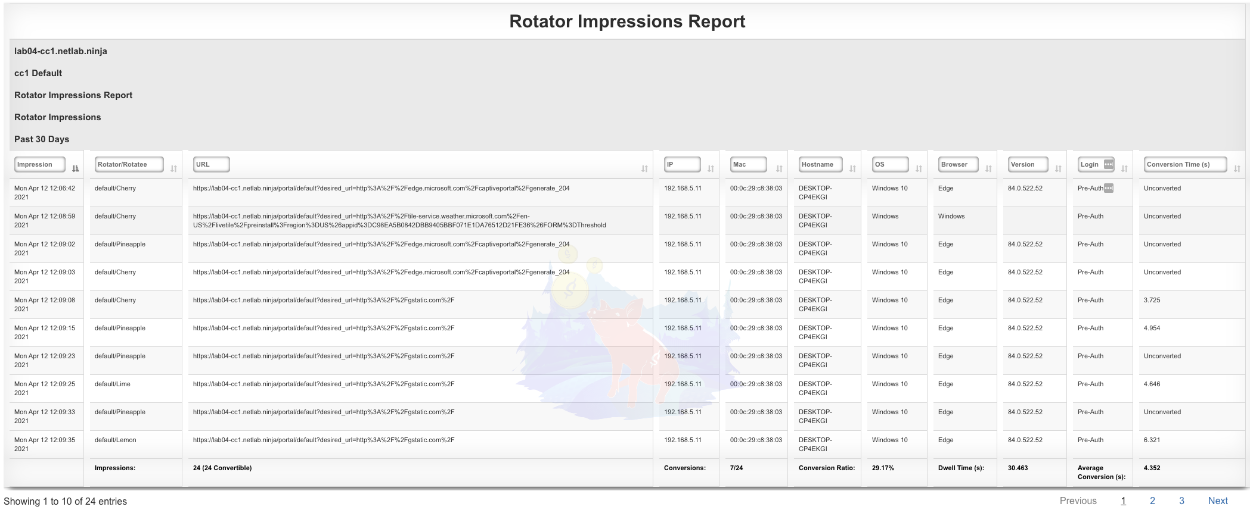
The report can be viewed by clicking the view option on the left side of the scaffold. The Impression column shows the date and time the Rotatee was displayed. The Rotator/Rotatee column shows which Rotatee the entry is for. The URL column shows the URL the device was trying to access when it was presented with the Rotatee. The IP field lists the IP of the device. The MAC field displays the MAC address of the device. The Hostname field will display the hostname of the device if available. The OS field displays the OS running on the device. The Browser field displays the browser the device is using along with the Version. The Login field displays the Policy the device is a member of. Lastly the Conversion Time(s) field displays the time between when the Rotatee was loaded and the user clicked on the Rotatee if applicable.
Content Management Best Practices
Image Handling
- Supported formats: JPEG, PNG, GIF, SVG, favicon (.ico)
- Size limit: 20 MB maximum
- Auto-generation: Uploading an image without payload automatically creates display code
- Local vs Remote: Local images don't require whitelisting; remote content must be whitelisted
Template Variables
Available variables in ERB payload templates:
- rotatee: Current rotatee object with all fields (name, payload, url, etc.)
- rotator_log: Impression tracking record for click attribution
Performance Considerations
- Random selection uses database-level randomization for performance
- Rotator logs can be disabled if table becomes large (handled automatically)
- ERB processing occurs at render time, not storage time
Display videos in captive portal based on location
In this example the rXg will be configured to display an advertisement video and static image in the captive portal based on the portal the device is associated and the location of the device when it connects, using a prebuilt portal.
Create Custom Portal

The Name field is arbitrary, for this example it will be named "videotest". The Controller name field is what is displayed in the URL when accessing the portal, for this example it will be "videotest". Set the Portal source field to Duplicate Local and the Duplicate field to default as the default portal will be used here. Click Create.


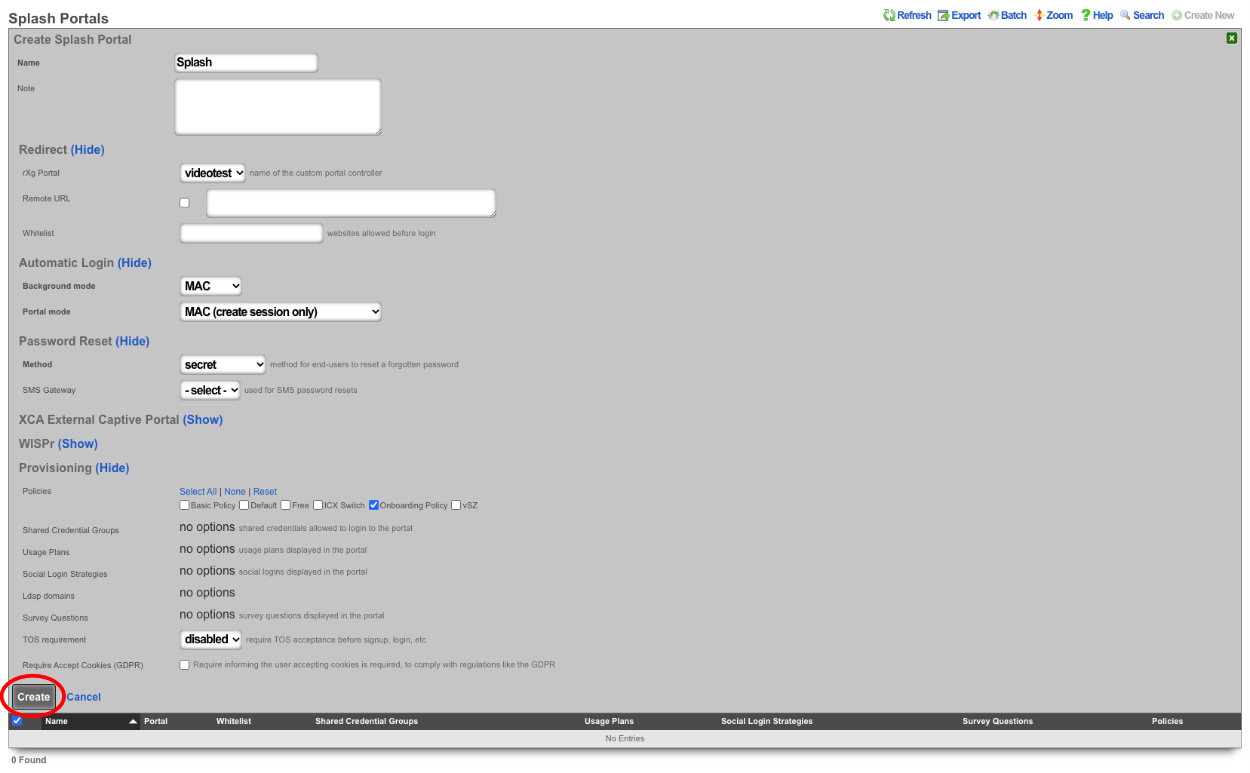
Create Splash and Landing portal to associate to Custom Portal

The Name field is arbitrary, for this example it will be named "Splash". The rXg Portal field should be set to the portal created in step 1 which is "videotest". Select the policy associated with unknown devices (devices connecting to the network for the first time), for the purpose of this example the "Onboarding Policy" will be selected. Click Create.
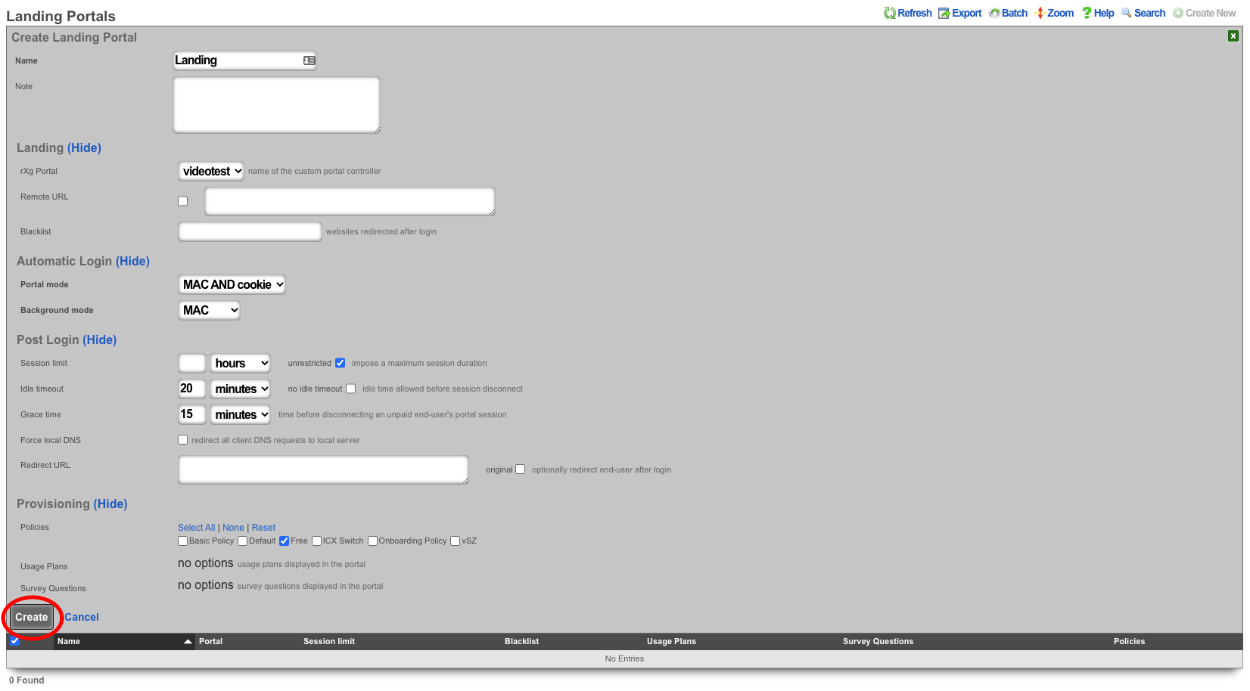
Create a new Landing Portal.

The Name field is arbitrary, for this example it will be named "Landing". The rXg Portal field should be set to the portal created in step 1 which is "videotest". Select the policy associated with devices that have authenticated for the purpose of this example the "Free Policy" will be selected. Click Create.

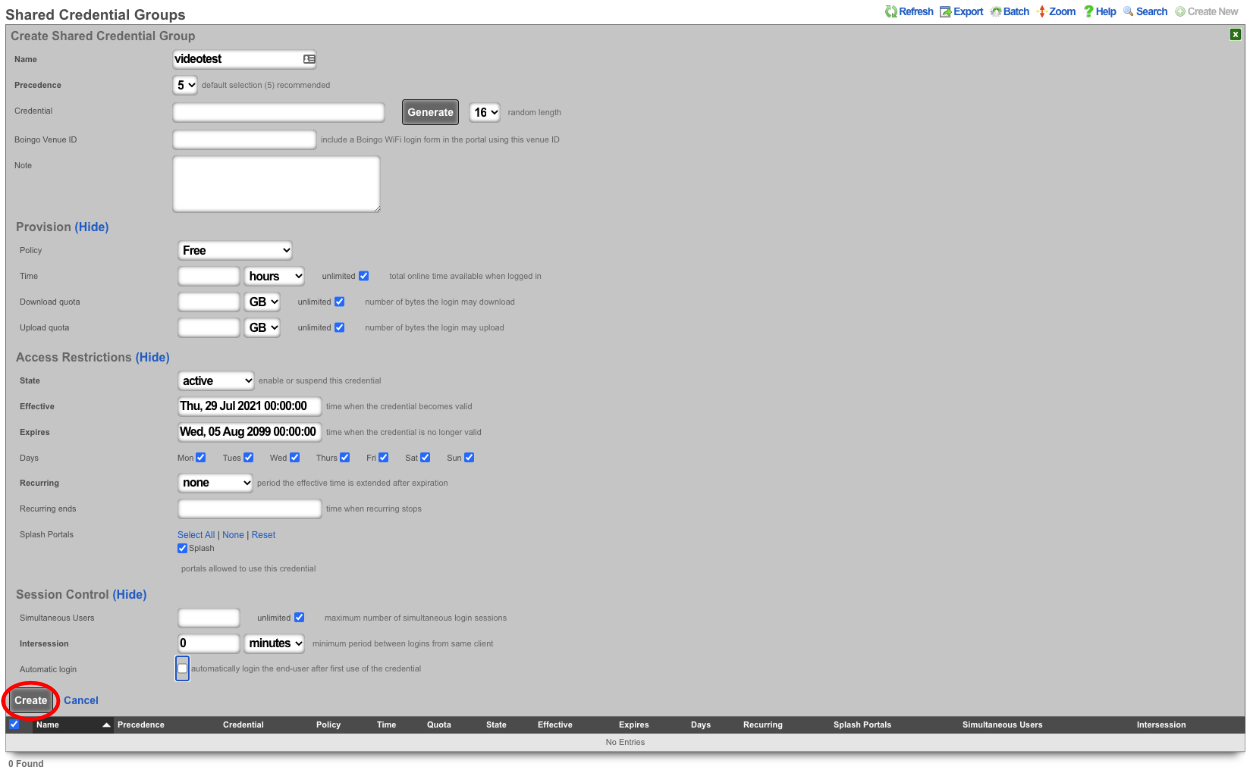
Create Shared Credential to activate ad rotator and allow access after advertisement

The Name field is arbitrary, for this example it will be named "videotest". Remove the characters from the Credential field, the code is looking for a blank credential to activate the advertisements. The Policy field is used to select which policy the end user will become a member of after watching/viewing the advertisement, for this example the "Free" policy will be used. The Time field is used to set the amount of time the end user will be granted after authenticating, this will be set to 1 hour in this example. Both the Download quota and the Upload quota fields will be set to unlimited. By default a shared credential is valid for one week, this can be extended by changing the date in the Expires field, this will be set to the year 2099. Make sure that the "Splash" portal is selected in the Splash Portals field. We can limit the number of simultaneous users by setting a value in the Simultaneous Users field, here it will be set to unlimited. If desired the Intersession field can be used to set a period of time that must pass before the same device can use the credential, this will be left at 0 for this example. Finally if we want the end user to be presented with the portal again if they leave the network and return we can uncheck the Automatic login checkbox. Click Create.

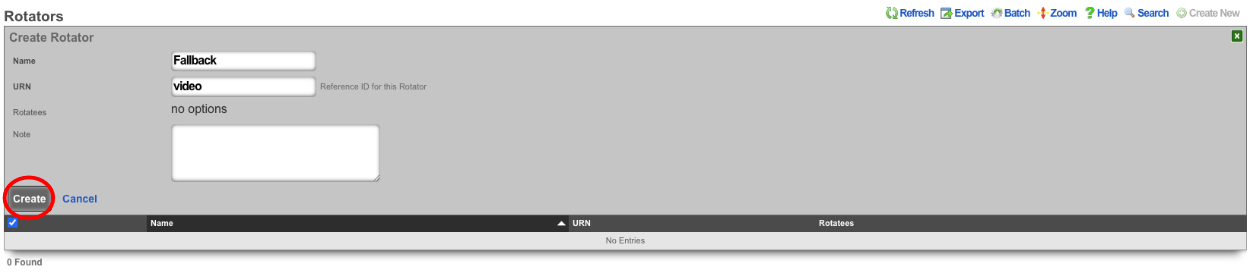
Create Rotators, this is what is used to determine which set of advertisements to display.

Because this is the fallback enter "Fallback" in the Name field and the URN field value will be "video". Click Create.
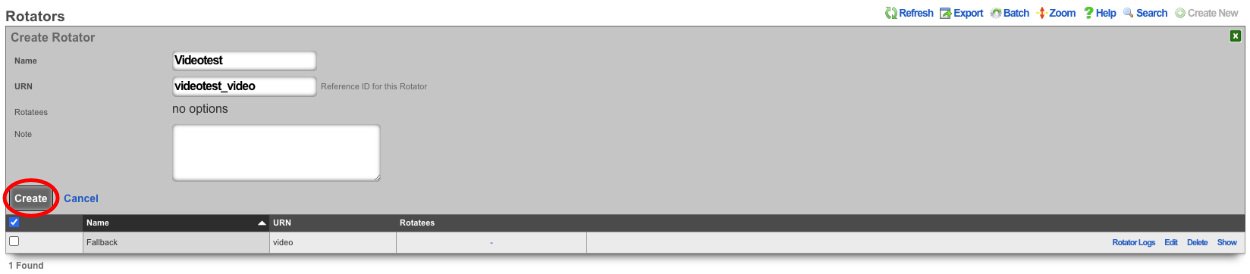
The next Rotator will match against the portal created in Step 1. Create a new Rotator , for this example the value of the Name field will be "videotest" which matches the portal created earlier. Note: this name can be anything and does not need to match the portal name. The URN field will need to match the portal name as this Rotator will be used to match against the portal created in Step 1, the value for the URN field will be "videotest_video". Click Create.
This system is configured with Location Areas that consist of a Floor and two Regions we can match against. The floor is named "building1" and then there are two regions name "room1" and "room2" that can be used to match against. If the match is against "building1" then any device connected to an AP located within the regions attached to "building1" will display advertisements assigned to the Rotator. "Building1" contains the regions "room1" and "room2".

To match against "building1" create a new Rotator , the Name field is arbitrary for this the value will be set to Videotest_building1, and the URN value is "videotest_building1_video". Click Create.
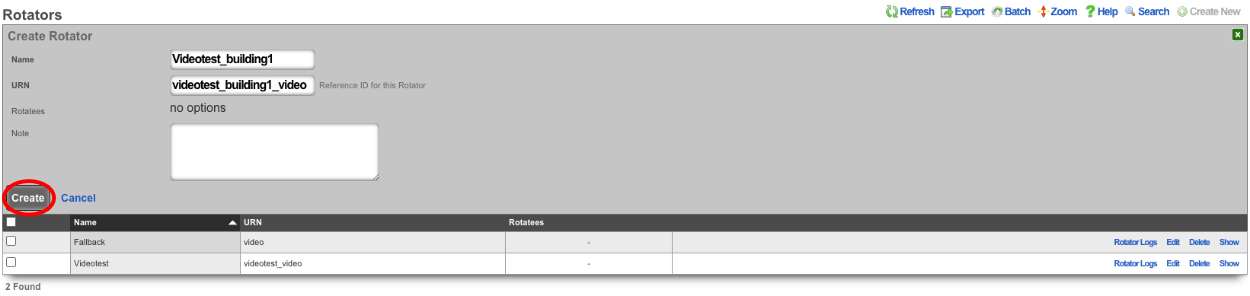
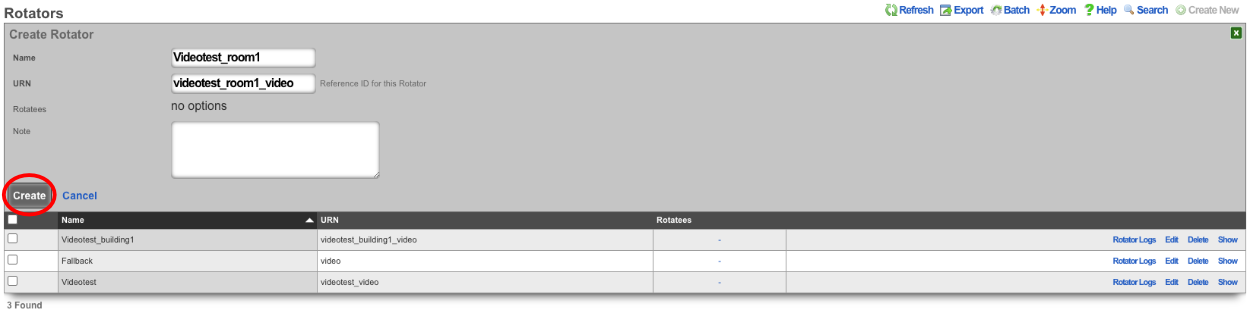
To make the match specific to a region we can use the region name instead of "building1", create a new Rotator , the value for the Name field is arbitrary and will be set to "Videotest_room1" in this example. The URN field will be the portal we want to display this on followed by the region and then video, which results in "videotest_room1_video". Click Create.
Create Rotatees, this is the advertisement content that will be displayed.

The Name field is arbitrary and its value will be set to "Video1" for this example. Select the "Videotest_room1" checkbox in the Rotators field to display this content to an end user connected in room1. For this example we will display a video of clouds in this Rotatee using the following Payload:
<video class="w-100 mb-3" src="/static/portal/videotest/clouds_1.mp4" preload="none" muted webkit-playsinline playsinline style="display: none;">. Click Create This step can be repeated for each advertisement that should be displayed.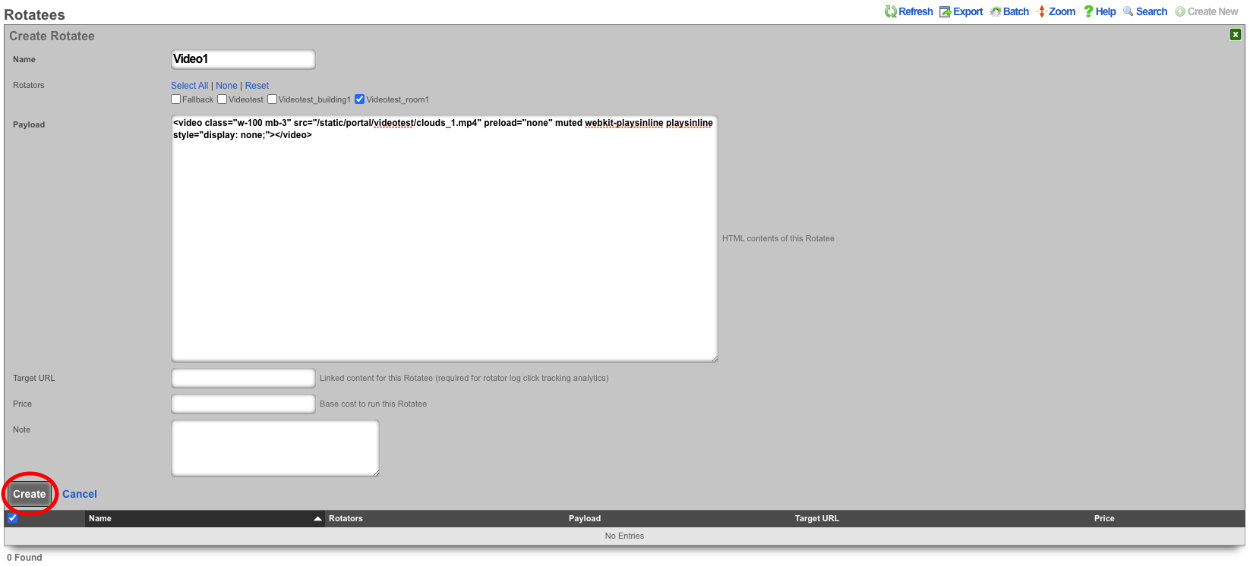
For the last example a Rotatee that contains a static image will be created to be displayed to end users as a fallback in the event they do not match against the portal or a location area. Create a new Rotatee. Provide a name and select the "Fallback" checkbox in the Rotators field. For this example we will use the payload
<img src="/static/portal/videotest/ad_one.png" width="80%" class="d-block mx-auto my-3">. Click Create. Note: for a list of images and videos provided in the default portal please scroll down.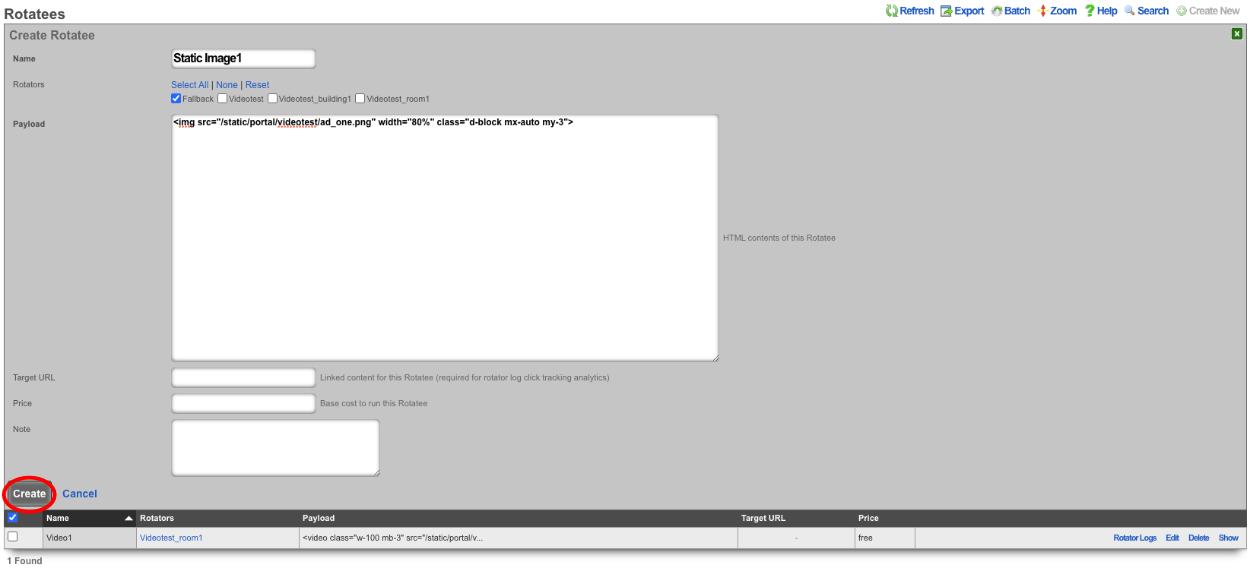
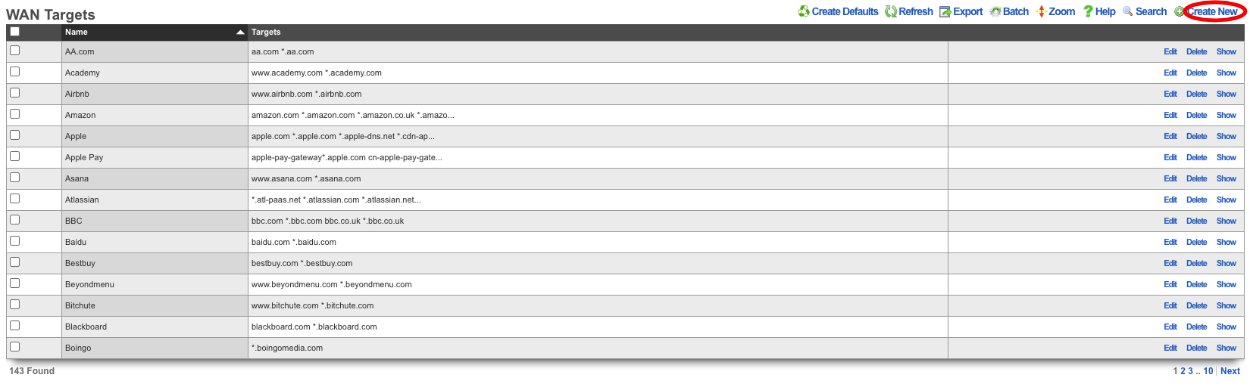
The above examples were all locally hosted files within the /static directory of the captive portal. To use content that is stored remotely, a WAN target must be configured containing the domains and/or IP addresses of where the content resides and it must be applied as a whitelist to the Splash portal. To create a WAN target navigate to Identities::Definitions and create a new WAN Target.
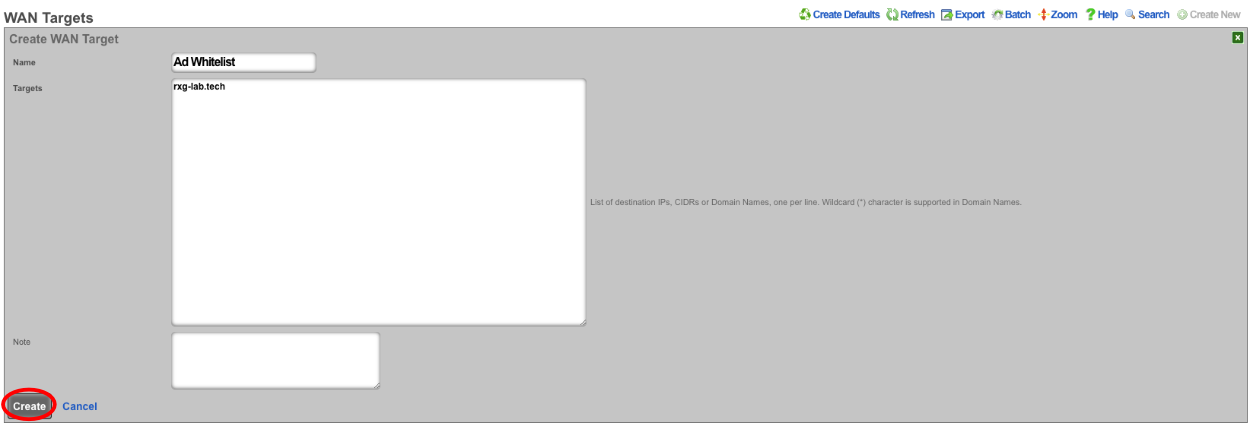
The Name field is arbitrary, value here will be "Ad Whitelist". In the Targets field enter the domains and/or IP addresses that will contain content then click Create.
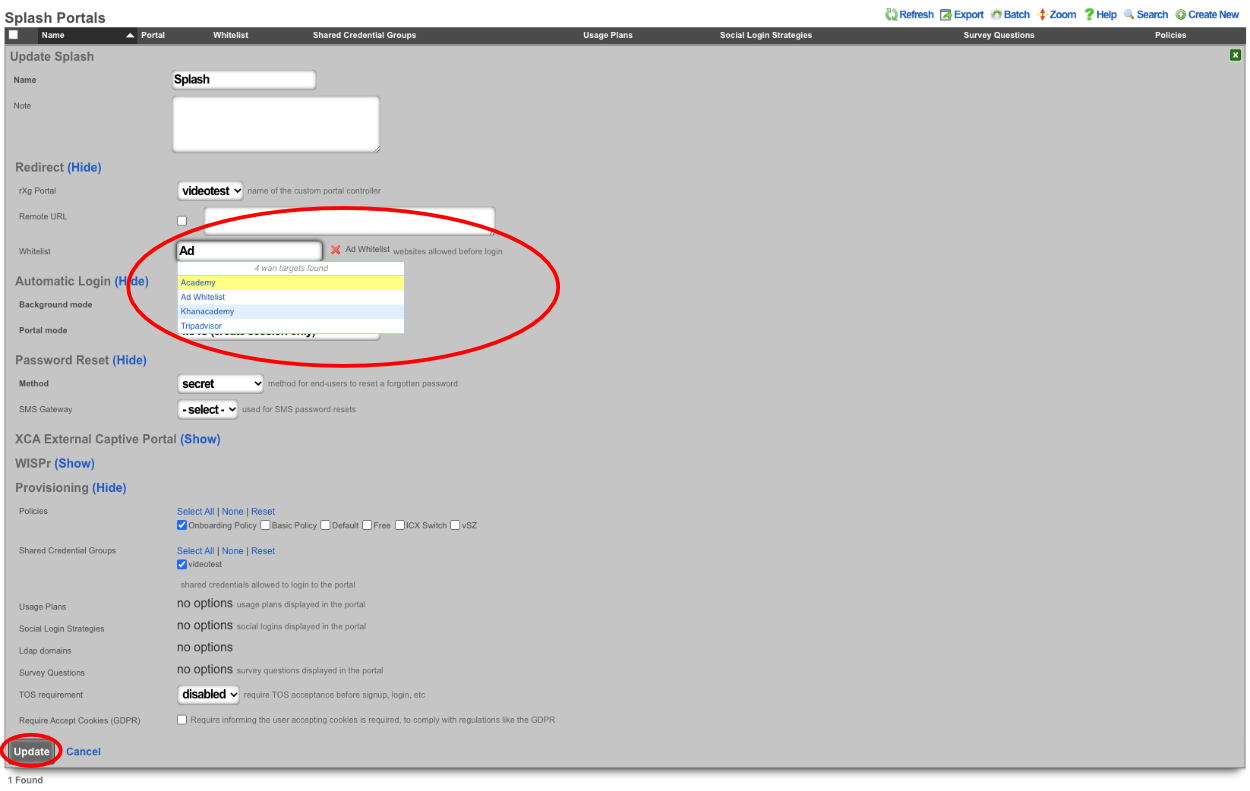
Once the WAN Target has been created, it must be set as a whitelist on the captive portal. Navigate to Policies::Captive Portal and edit the Splash portal.

Type the name of the WAN target into the Whitelist field and it will bring up any matching results, click on each one to add it to the whitelist. Click Update.
Now we can pull content from the domain(s) that are in the Whitelist. For example to pull content from rxg-lab.tech which is included in the Whitelist that was created. Create a new Rotatee give it a name, and the Payload will be
<img src="https://rxg-lab.tech/images/ad_two.png" width="80%" class="d-block mx-auto my-3">. Include the Rotators the content should be associated with and click Create. Note: to include external content it is important that you define a WAN target that contains all the domains and IP addresses content will be pulled from and this needs to be assigned to the Whitelist of the portal where the content will be displayed.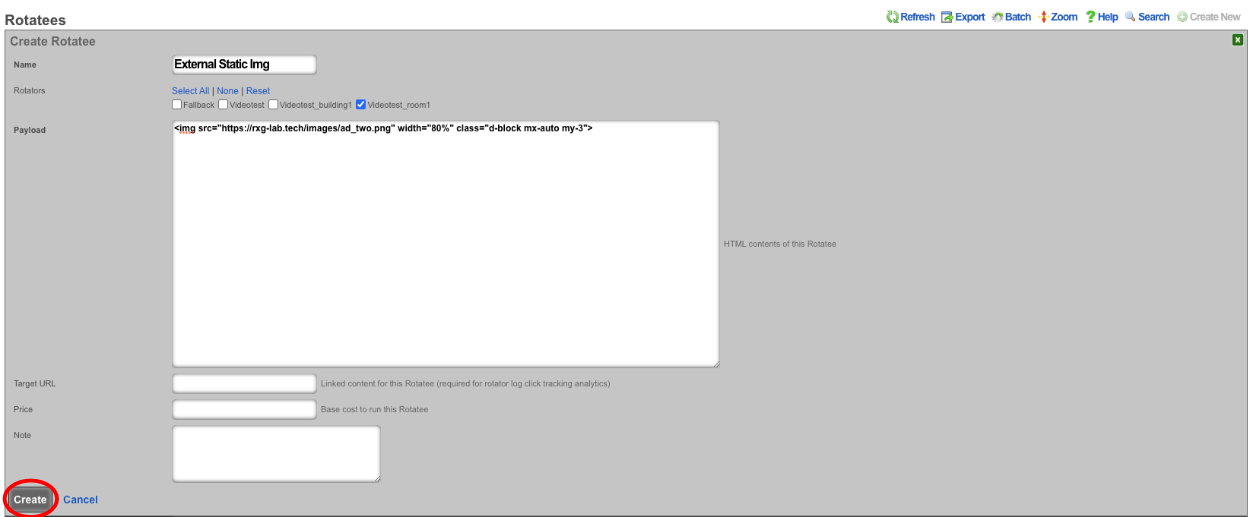
Static Image examples included in default portal.
- ad_one.png
<img src="/static/portal/videotest/ad_one.png" width="80%" class="d-block mx-auto my-3"> - ad_two.png
<img src="/static/portal/videotest/ad_two.png" width="80%" class="d-block mx-auto my-3"> - ad_three.png
<img src="/static/portal/videotest/ad_three.png" width="80%" class="d-block mx-auto my-3">
Video examples included in default portal.
1. Big_Buck_Bunny_360_10s_1MB.mp4
<video class="w-100 mb-3" src="/static/portal/videotest/Big_Buck_Bunny_360_10s_1MB.mp4" preload="none" muted webkit-playsinline playsinline style="display: none;">
2. clouds_1.mp4
<video class="w-100 mb-3" src="/static/portal/videotest/clouds_1.mp4" preload="none" muted webkit-playsinline playsinline style="display: none;">
3. control_vid.mp4
<video class="w-100 mb-3" src="/static/portal/videotest/control_vid.mp4" preload="none" muted webkit-playsinline playsinline style="display: none;">
4. money.mp4
<video class="w-100 mb-3" src="/static/portal/videotest/money.mp4" preload="none" muted webkit-playsinline playsinline style="display: none;">
5. mountains_2.mp4
<video class="w-100 mb-3" src="/static/portal/videotest/mountains_2.mp4" preload="none" muted webkit-playsinline playsinline style="display: none;">
Note: The links provided above are linked to the custom portal created for the example, if you use these you may need to change the "videotest" portion of the link to match the name of the custom portal you created.


